Getting Started
Creating New Project
To create a new document training model project from IntelliTrainer:
- Invoke IntelliTrainer.exe from IntelliBuddies installation folder
- In the File tab, click on New and select Blank Project
- This will pop up a new project dialog:

| Field | Description |
|---|---|
| Project Name | Specify a name for this project. Ensure that the following characters are not used as part of the name: "<>:/\|?* |
| Location | Specify a location to save this project in your file system. A new folder with the Project Name specified above will be created under this location. All the project-related files and resources will be stored under this folder. |
| Image Resize Percent | Specify the image resize percentage from the dropdown. This will help OCR Engine to extract text more accurately. |
| Description | Type in some description about this project for your reference in the future. |
- Click on the Create button to create a new project with the details provided above.
Document Templates
You can add, modify, and delete a document template for training your model from IntelliTrainer. You should open the corresponding project in the IntelliTrainer to manage the document templates for training your model.
Adding new document template
- Click on Batch tab in Ribbon Tabs panel
- Click on Add menu in Ribbon Menu panel
- Select the document template that you want to train as part of this project
- This will add a new node with the name of the document template file selected under the Batch panel
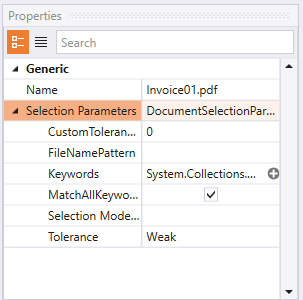
For example, if the selected document template name is invoice01.pdf, then the Batch panel would be updated as shown below:

Document Template Properties
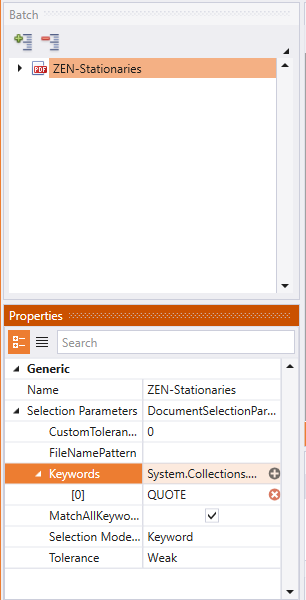
Once you have added a new document template to the project, you can view and configure the document template properties from the Properties panel.
| Property | Description |
|---|---|
| Name | The name of this document template. By default, it will be set to the file name of the document template added. You can modify the name according to your project needs. |
| Selection Mode | Select the document identification mode. You have the following options:
|
| Keywords | The keywords to be matched in case the Selection Mode was Keywords. You can add, edit, and remove keywords from here. |
| Match All Keywords | Check this if you want to match all the specified keywords to identify a document. By default, the document will be identified as belonging to this template if one of the keywords matches. |
| Tolerance | Tolerance is to be used while matching the keywords inside the document content. The following options are available:
|
| Custom Tolerance | The custom tolerance in percentage to be used in case the Tolerance selected was Custom |
Once you configure the document template properties, the same will be reflected in the Batch and Properties panels.
Page Templates
Once you add a new document template to the project, it automatically lists all the pages of this template under the corresponding document template node inside the Batch panel. You can view all the pages by expanding the corresponding document template node in the Batch panel.
Context Menu
You can manage the pages from the Batch panel. IntelliTrainer provides a context menu to manage the pages to be utilized for training under a corresponding document template.
| Menu | Description |
|---|---|
| Add Region | Adds a new region node under this page |
| Disable | Disable this page from the training project. Turning off the page will still keep the page node so that you can enable it back later |
| Delete | This page from the training project is deleted. A page, once deleted, can never be reverted. |
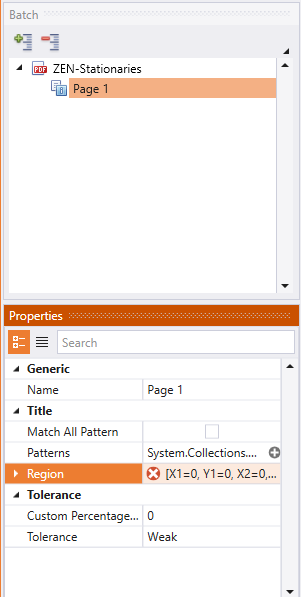
Page Template Properties
You can view and configure the page properties from the Properties panel for the page selected in the Batch panel.
| Property | Description |
|---|---|
| Name | The name of this page. By default, the name would be set to Page #, where # would represent the page number of the corresponding page inside the document template |
| Title - Patterns | You can identify this document page by matching the patterns specified here. |
| Title - Match All Pattern | You can check this flag to match all the patterns specified to identify this page. |
| Title - Region | You can specify the region on this page to search for the Title Patterns. |
Regions
The performance of OCR Engine depends on the size of the image processing. The smaller the size, the higher the performance. It has also been seen in some cases the accuracy of extraction will also improve if we provide accurate Clipping Region to OCR Engine. By defining the regions inside your pages, you can manage the data extraction to be much faster and more accurate. You can add a new region under a page using the Context Menu option Add Region for the corresponding page.
Context Menu
The region node inside the Batch panel provides the following context menu options:
| Menu | Description |
|---|---|
| Add Field | Adds a new field under this region |
| Copy | Copies the entire region onto the clipboard so that you can paste it to re-use this region under a different page or document template |
| Delete | Delete this region |
Region Properties
You can view and configure the region properties from the Properties panel for the selected region under the Batch panel.

| Property | Description |
|---|---|
| Name | Specify a name for this region. By default, a name would be assigned to this region in the format Region #, where # would be the region index. |
| Region | Specify the BoundingRect for this region. By default, it would select the entire image as a region. You can select your region by clicking on the [...] button of the Region property inside the Properties panel. This will bring up the region selection dialog on the Image panel. You can then specify the region by holding the mouse's left button and dragging and releasing the button. You can then press the Apply button inside the region selection dialog to set the specified region inside the Region property. |

Fields
A Field is the leaf node in the Batch panel. It represents specific information that needs to be extracted from the document. You can add a new field under a region through the region context menu.
Field Properties
You can view and configure the field properties in the Properties panel for the selected field inside the Batch panel.

| Property | Description |
|---|---|
| Name | Specify a name for this field. By default, a name would be assigned to the field in the format Field #, where # represents the index of this field. |
| Default Value | The default value to be assigned to this field |
| OCR Parameters | OCR Parameters to be used by OCR Engine while extracting this field value |
| Region | The Bounding Rectangle in the page where this field's value is located |
| Type | Should be one of the following:
|
| Relative Anchor Patterns | The anchor patterns to be used in case of Relative to Anchor type field |
| Relative Field | The name of the field to be used in case of Relative to Field type |
| Tolerance | Tolerance is to be used while matching the anchor patterns inside the document content. The following options are available:
|
| Custom Percentage | The custom tolerance in percentage to be used in case the Tolerance selected was Custom |

This way, you can add all the fields under the corresponding region. You can train the document training model by adding all the fields under this region and continue further to add any other regions under this page. Further, you can continue training the model to handle other pages under the current document template before adding more document templates to the model.
Validating Document Training Model
Once you have completed training for all the document templates, you can validate the document training model by clicking the Validate button inside the Batch ribbon tab menu. Any errors during the validation process will be reported under the Error panel.
Resolve all the errors before publishing or exporting the document training model.
Publishing Document Training Model
Once the validation of your document training model is successful, you can publish the training model so that it can be consumed as part of IntelliBuddies OCR Activities.
You can publish by clicking the Publish button in the Batch ribbon tab menu. This will bring up the publish dialog, asking you to select the location to publish this document training model.

The document training model will be serialized to a JSON file under the specified location on publishing. The name of the model would be selected based on the project name. The Output panel would display the message indicating the name of the training model published.

You can now use this training model for activities such as Identify Document With OCR and Extract PDF Data With OCR. The JSON file published by IntelliTrainer is the serialized version of DocumentQueries, which goes as input to these Activities