Format Excel Cells
Description
Applies specified formatting to the specified cell(s). You can either specify a single cell, range of cells, or comma-separated cells.
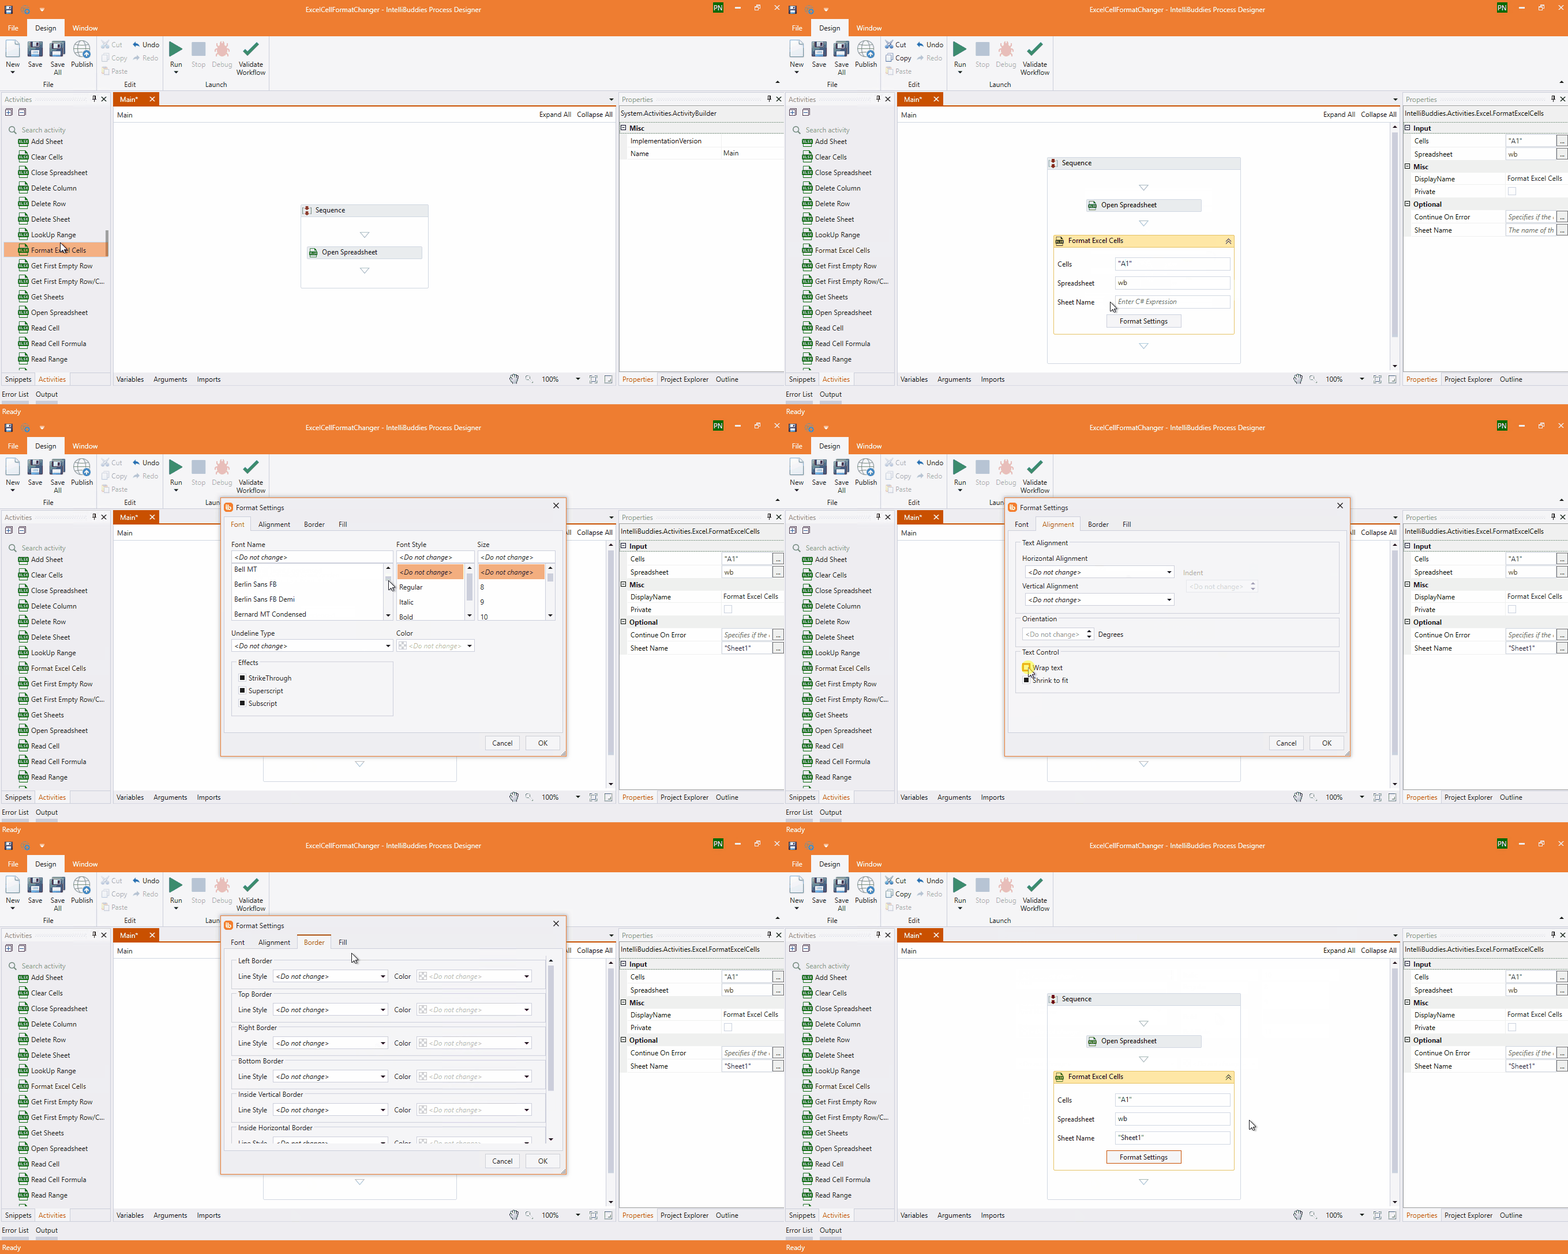
You can specify the format settings to be applied to the selected cell(s) by clicking on the Format Settings button available as part of the body of this activity. This will bring up the Format Settings dialog similar to Microsoft Office Excel.

You are allowed to modify the following format settings:
Note: By default, all the format settings for a cell will be set to Do not change, which means the settings will be based on the existing settings of that cell. If you want to alter the settings, you need to select the new settings to be applied for that cell.
| Setting | Category | Description |
|---|---|---|
| Font Name | Font | Select the font from the dropdown |
| Font Style | Font | Select the font style from the dropdown |
| Font Size | Font | Select the font size from the dropdown |
| Underline Type | Font | Select the underline type from the dropdown |
| Color | Font | Select the color from the color picker provided |
| Effects | Font | Enable or disable following effects: Strikethrough, Superscript, Subscript |
| Horizontal Alignment | Alignment | Select the alignment from the dropdown |
| Vertical Alignment | Alignment | Select the alignment from the dropdown |
| Indent | Alignment | Specify the indentation to be applied on the selected alignment |
| Orientation | Alignment | Specify the text orientation in degrees |
| Text Control | Alignment | Enable or disable text controls: Wrap Text, Shrink to fit |
| Left Border - Line Style | Border | Select the line style to be applied for the left border for the cell(s) from the dropdown |
| Left Border - Color | Border | Specify the border color from the color picker |
| Right Border - Line Style | Border | Select the line style to be applied for the right border for the cell(s) from the dropdown |
| Right Border - Color | Border | Specify the border color from the color picker |
| Bottom Border - Line Style | Border | Select the line style to be applied for the Bottom border for the cell(s) from the dropdown |
| Bottom Border - Color | Border | Specify the border color from the color picker |
| Top Border - Line Style | Border | Select the line style to be applied for the top border for the cell(s) from the dropdown |
| Top Border - Color | Border | Specify the border color from the color picker |
| Inner Vertical Border - Line Style | Border | Select the line style to be applied for the inner vertical border for the cell(s) from the dropdown |
| Inner Vertical Border - Color | Border | Specify the border color from the color picker |
| Inner Horizontal Border - Line Style | Border | Select the line style to be applied for the inner horizontal border for the cell(s) from the dropdown |
| Inner Horizontal Border - Color | Border | Specify the border color from the color picker |
| Diagonal Border - Line Style | Border | Select the line style to be applied for the diagonal border for the cell(s) from the dropdown |
| Diagonal Border - Color | Border | Specify the border color from the color picker |
| Background Color | Fill | Specify the background color to be applied for the cell(s) |
| Pattern Type | Fill | Select the fill pattern from the dropdown |
| Pattern Color | Specify the pattern color from the color picker. | |
Properties
Input
- Cells - The range of cells or single cell or comma-separated cells you want to format.
- Spreadsheet - The Excel spreadsheet instance.
Misc
- DisplayName – Add a display name to your activity.
- Private – If selected, the variables and argument values will no longer be logged at the Verbose level.
Optional
- Sheet Name – Specify the spreadsheet name where the cell(s) need to be formatted. By default, it will perform the formatting on the first spreadsheet in the Workbook.
- Continue On Error – Specifies if the automation should continue even when the activity throws an error. This field only supports Boolean values (True, False). The default value is False.
Note: If this activity is included in Try Catch and the value of this property is True, no error is caught when the project is executed.
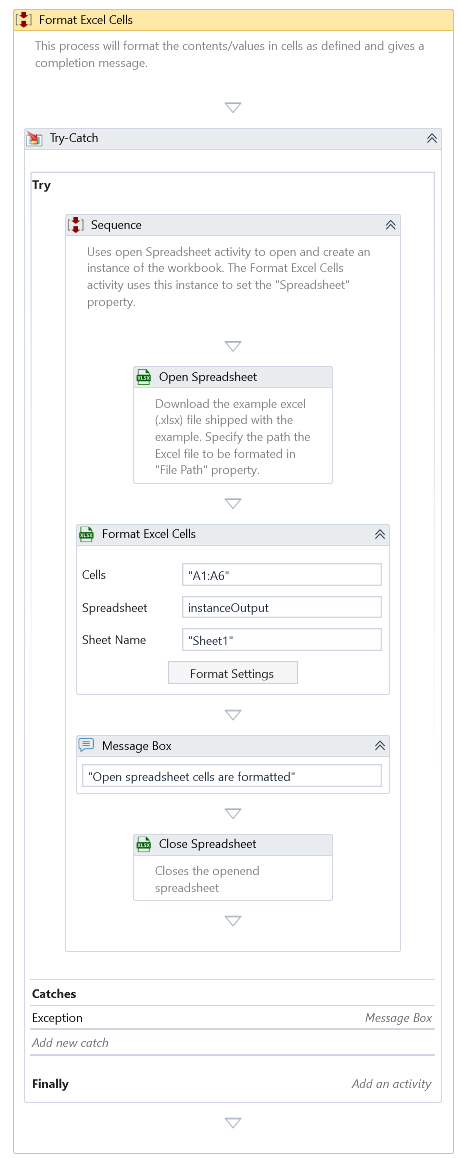
Example
Download Example
