Web Installer - AI Command Center Configuration
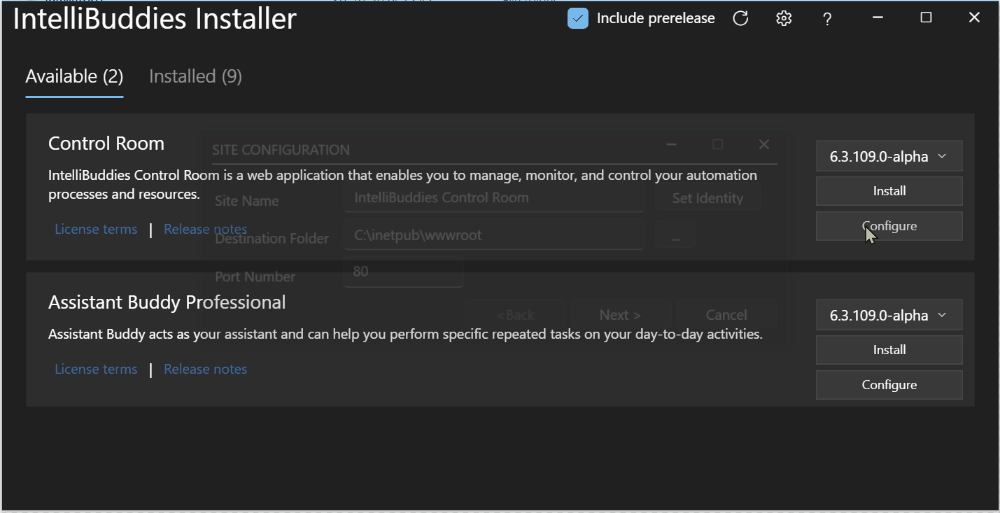
You can Configure the installation parameters, such as install location, database details, and others, by clicking the Configure button available per Component.
Configuring AI Command Center Installation
You can set AI Command Center configurations by traversing all settings and clicking the Next button. Finally, click on the Save & Close button. Once set, the configuration settings can be saved and used for any version of the AI Command Center installation unless the settings change.
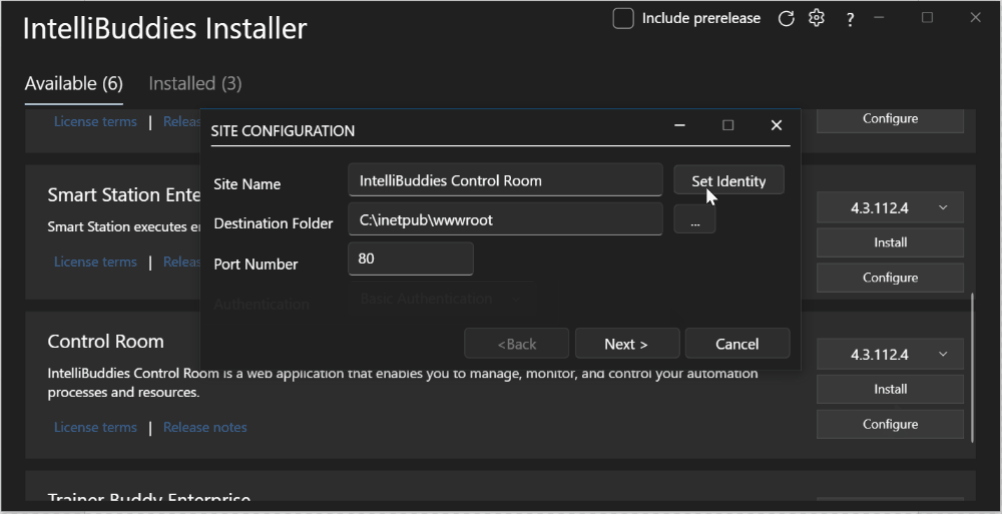
Site Configuration
Configure the options as desired:
- Step 1: - The Site Name is the hardcode application pool name of the IntelliBuddies AI Command Center.
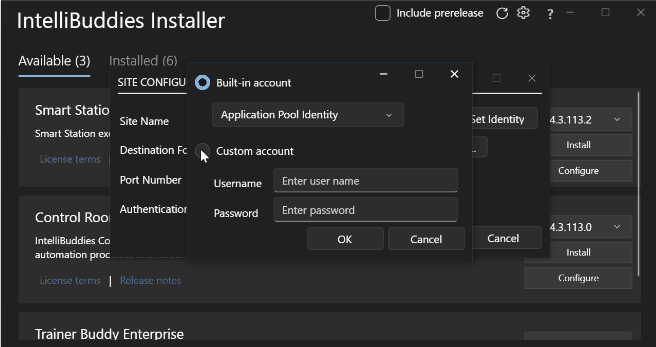
IntelliBuddies AI Command Centeris set by default. - Step 2: - Click on the Set Identity button to select the option to choose the Identity under which the IntelliBuddies AI Command Center web application should run.
Built-in Account
The following options are available :
- Application Pool Identity—Runs under the application pool's default identity, which is set by default.
- Local Service—This is a built-in account with the same level of access to resources and objects as members of the Users group.
- Local System—This is a high-privileged built-in account. It has extensive privileges on the local system and acts as a computer on the network.
- Network Service - It is a built-in account with more access to resources and objects than User group members. Services that run as the Network Service account access network resources by using the credentials of the computer account.
Custom Account
Selecting this option enables two extra fields, Username and Password, allowing you to specify the Identity under which to run the IntelliBuddies AI Command Center web application.
- Step 3: - The Destination Folder path is set to
C:\inetpub\wwwrootpath by default. Choose the browse button to set a different location. - Step 4: - Specify the TCP Port Number used to enable communication between the computer and the AI Command Center. The port number
80is set by default.
Make sure that the provided port number is open for communication.
- Step 5: - Click on the Next button.
Admin Account Configuration
You are allowed to configure the following AI Command Center Administrator-related properties from here.
| Field | Description |
|---|---|
| First Name | The First Name of the Host Administrator |
| Last Name | The last Name of the Host Administrator |
| The email of the Host Administrator | |
| Username | The Username of the Host Administrator |
| Password | The Password to be used for Host Administrator |
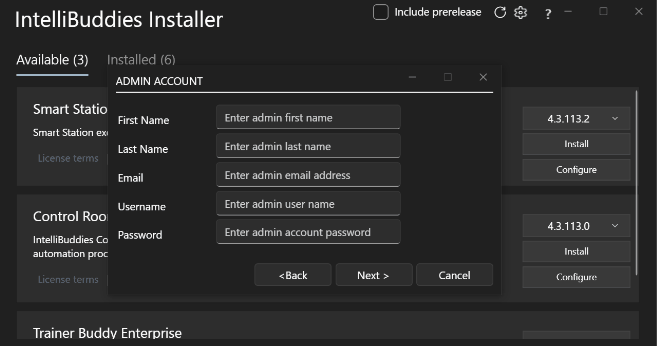
- Click on Next
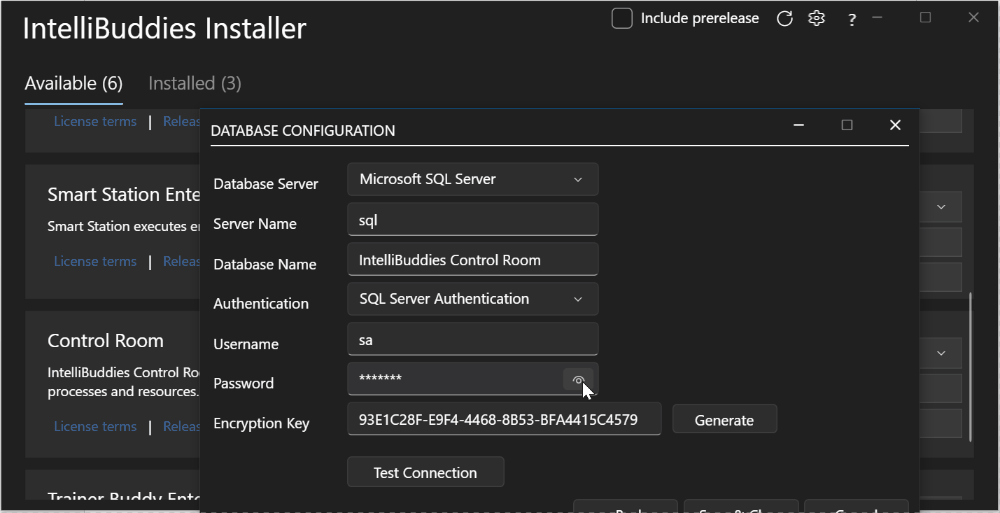
Database Configuration
You can configure your Database server-related properties from here.
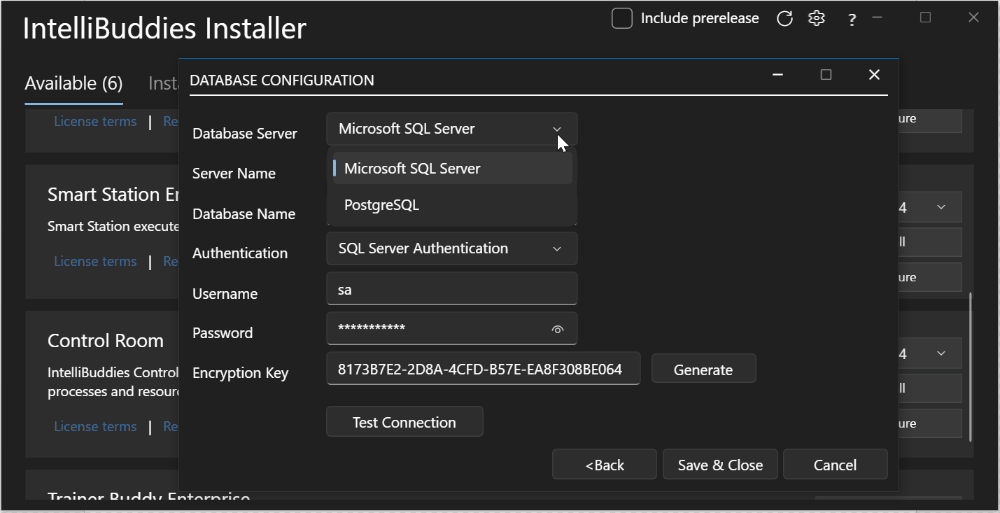
- Choose the Database Server type from the dropdown. The settings are displayed based on the Database Type you selected.
Microsoft SQL Server
- Fill in the following details and click on Next:
- Server Name – Microsoft SQL Server name.
- Database Name – Specify the Database Name.
- Authentication – select the appropriate Authentication to be used to connect to Microsoft SQL Server - Windows Authentication OR SQL Authentication
- Login – the Username in case of SQL Authentication
- Password – the Password in case of SQL Authentication
PostgreSQL
- Fill in the following details and click on Next
- Hostname / address – the PostgreSQL server name
- Port Number – the port number at which the server is listening
- Authentication – select the appropriate authentication type to be used to connect to PostgreSQL server – Windows Authentication OR Password Authentication
- Username – the Username in case of Password Authentication
- Password – the Password in case of Password Authentication.
- Encryption Key - The Key used by the AI Command Center to encrypt and decrypt the password properties stored as part of AI Command Center. You can either copy your own Key inside the text area or click on Generate Key so that our installer can generate a new Key
If you reinstall the AI Command Center in the future, you may need the same Key, so save it safely.
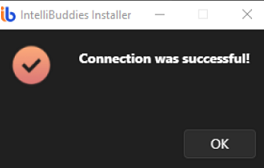
- Use Test Connection to test the connection. Displays a popup if the test is successful.