BPA Designer Panel
Overview
The BPA Designer Panel is a comprehensive interface for designing and managing workflows efficiently. It is user-friendly and provides all the necessary tools and features to create, configure, publish, and maintain automated business processes.
Functions
The BPA Designer Panel provides the following functionalities for users to ease building their business process automation solutions.
- Designing BPA Process
- Adding and configuring Swimlanes
- Publishing BPA Process
- Maintaining BPA Process
Designing BPA Process
IntelliBuddies provides an extensive set of Business Process Workflow Activities inside the BPA Designer Panel to create your BPA process. The BPA Designer panel provides the following functionalities to ease the creation of your Business Process Automation Solutions.
| Title | Function | Description |
|---|---|---|
| Drag and Drop Activities | 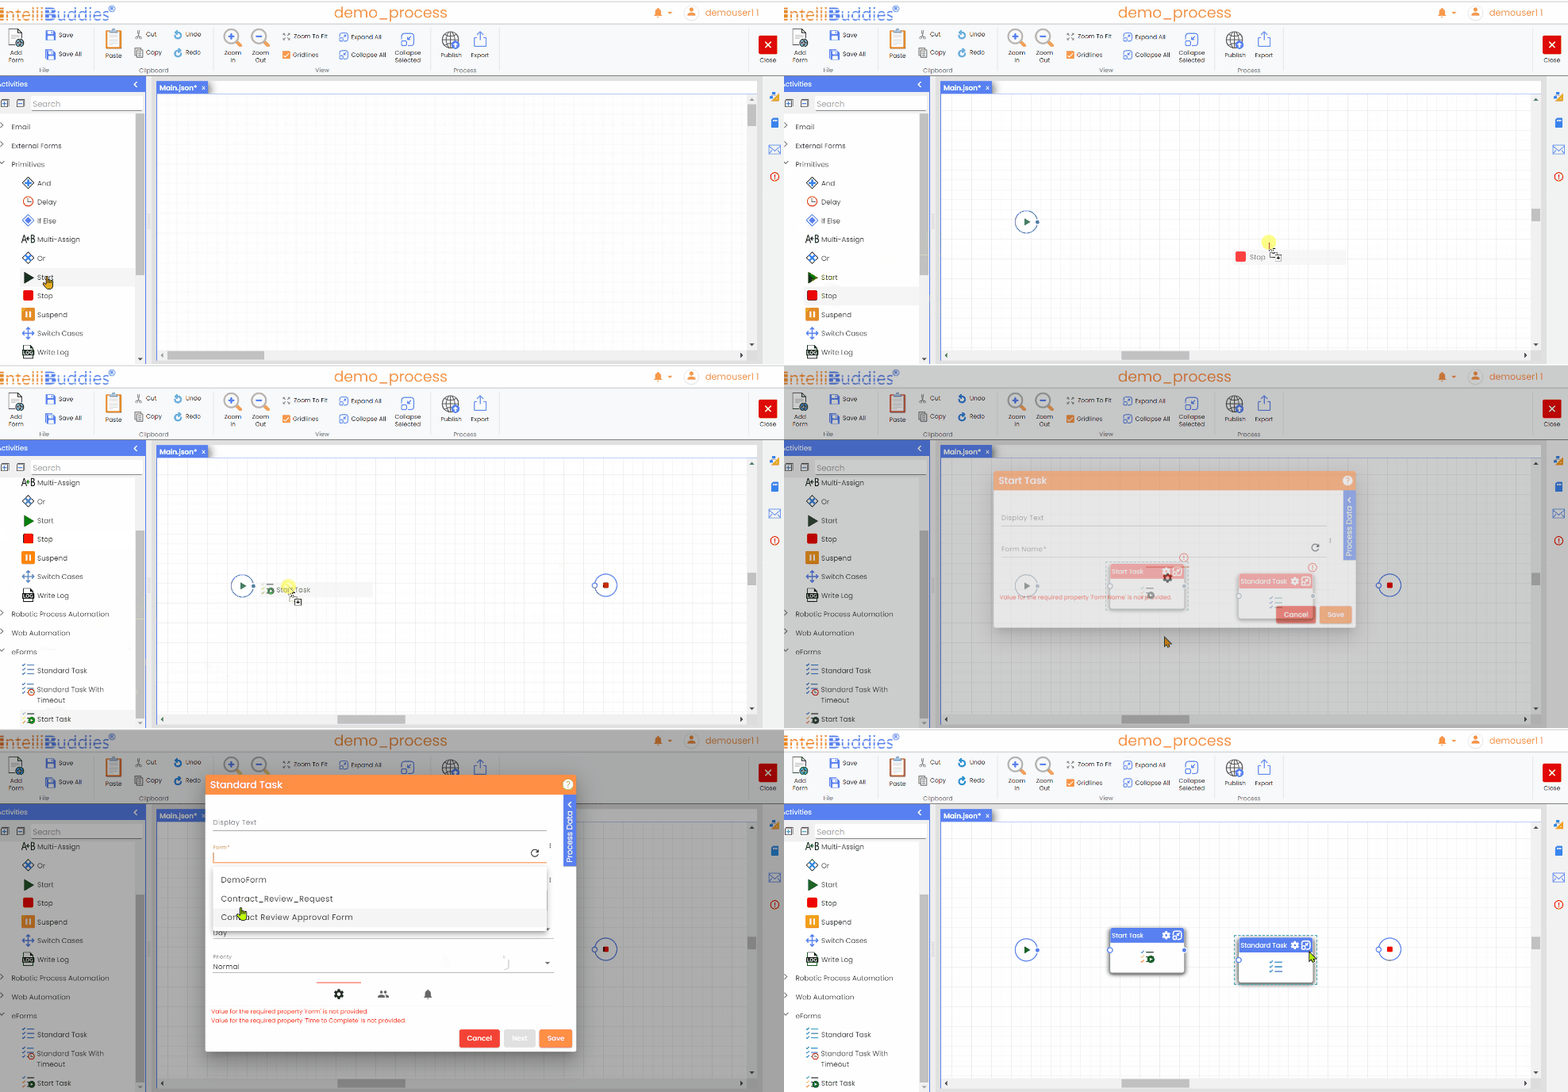 | You can design your process by dragging and dropping the activities from the activity panel. |
| Connect Activities to create workflow | 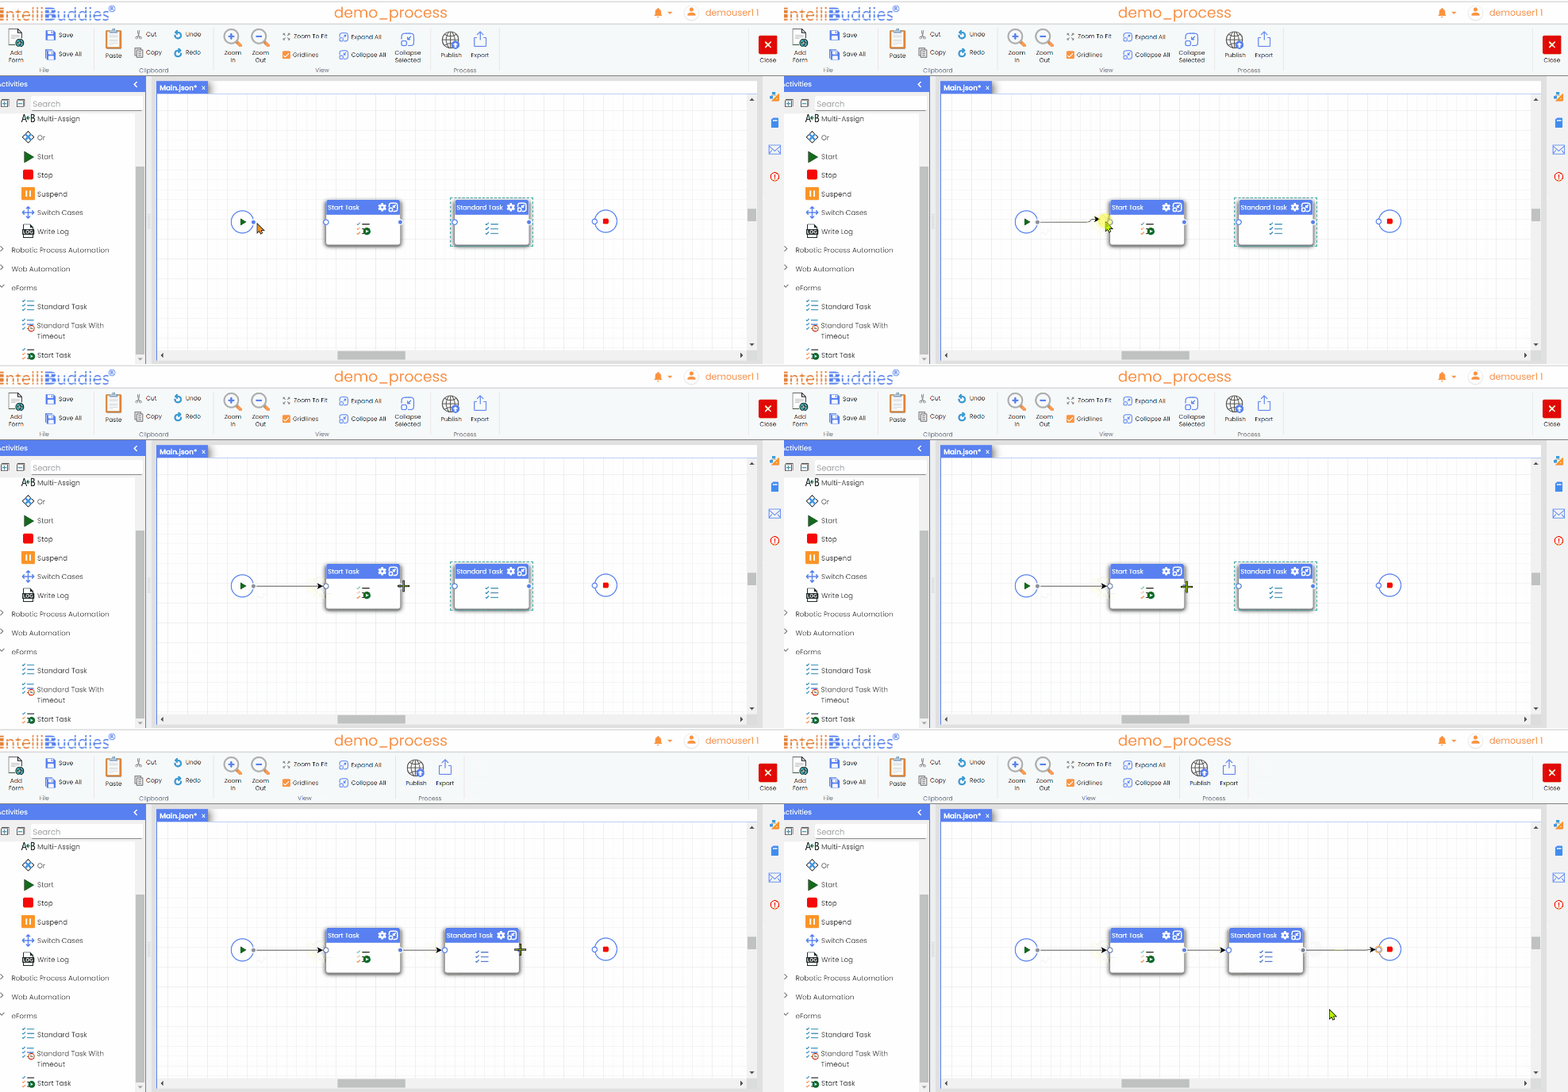 | It lets you build your workflow by connecting the activities. To join two activities, you can click on the output port of the first activity, drag the mouse, and release it at the input port of the second activity. |
| Configure Activities | 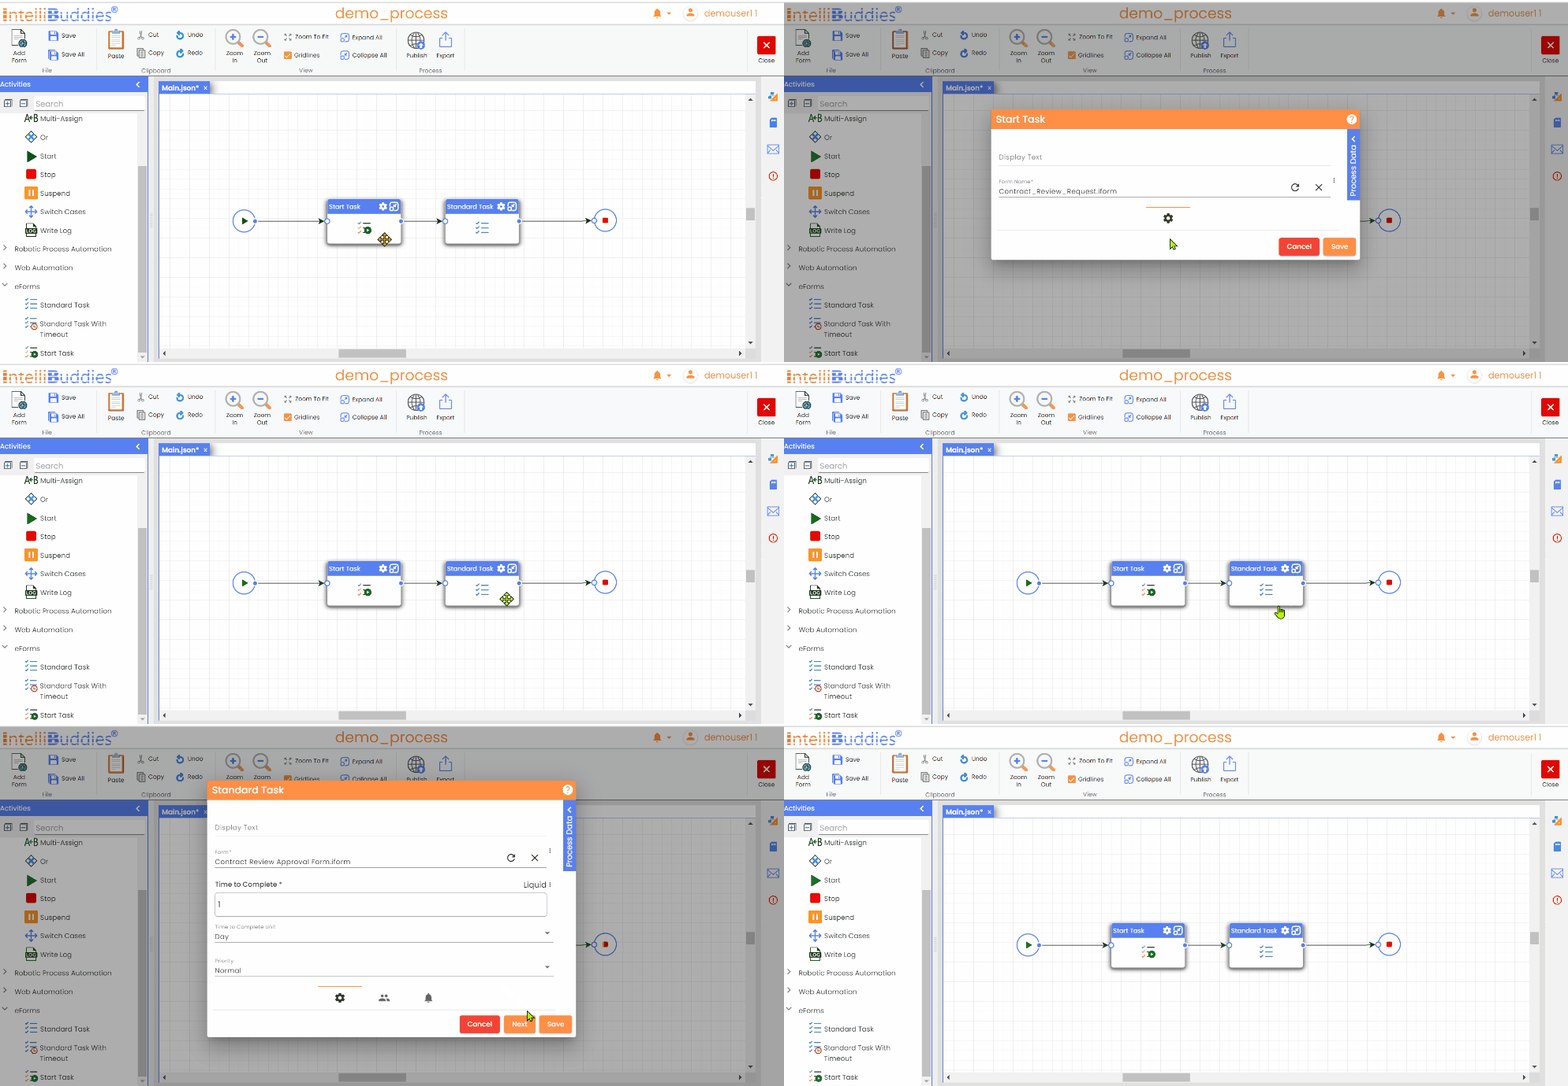 | You can configure your Activities. To do so, double-click on an activity or click the gear icon in its UI to open the configuration dialog. |
| Context Menu | 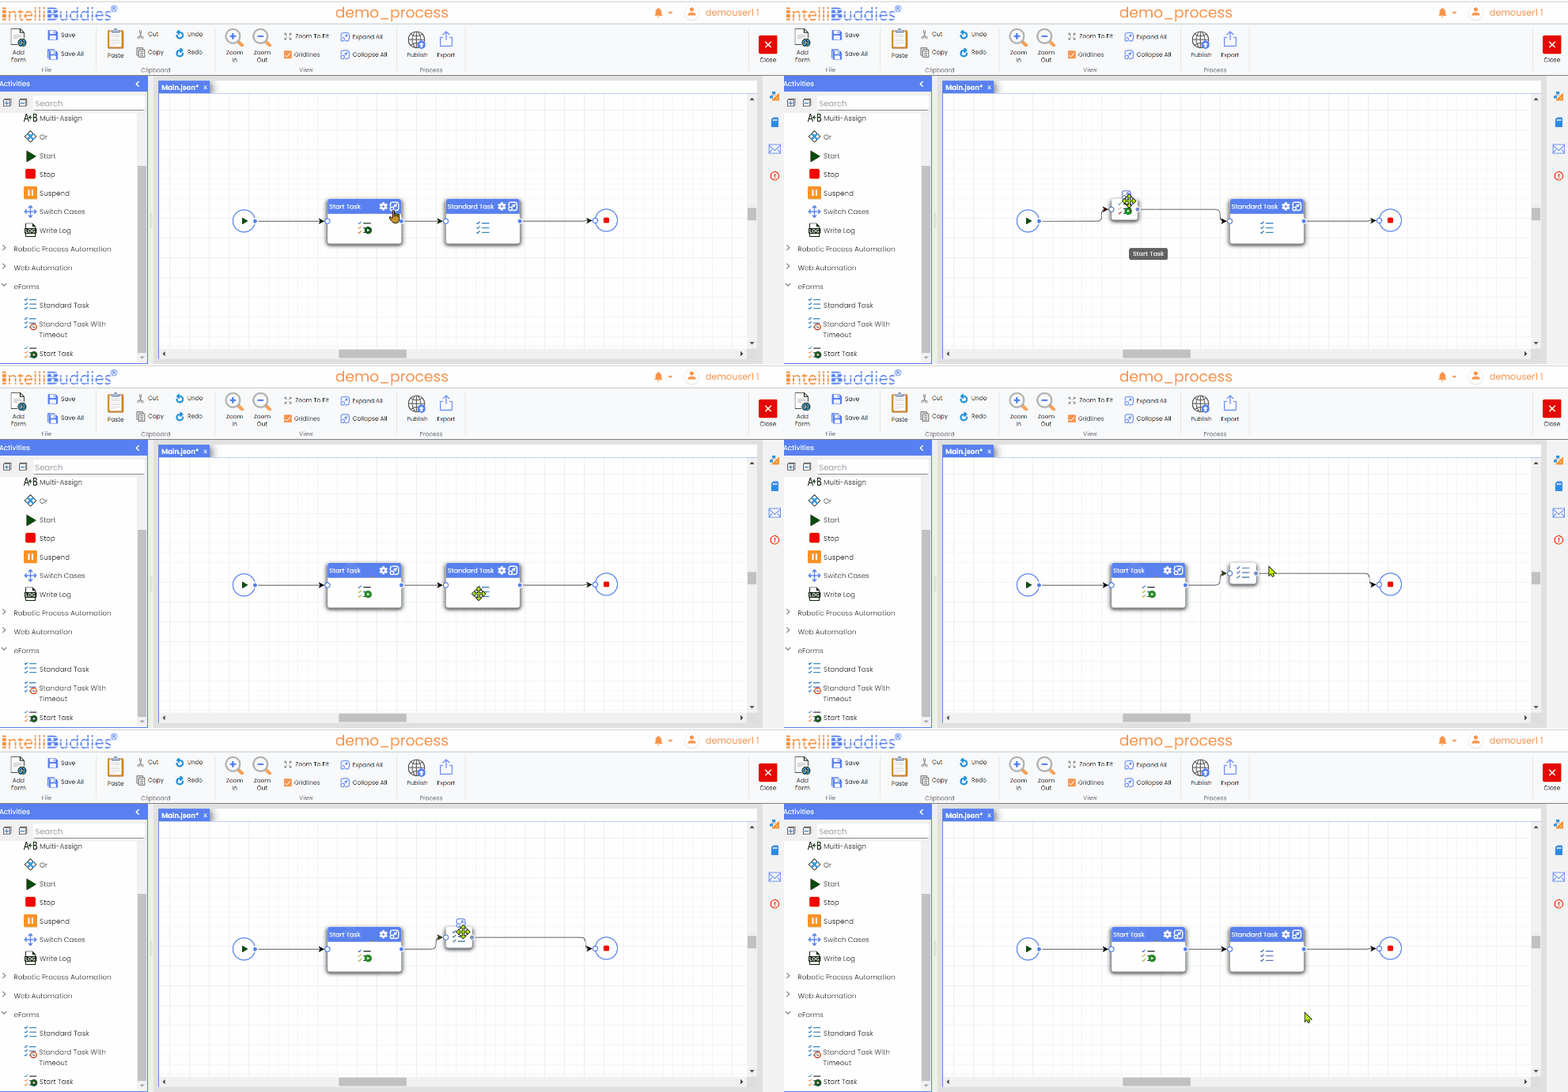 | Right-click context menu is provided at each activity level to ease your design efforts. For more information, refer to Context Menu Options. |
Context Menu Options
The Designer Pane offers a range of context menu options to simplify and enhance the design process. These options allow users to quickly access commonly used tools and settings, minimizing the need to navigate multiple menus. With a right-click, users can efficiently modify design elements, adjust properties, and manage settings directly within the workspace.
| Option | icon | Function | Description |
|---|---|---|---|
| Cut | 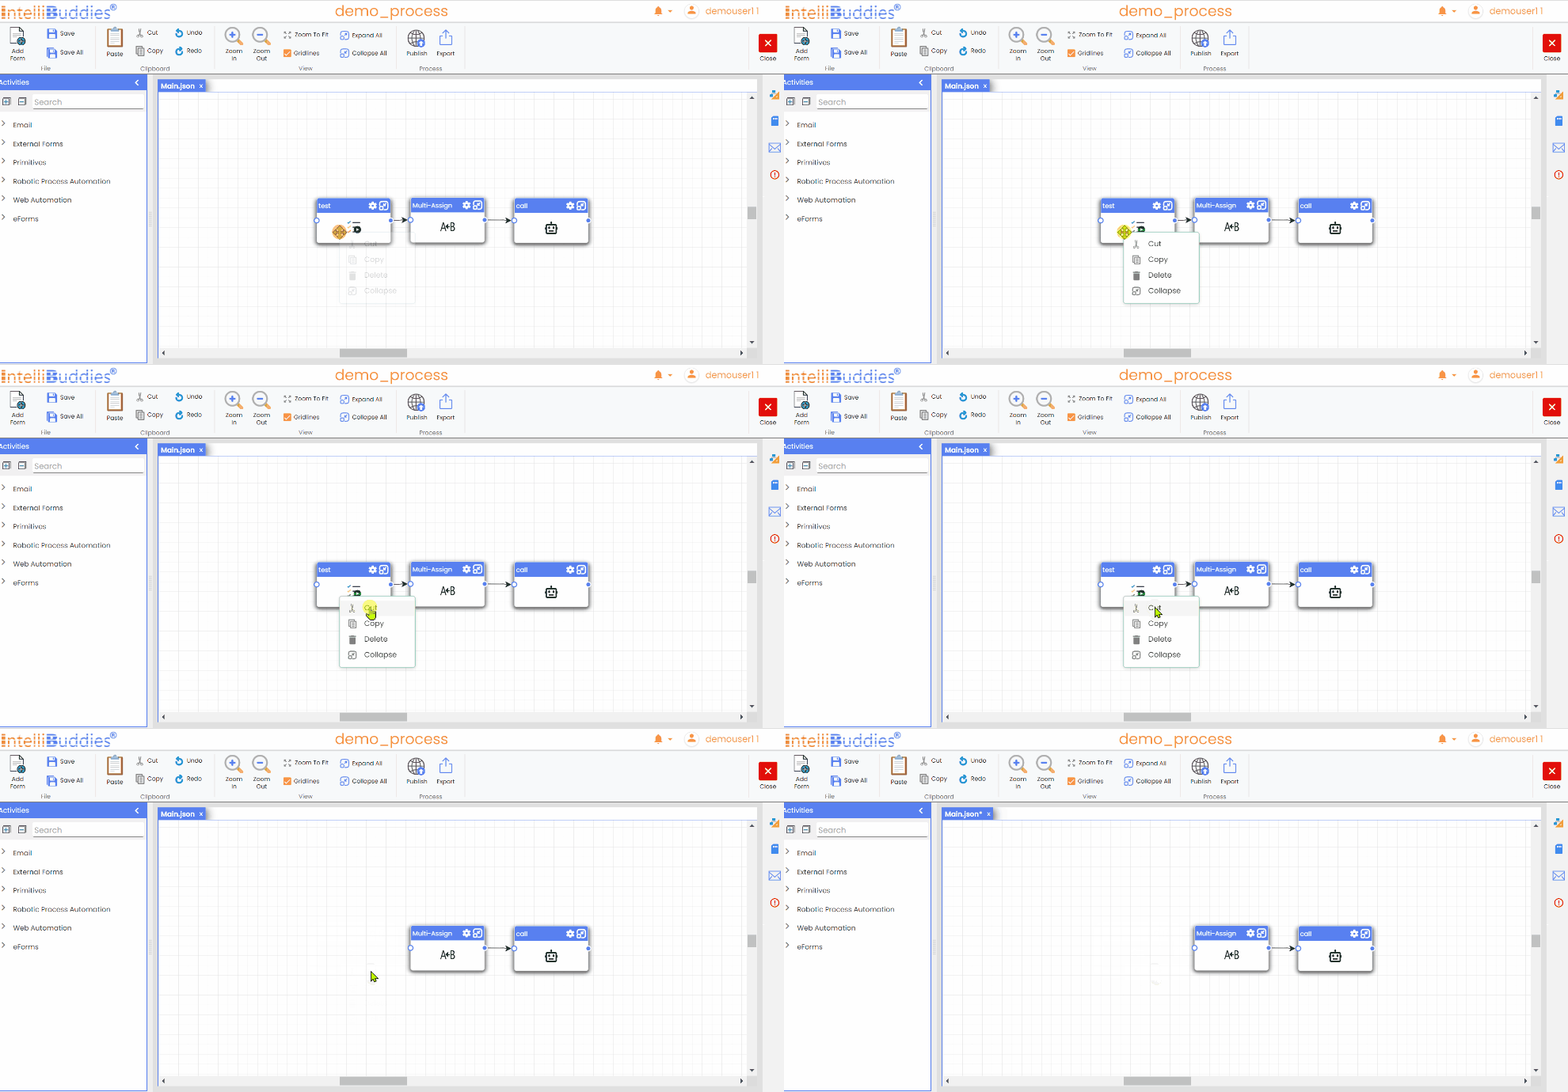 | Click on this option to cut the selected activity | |
| Copy | 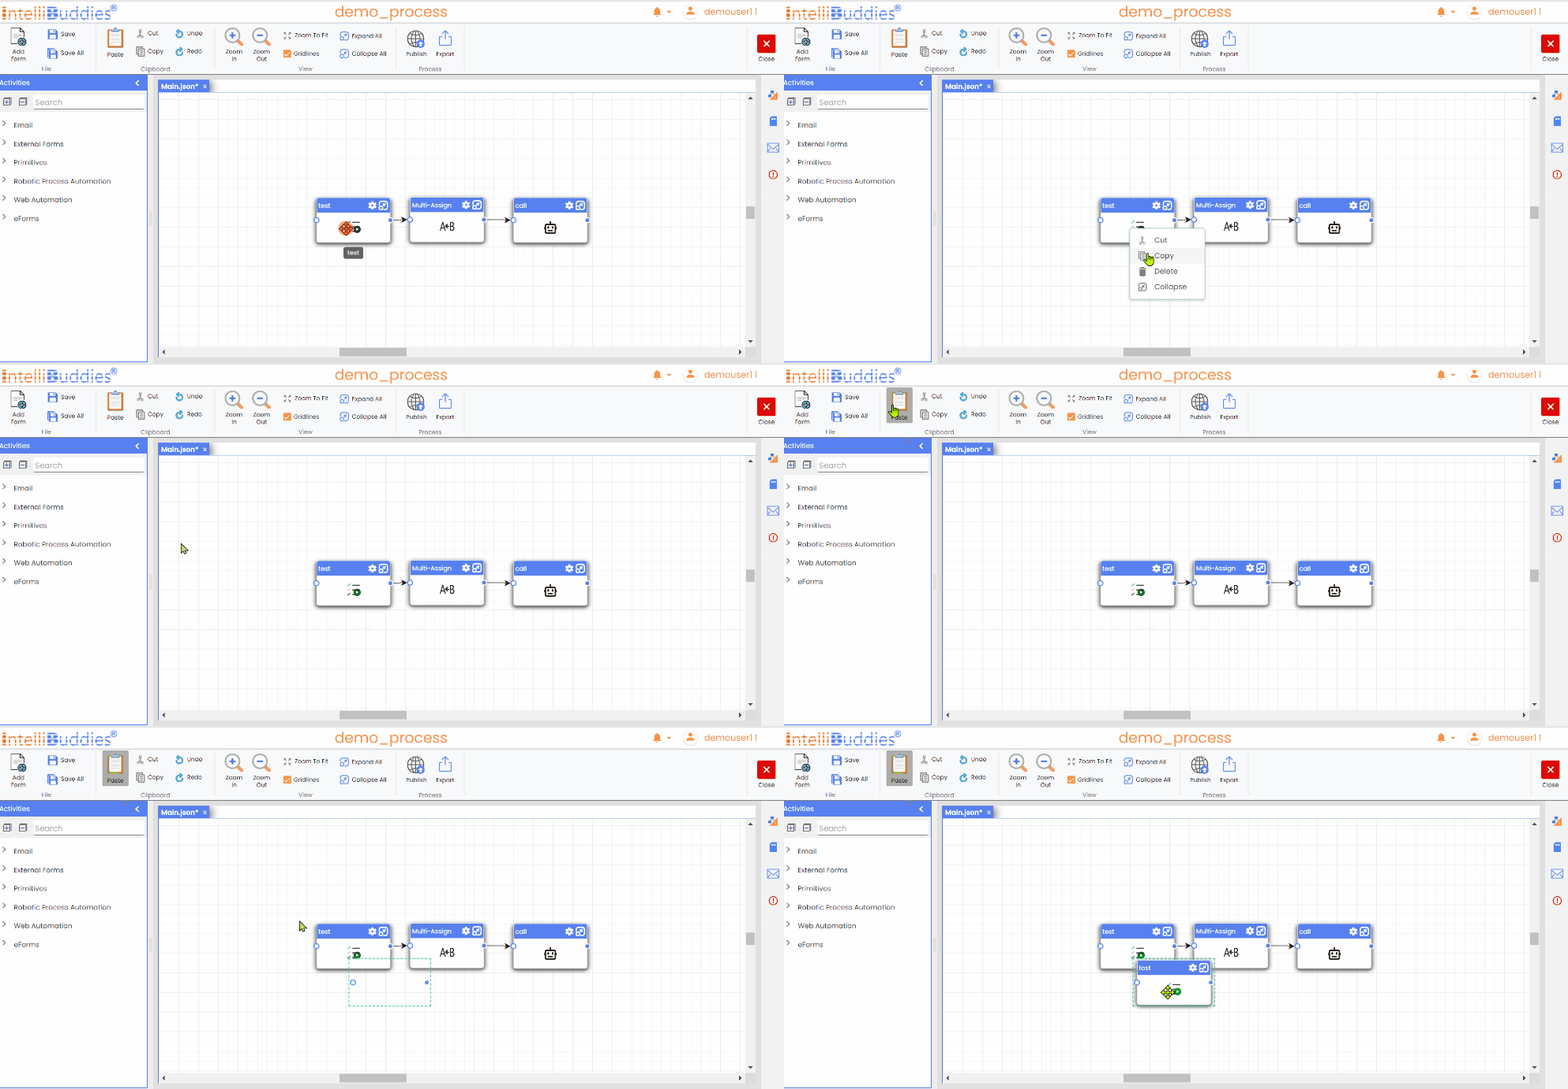 | Click on this option to copy the selected activity | |
| Delete | 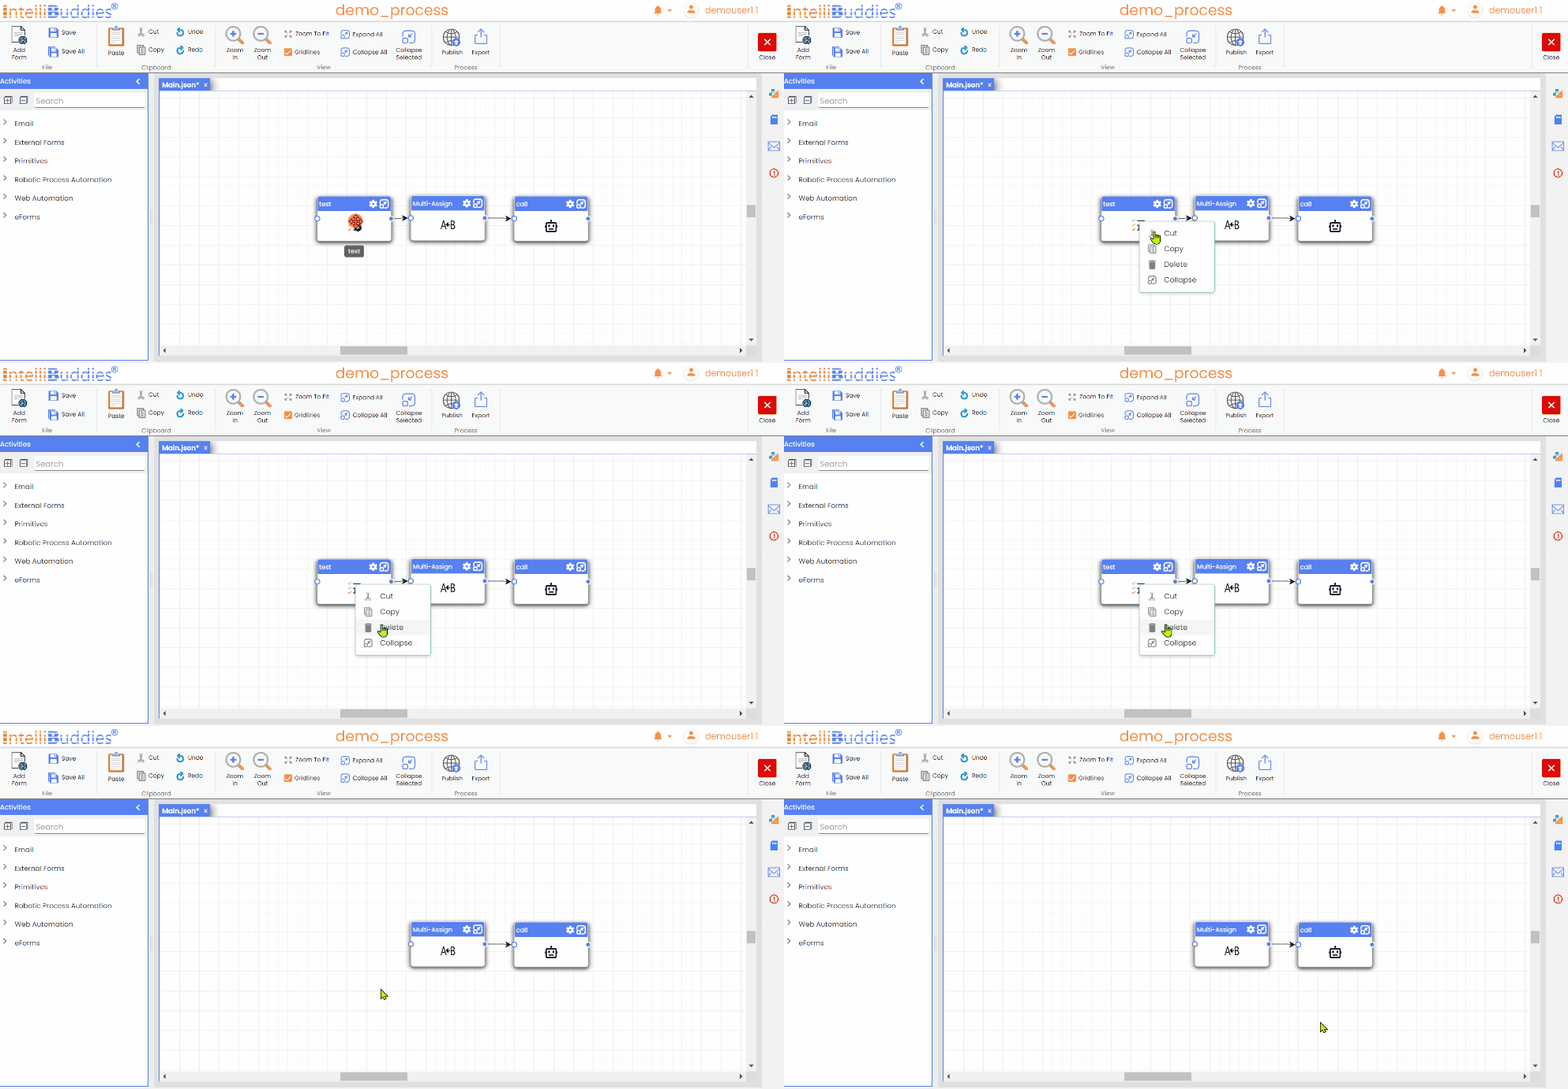 | Click on this option to delete the selected activity | |
| Collapse | 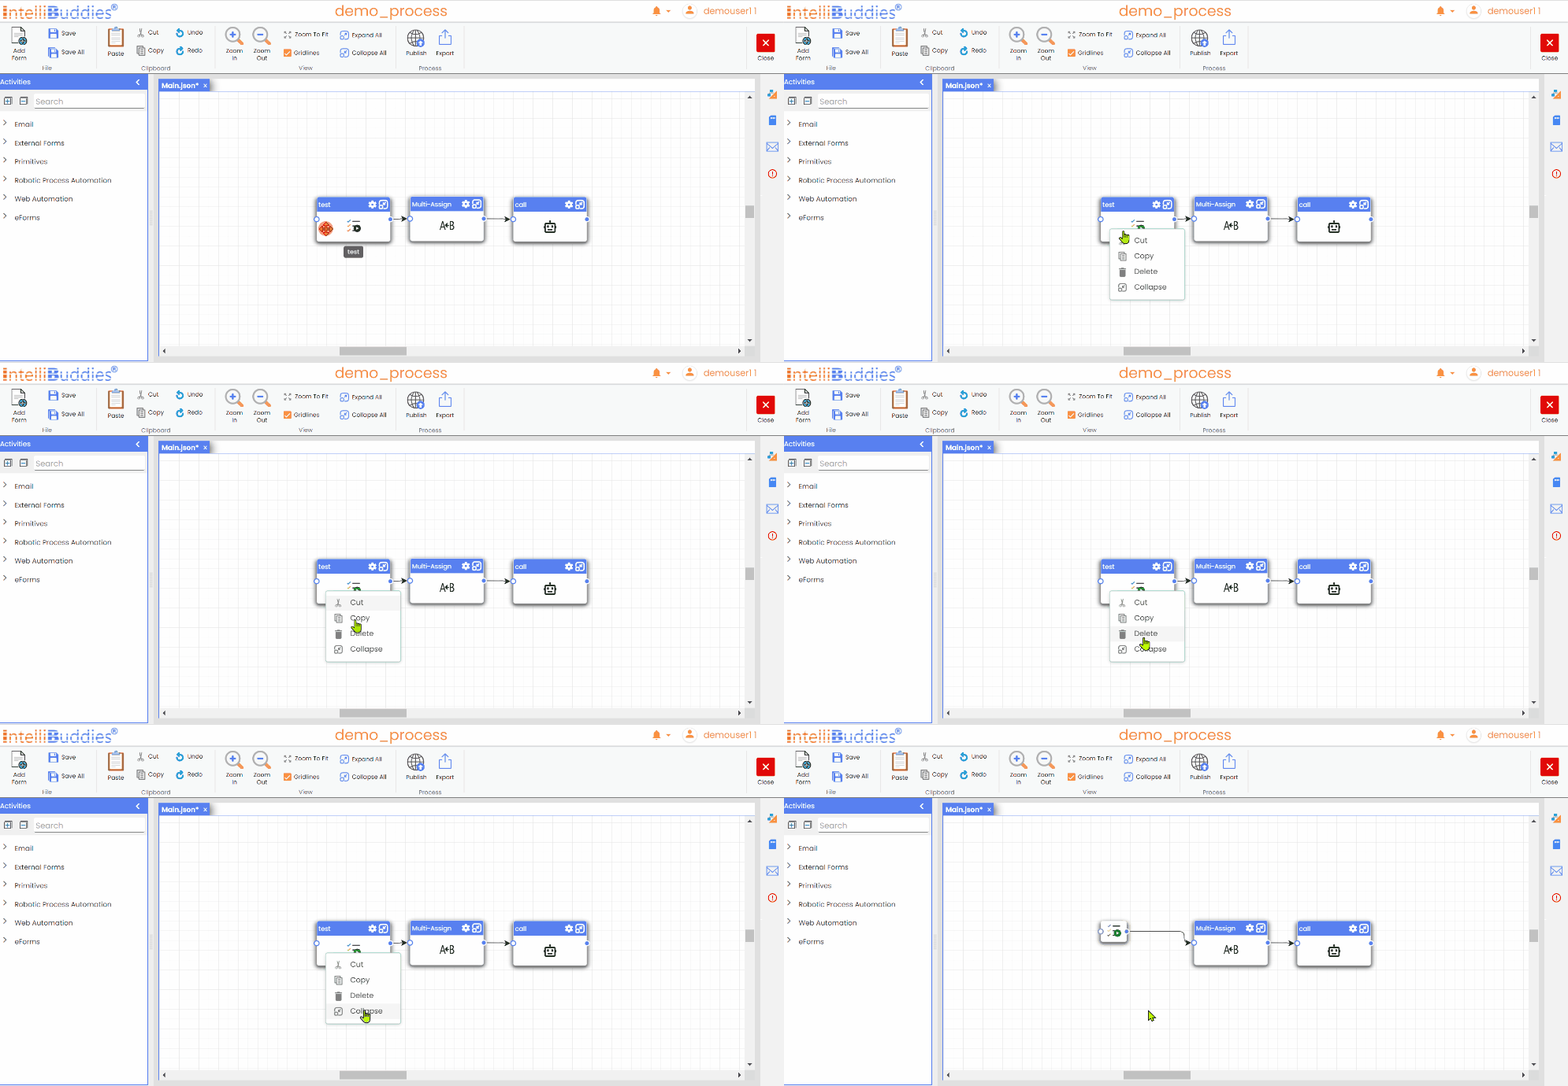 | Click on this option to collapse the selected activity | |
| Expand | 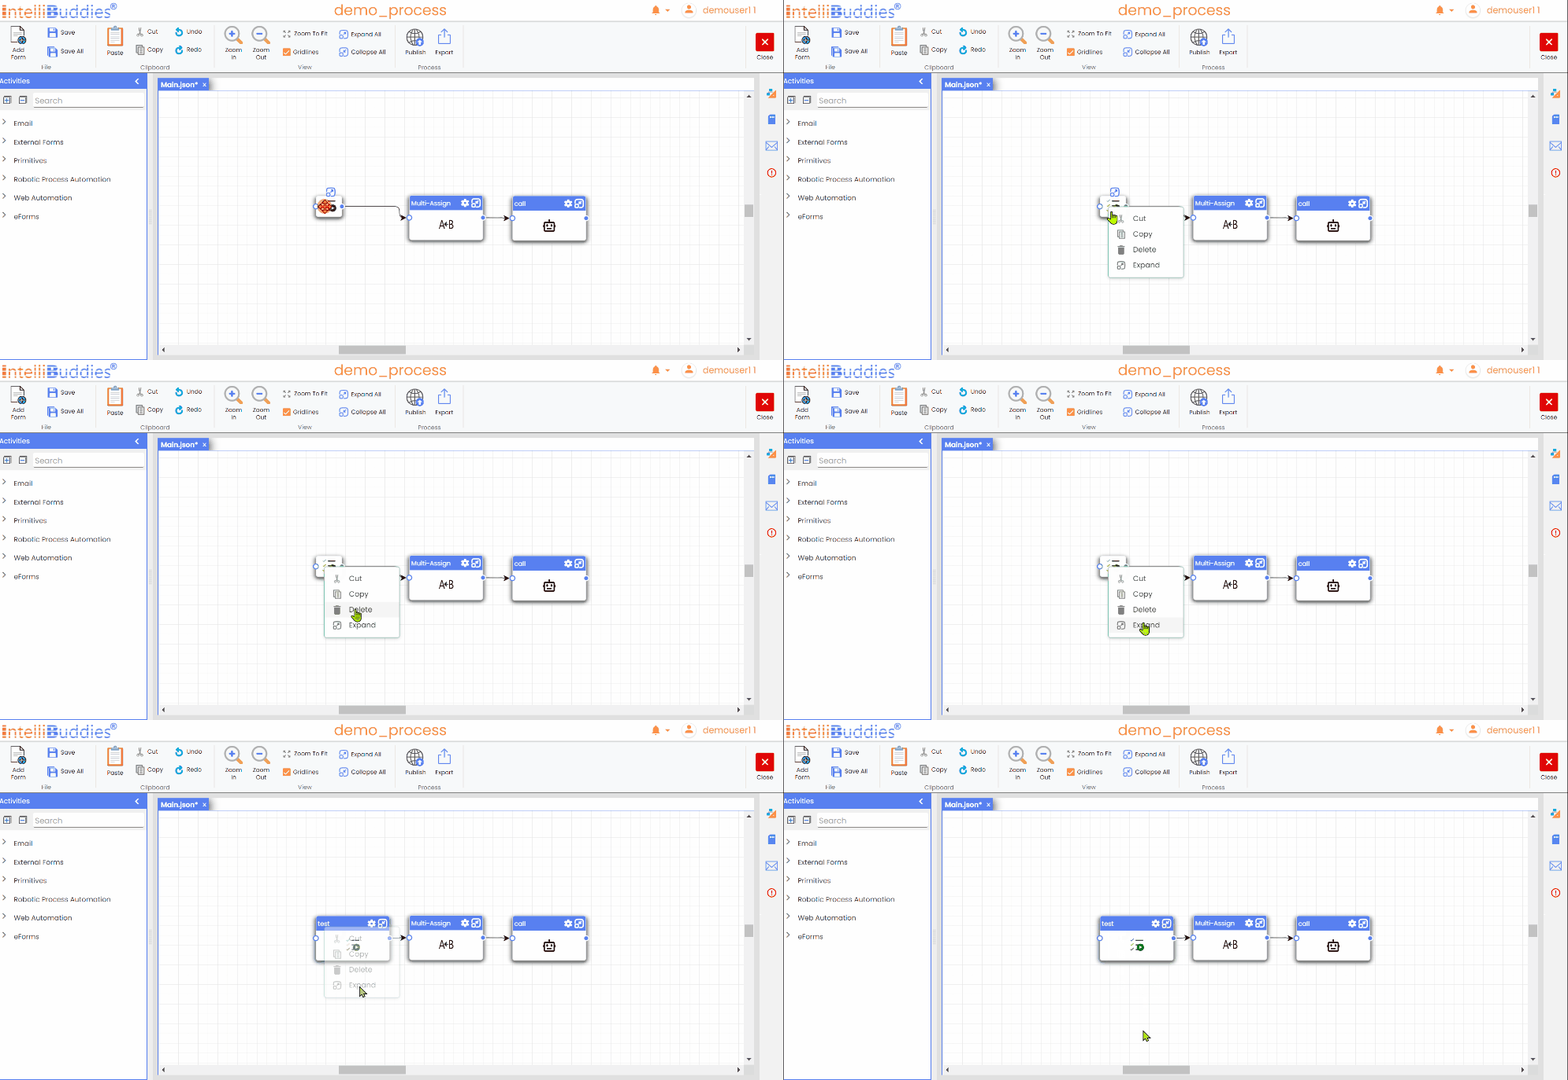 | Click on this option to expand the selected activity | |
Adding and configuring Swimlanes
Drag and drop a horizontal or vertical Swimlane from the activities panel. The first time, it will ask for the Swimlane orientation and the number of swimlanes required. You can configure it according to your needs and then build your workflow. If the Swimlane already exists, dragging will add a new lane at the end.
You can perform the following operations on the Swimlane activity:
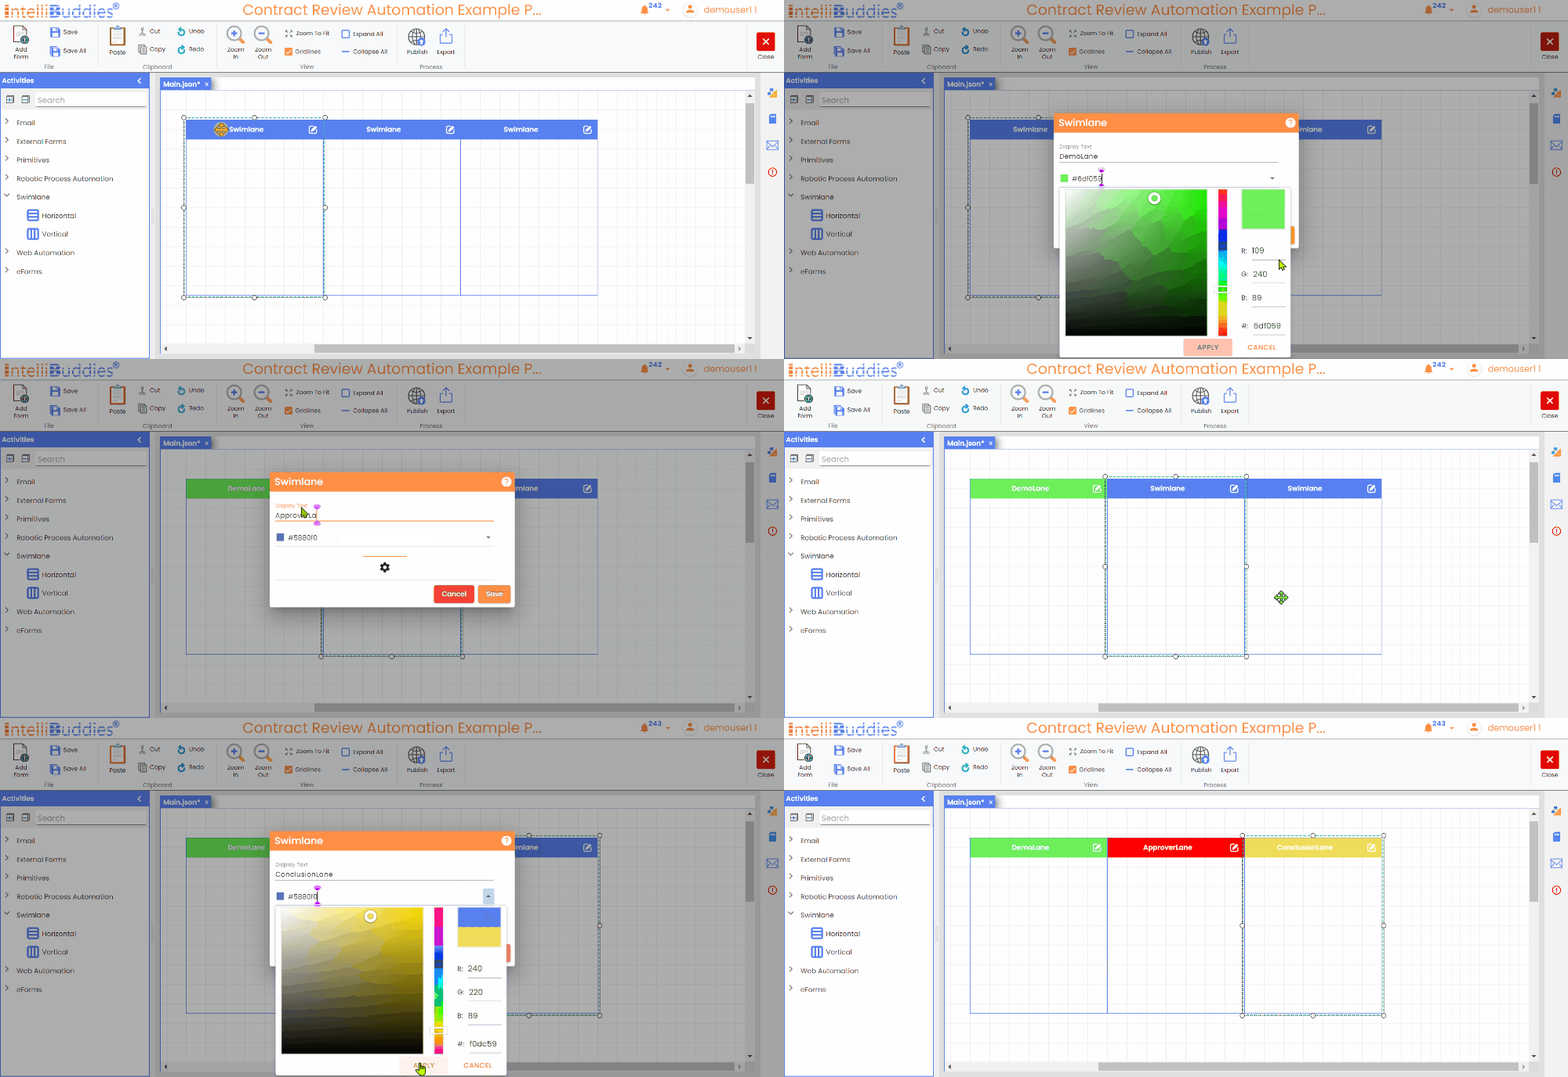
Changing Header Label and Color
Clicking on the pencil write icon or double-clicking will open a dialog where the user can change the display text and header color.
Changing the Size of the Lane
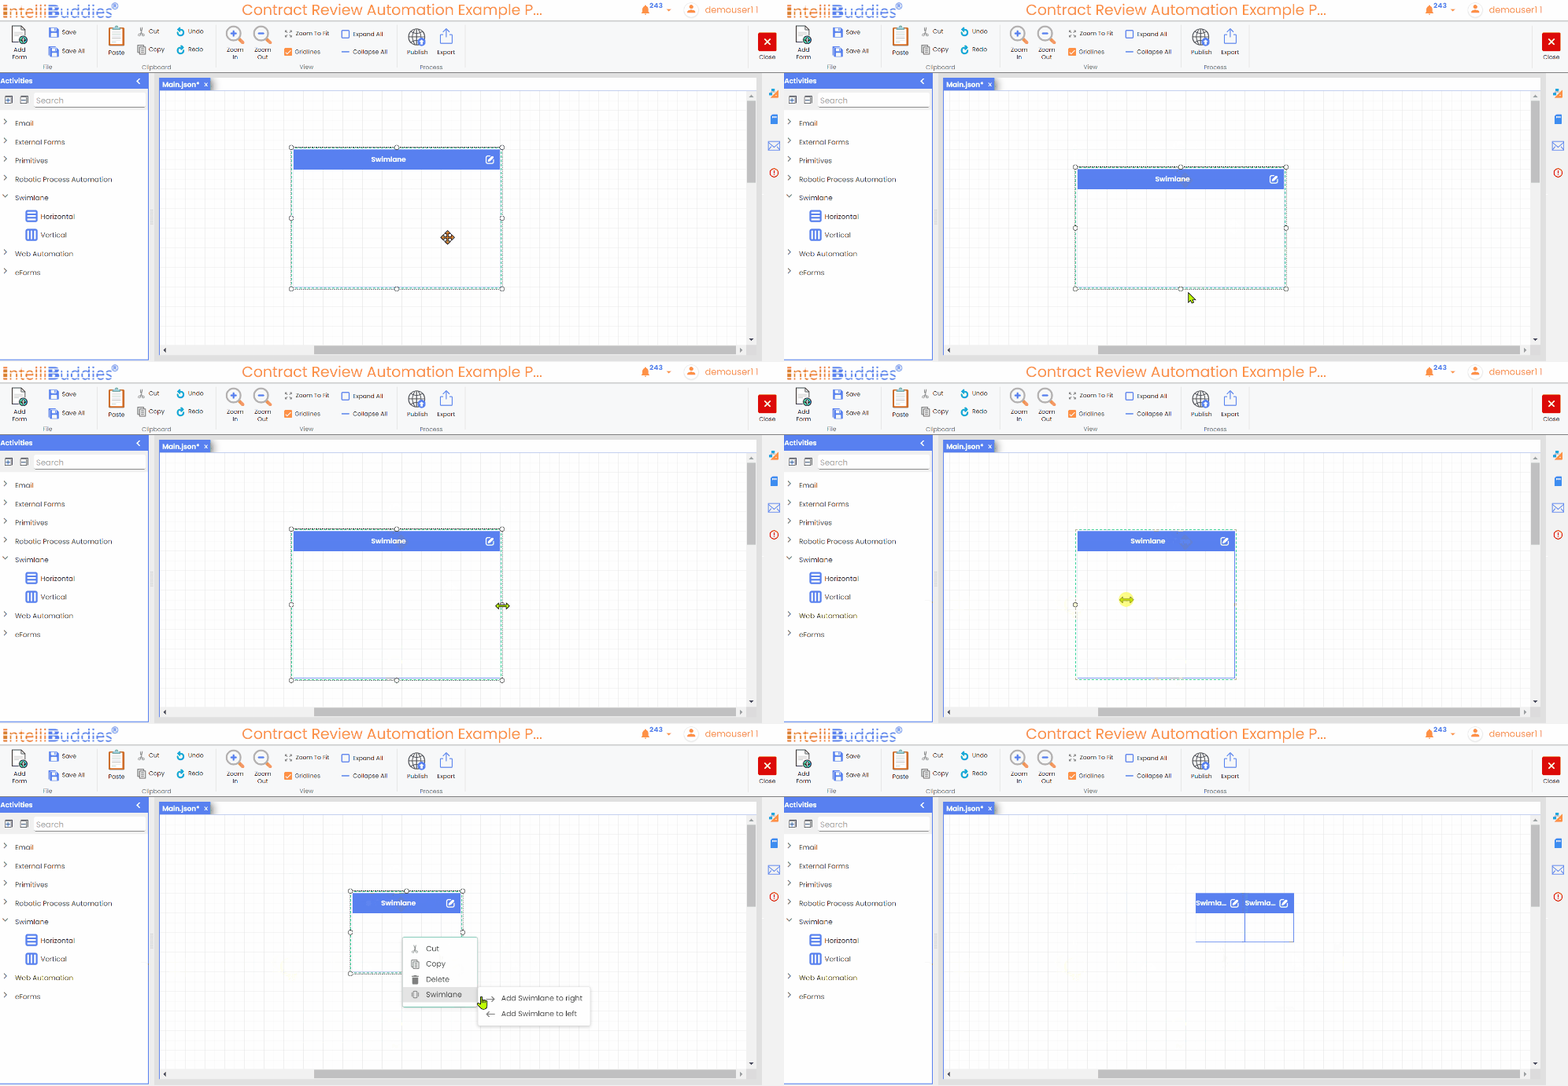
Click on the desired Swimlane to highlight it. To expand the Swimlane, click and drag to the right, left, top, or bottom as needed. Dragging from the corners will adjust the size of all swimlanes simultaneously.
Changing Position
Hold the click on any swimlane and drag; it will move all swimlanes.
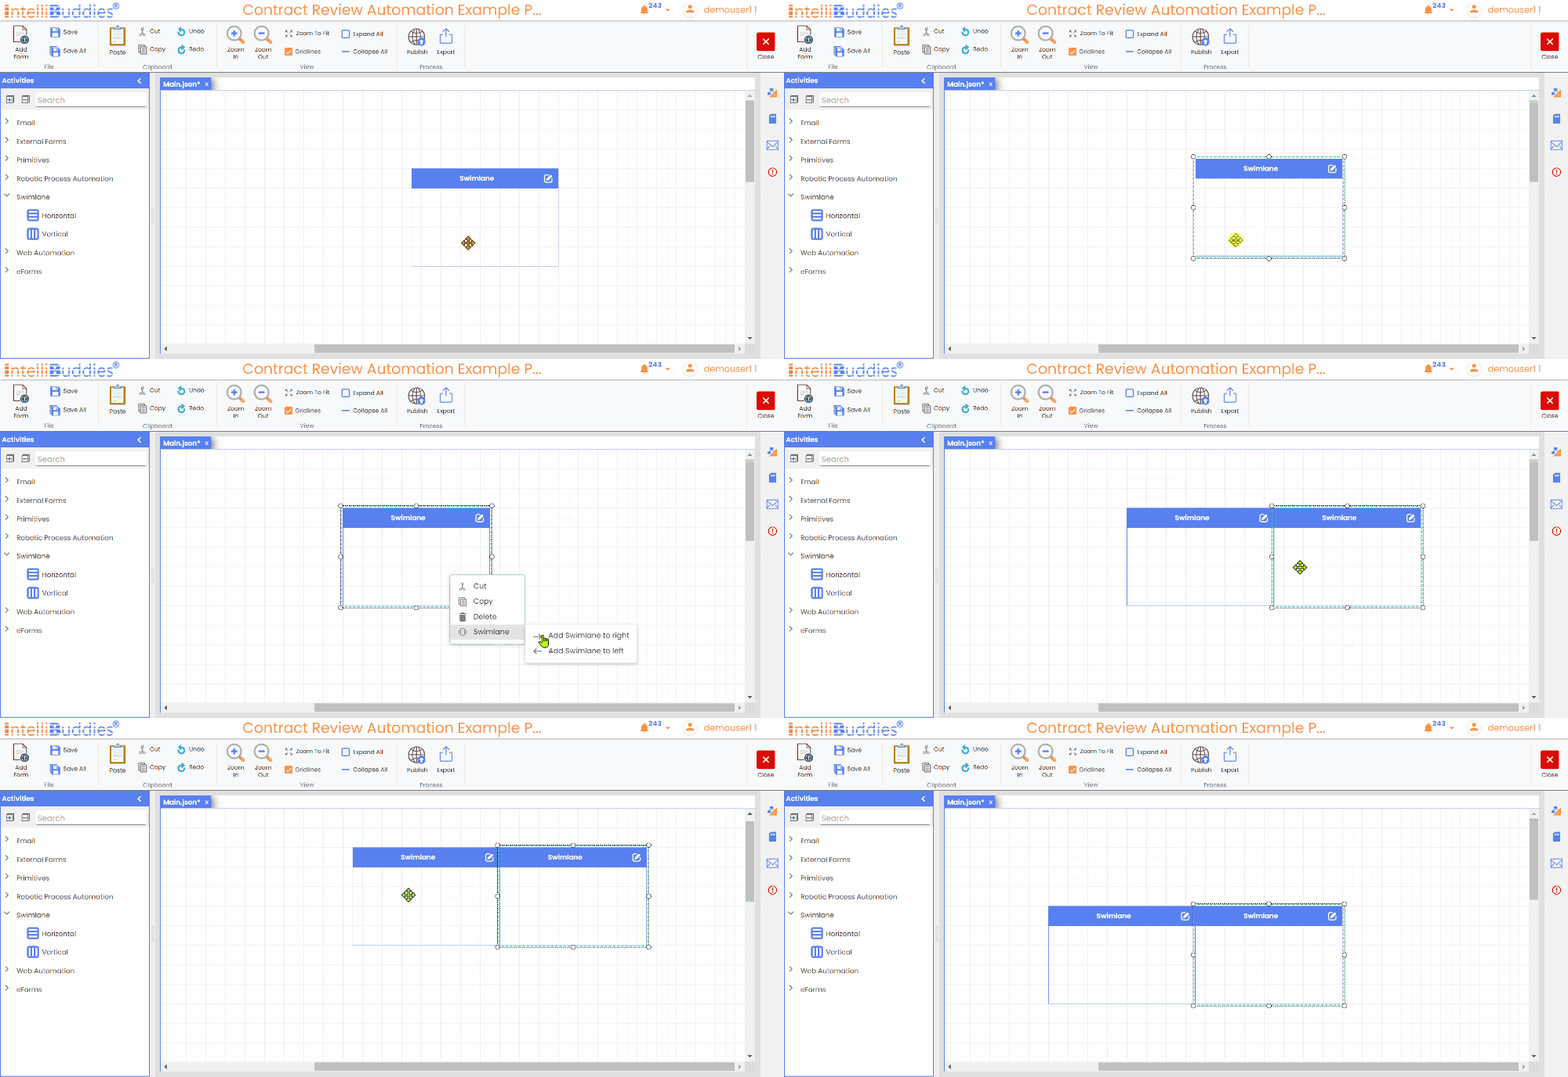
Adding a new Lane
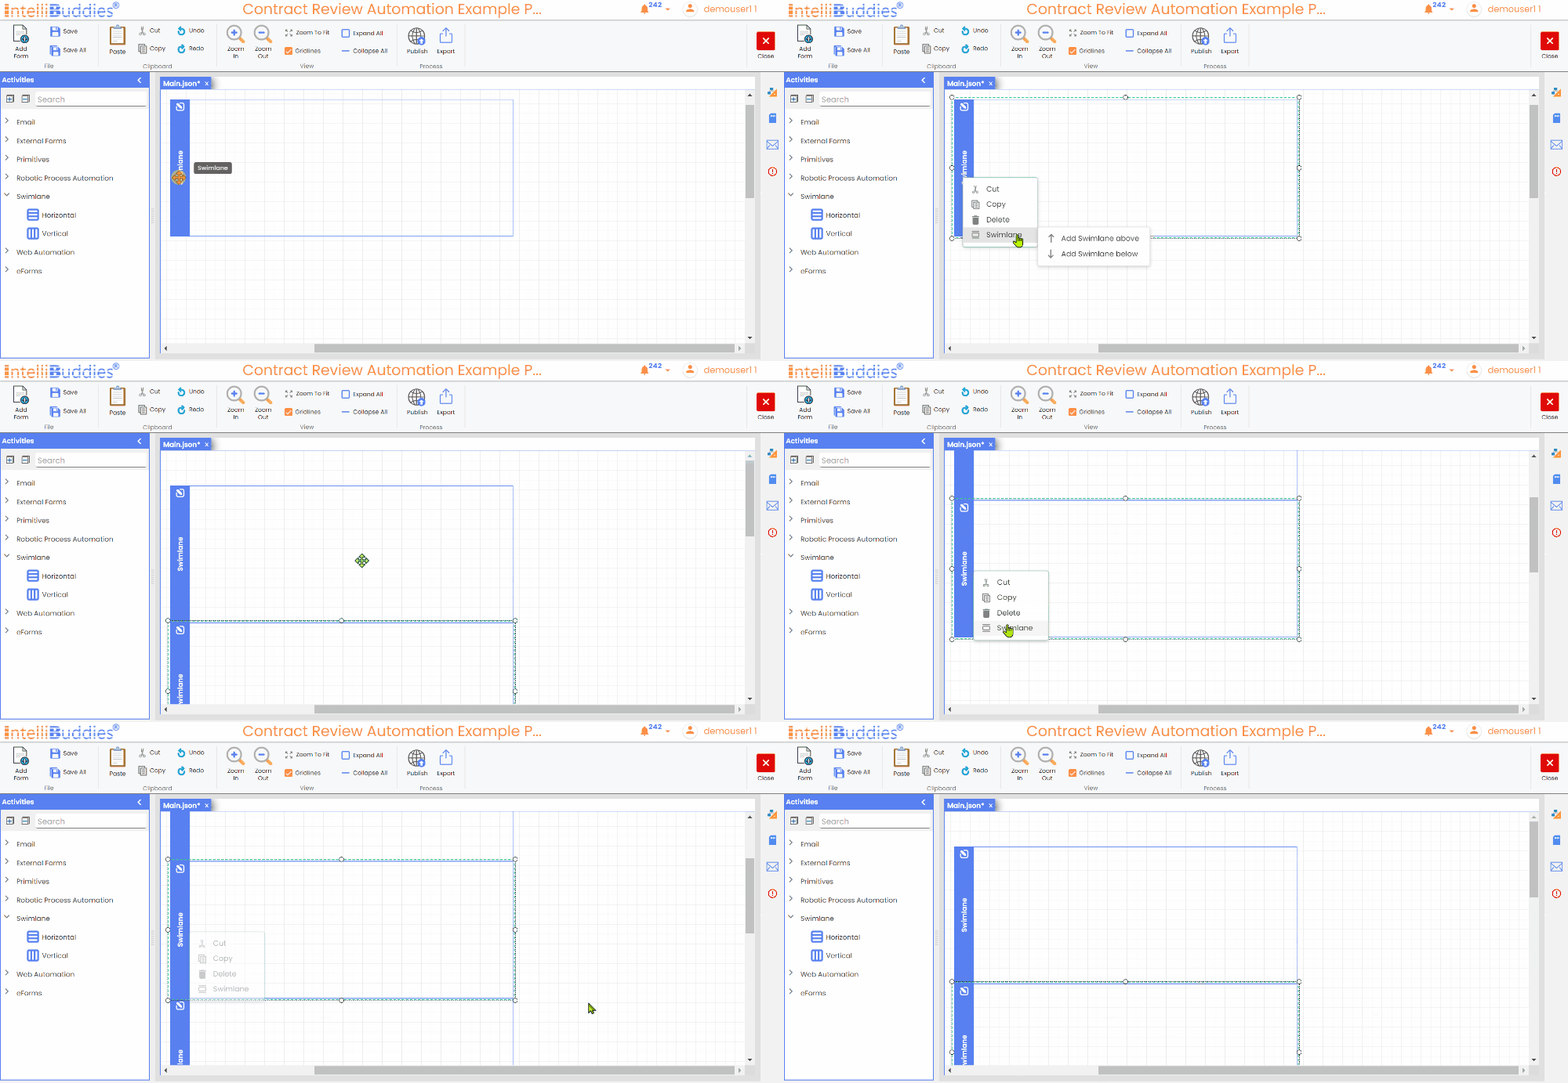
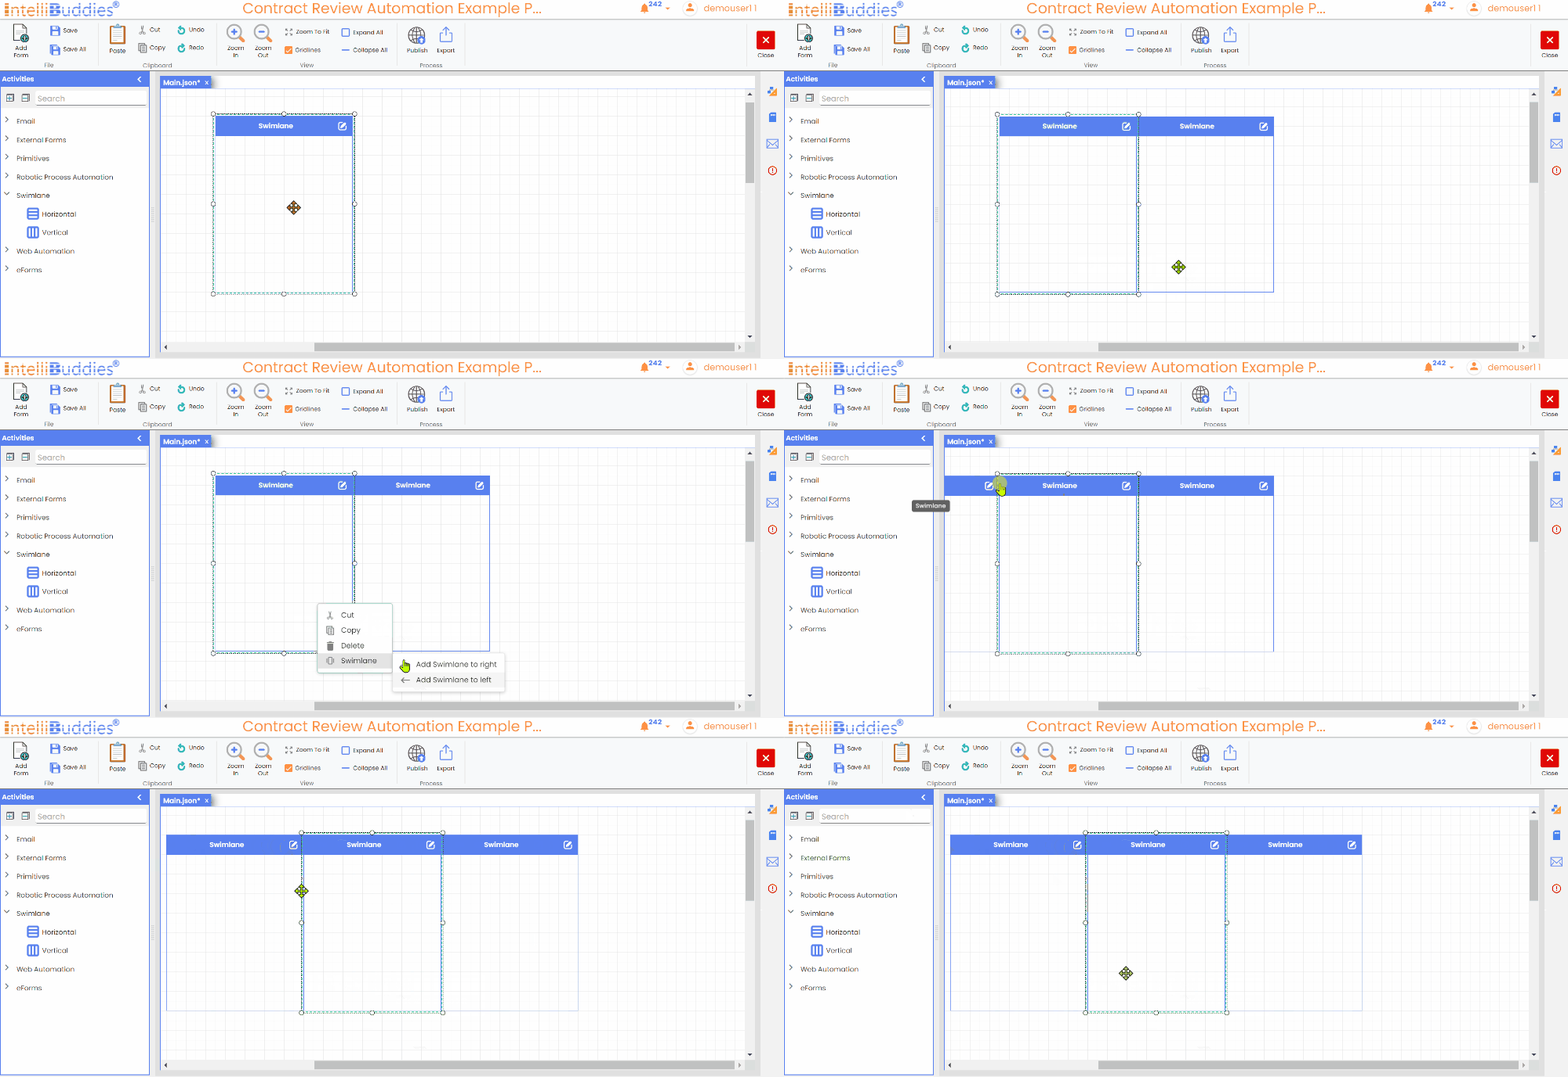
Depending on the Swimlane's orientation, you can add a new swimlane in the following ways: for horizontal orientation, place it above or below; for vertical orientation, place it to the right or left.
Adding a new Horizontal Lane
- Right-click on the Swimlane and select one of the following options. - Swimlane > Add Swimlane Above - Swimlane > Add Swimlane Below
Adding a new Vertical Lane
- Right-click on the Swimlane and select one of the following options. - Swimlane > Add Swimlane to Right - Swimlane > Add Swimlane to Left
You can also add and configure the Swimlane while creating the process.
Publishing BPA Process
Once you have designed your BPA Process, you need to publish it to the Control Room so that you can go live with your automation solution. To publish, click on the Publish button inside the Designer Panel Ribbon. Each time you publish a process, a new version will be created. Please provide your comments on the version you are publishing for your reference.
Maintaining BPA Process
Your business process might change over time, so modifying your BPA Process to accommodate those changes becomes necessary. To modify your existing published BPA Process, open the process in the Designer Panel, modify it, and re-publish it to the Control Room.