Manage your Customer Account
Once you successfully register as a Customer inside IntelliBuddies Account Manager, you can log into the portal and perform the following functions.
- Manage your IntelliBuddies Subscriptions
- Download and Deploy IntelliBuddies Software
- Activating your Subscription
- Monitor your Deployments
- Managing IntelliBuddies Support Tickets
Managing your IntelliBuddies Subscriptions
Account Manager allows Customers to create and manage their IntelliBuddies Subscriptions.
Understanding Subscription Status
The Status column under Subscription would indicate the current Status of your Subscription, and it would hold one of the following values.
| Status | Description |
|---|---|
| Draft | The Subscription has been saved by the user but has not been submitted for approval. It remains in the draft state until submitted. |
| Submitted | The Subscription has been successfully created and is awaiting approval from the IntelliBuddies Team. |
| Approved | The Subscription has been approved by the IntelliBuddies Team, and a Serial Key has been generated. The Subscription is now ready for Activation using the generated Serial Key. |
| Rejected | The Subscription has not been approved. |
| Active | The Subscription is activated and currently in use. |
| Suspended | The Subscription is suspended. This Status applies only to IntelliAppZ subscriptions. |
| Expired | The Subscription has expired. |
Creating New Subscription
- Login to Account Manager Portal using your registered email-id or customer-id
- Expand the Subscriptions menu in the left pane.
- Click on New Subscription
- In the New Subscription dialog, choose the appropriate edition, Enterprise or Professional, from the drop-down list.
- Specify the License validity period in days; the default setting is 365 days.
OR
- Check Perpetual License option to allow product indefinite use after a one-time purchase, with limited updates and support and optional maintenance for future updates.
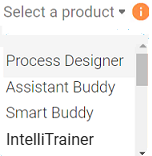
- Add the appropriate Product (s) or SKU(s) to this Subscription by selecting the Product from the drop-down under the Name column and specifying the license count.
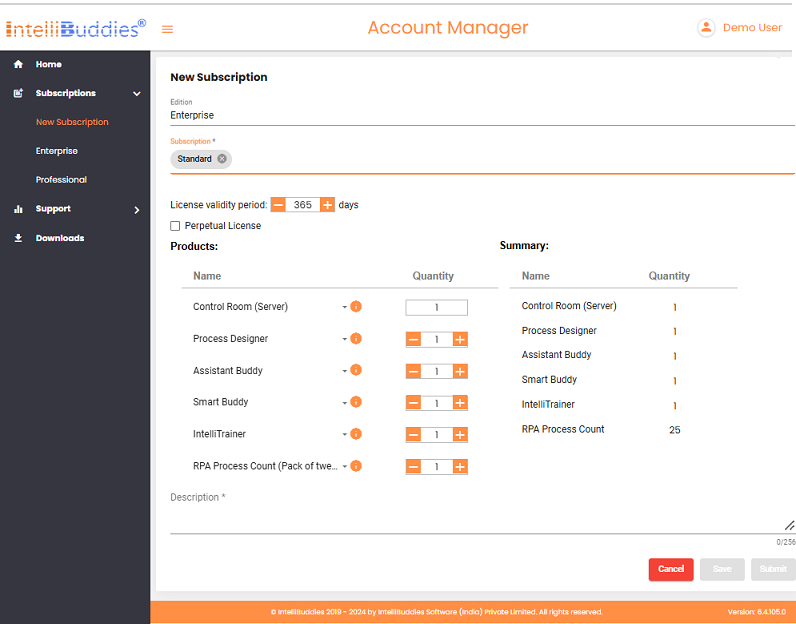
- In the case of Enterprise and Professional editions, the default product and license count are listed based on the subscription type (Standard or Trial) in Products, Name, and Quantity columns.
- Here is the view of the Enterprise edition with a standard subscription:
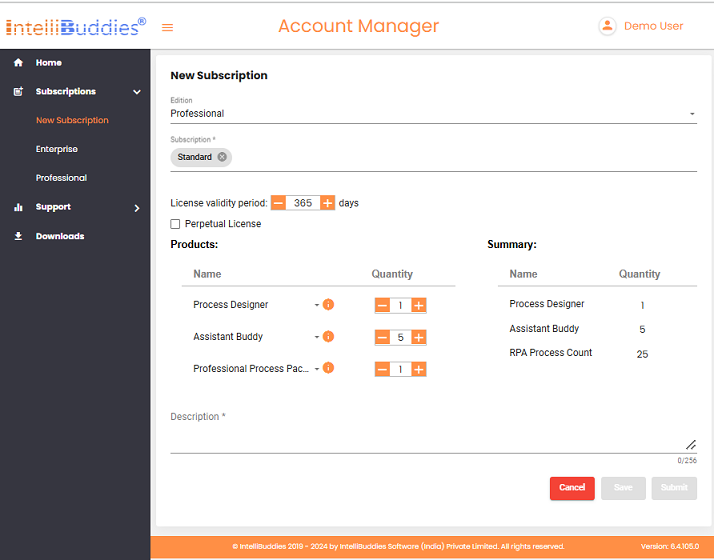
- Here is the view of a Professional edition with a standard subscription:
- Here is the view of the Enterprise edition with a standard subscription:
You can add one or more available products as part of the product list. The Enterprise edition will add the AI Command Center product by default.
- Provide the Description of the new Subscription for your future reference.
- Click on the Submit button
On approval of your Subscription, a Serial Key will be generated. You can copy your Subscription Serial Key to activate your deployments.
Perpetual License
A Perpetual License is a software licensing model that grants indefinite usage rights (up to 20 years) following a one-time purchase; unlike subscription-based licenses, which require regular payments to maintain access, a perpetual license allows users to pay a single upfront fee for continued use of the software without recurring costs. It typically includes a limited period of complimentary updates and support (e.g., 1 year), after which users may purchase additional maintenance or support plans for further updates.
Top Up existing Subscription
-
Login to Account Manager Portal using your registered email-id or customer-id
-
Expand the Subscriptions menu in the left pane.
-
Click on Enterprise to top-up your Enterprise Subscription or Professional to top-up your Professional Subscription. It will display all your existing subscriptions in the right pane.
-
Select the Subscription you want to top up from the right pane.
-
Right-click and select Top Up

-
Add one or more Products or SKUs to the current Subscription by selecting the Product or SKU from the drop-down and specifying the respective incremental license count.
-
Click on Submit
On approval of your top-up, you can Refresh License (Enterprise Edition) or use your Subscription Serial Key (Professional or IntelliAppZ) to activate new deployments
Renewing your Subscription

You can renew your Subscription thirty(30) days before it expires. To renew:
- Login to Account Manager Portal using your registered email-id or customer-id
- Expand the Subscriptions menu in the left pane.
- Click on Enterprise to renew your Enterprise Subscription or Professional to renew your Professional Subscription. It will display all your existing subscriptions in the right pane.
- Select the Subscription you want to renew from the right pane.
- Right-click on the Subscription and click on Renew Subscription

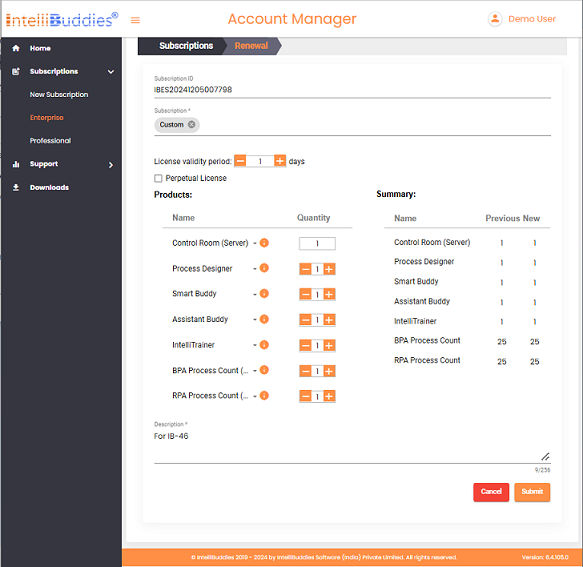
You can alter your Subscription product or SKUs and their corresponding license count before hitting the Submit button.
- Click on Submit
Subscription Serial Key
On approval of your Subscription request, the Account Manager generates and associates a Serial Key with each Subscription. You can use this Serial Key to activate your deployments.
Once your Subscription is approved, you can come to the IntelliBuddies Account Manager and copy the Serial Key. To get your Subscription Serial Key:
- Login to Account Manager Portal using your registered email-id or customer-id
- Click on Subscriptions
- Click on the Enterprise or Professional subscription page from the left pane.
- Right-click on the Subscription and click on Copy Serial Key
- Save the copied Serial Key in a safe location
Activating your Subscription
To activate your subscription, you need to complete the following prerequisites:
- Downloaded and deployed IntelliBuddies
- Obtained and have access to your Subscription Serial Key
There are two ways to activate your Subscription: Online and Offline.
Online Activation
It is the recommended and easiest way of activating your Subscription. It needs internet connectivity on the system where you are activating your deployment.
Offline Activation
If you do not have an internet connection on the system to activate your deployment, you can go with Offline Activation.
Enterprise Subscription Activation
You can activate your Enterprise Subscription through your AI Command Center. To activate:
- Login to the AI Command Center using your Administrator account
- Go to Administration->Licenses
- Click on the + button
- Provide your Subscription Serial Key
- Select either Online or Offline mode of activation and activate the Subscription
Professional Subscription Activation
You can activate your Professional Subscription through one of the Professional component activations. To activate:
- Open Professional Client Tool (Process Designer or Assistant Buddy)
- Go to Backstage View
- Go to Account
- Click on License Status
- Click on Activate License
- Provide your Subscription Serial Key
- Select either Online or Offline mode of activation and activate the Subscription
Managing Support Ticket
To get technical assistance related to the Product, email support@intellibuddies.com or raise the support ticket inside Account Manager by logging in using your registered email or customer-id.
Account Manager provides the following functionalities to manage your support tickets.
Support Dashboard
The Support Dashboard provides you with a brief analysis of your Support Tickets. It gives information about the total support tickets you raised across your subscriptions and their status analytics.
It also provides you valuable filters where you can filter it based on a specific Subscription or tickets created after or before a particular date.
Creating Support Ticket
- Login to Account Manager Portal using your registered email or customer-id
- Expand the Support menu in the left pane.
- Click on New Ticket
- The New Ticket dialog appears.
- From the Properties pane inside the New Ticket dialog
- Choose the appropriate Subscription for which you need to raise a ticket
- Choose the appropriate Product(s) or SKU(s)
- Select the Product Version that you have currently deployed and using
- Set the ticket's priority (Low, Medium, High, or Critical) by selecting the appropriate radio button.
- Provide the Ticket summary in the Subject text box.
- Provide a detailed Description of this ticket to help our Support or Engineering team understand the support request.
- If your description requires you to attach a few files, you can do the same by using Add Attachment(s)
- Click on the Submit button
Ticket List
- Login to Account Manager Portal using your registered email or customer-id
- Expand the Support menu in the left pane.
- Click on Tickets
- You will see all the tickets raised by you in the right pane along with their corresponding Status
- You can select a specific ticket, right-click it, and select View. It will give you a descriptive view of the ticket.

Support Ticket Status Details
| Status | Description |
|---|---|
| New | Support Ticket was successfully created and is waiting to be taken by the IntelliBuddies Support Team. |
| Open | The IntelliBuddies Support Team has acknowledged the receipt of this ticket and is currently working on it. |
| Close | Your Support Ticket is addressed and closed. |
Download and Deploy IntelliBuddies Software
- Login to Account Manager using registered email or customer-id.
- Click on the Downloads in left pane.
- Click on the appropriate IntelliBuddies editions to download the corresponding MSI onto your system
Web Installer

Enterprise
Professional
Monitor your Deployments
- Login to Account Manager using registered email or customer-id.
- Expand the Subscriptions menu in the left pane.
Monitor Enterprise Edition

- Click on Enterprise in left pane. It will display all your existing subscriptions in the right pane.
- You can monitor your subscriptions by checking the following details.
- Activation and Expiration date and time of each Subscription.
- Number of Days left for expiry of license.
- Status (Active, Ready, etc.) of license
- You can right-click on each Subscription and choose View License History to check the following details.
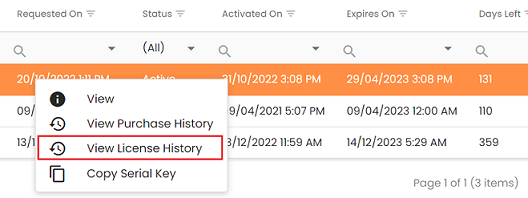
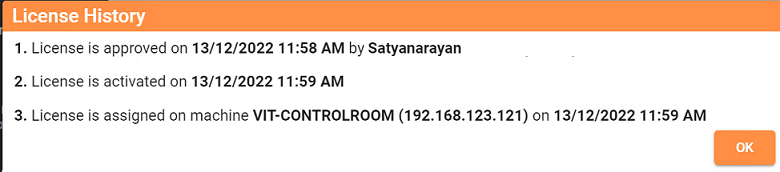
- Who activated the license
- Machine details where it is activated
Monitor Professional Edition
- Click on Professional. It will display all your existing subscriptions in the right pane.
- You can monitor your subscriptions by checking the following details.
- Activation and Expiration date and time of each Subscription.
- Number of Days left for expiry of license.
- Status (Active, Ready, etc.) of license
- Expand each Subscription to view the products
You can right-click on each Product and choose View License History to check the following details.
- Who activated the license
- Machine details where the Product is activated