Client Tools - Installation (Windows)
This guide applies to Windows. For other deployment options, see the Installation Overview.
Use the Client Tools MSI installer to install Enterprise design and execution tools on a supported Windows system. IntelliBuddies® Client Tools is a software suite that is needed to create and execute automation. The Client Tools software bundle contains the following tools:
- IntelliBuddies® Process Designer
- IntelliBuddies® Assistant Buddy
- IntelliBuddies® Smart Buddy
- IntelliBuddies® IntelliTrainer
Before starting, review the Client System Requirements.
Prepare for offline installation
Download the MSI and prerequisite packages on a connected machine and transfer them to the target Windows system. Check the system requirements linked above before starting. License activation is a separate step and supports an offline workflow.
Installing IntelliBuddies® Client Tools
Download Windows Installer
If you have not yet downloaded the Client Tools Windows Installable, please download it from your IntelliBuddies® Account Manager portal using a customer account.
Once login to IntelliBuddies® Account Manager portal with your customer login credentials, go to the Downloads section and download the installable onto the system where you need to install the Client Tools.
The IntelliBuddies® Client Tools Windows Installer (IntelliBuddies.Client.<version>.msi) can help you install Client Tools by enabling you to perform the following things:
- Install IntelliBuddies® Process Designer
- Install IntelliBuddies® Assistant Buddy
- Install IntelliBuddies® Smart Buddy
- Configure AI Command Center and Authentication settings
By default, IntelliBuddies® Client Tools are installed in C:\Program Files (x86)\IntelliBuddies\2020\Client Tools\Enterprise directory.
Installation Steps
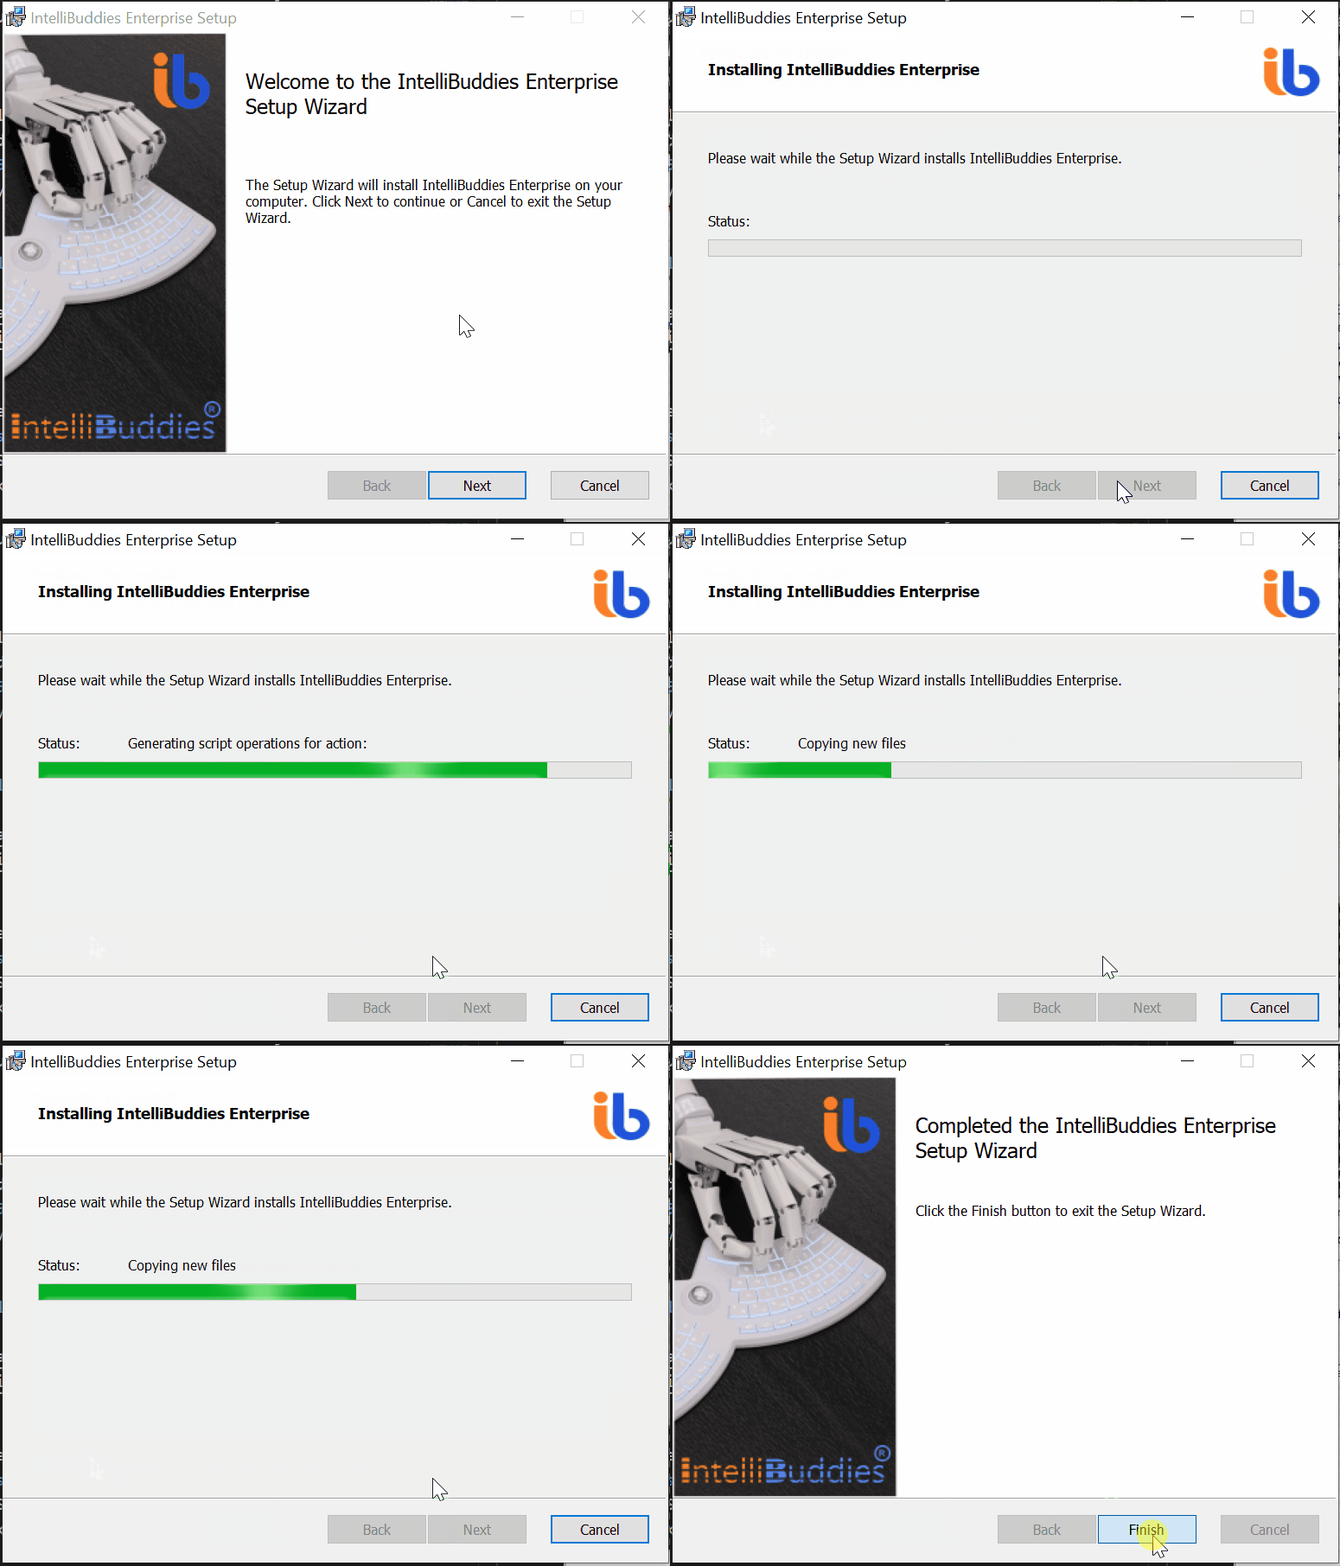
Step – 1: Invoke Installer
- Run the Windows Installer (IntelliBuddies.Client.msi). The IntelliBuddies® Client Tools Setup wizard will be displayed. • Click on Next
Step – 2: End User License Agreement
- The setup wizard will bring the End User License Agreement. Please go through the License Agreement and then check I accept the above licensing terms and privacy policy before clicking on Next
Step – 3: Select Installation Folder
- Change the installation folder if needed. By default, the Client Tools would be deployed under C:\Program Files (x86)\IntelliBuddies\Client Tools. Click on Next
Step – 4: Select Client Tools to be installed
- By default, the client tool installer will install all the client tools: Process Designer, Assistant Buddy, Smart Buddy, and IntelliTrainer. If you want to install all the client tools on a system, click on Next and move on.
Alternatively, you can use this installer to install a specific client tool by removing the tools you want to skip installation.
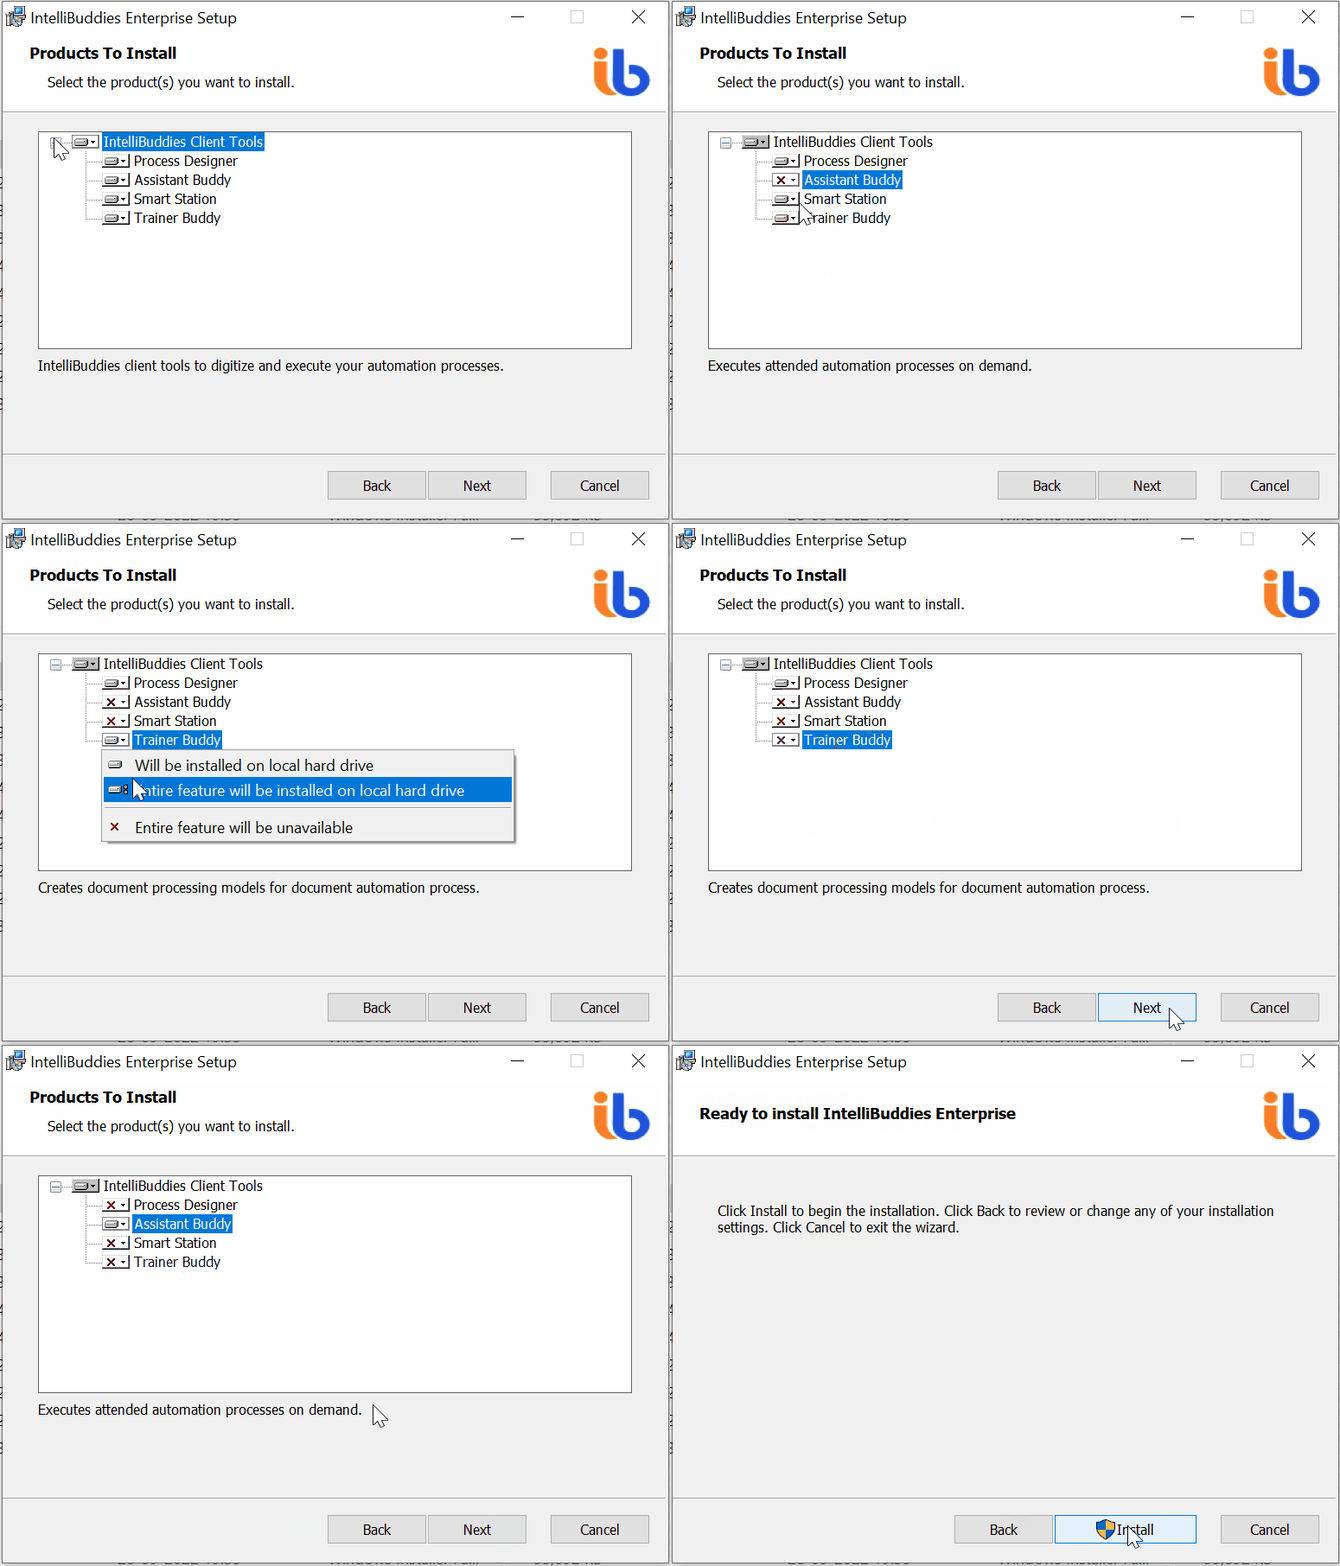
- After configuring, click on Next
Step – 5: Start Installation
- The ready to install step is displayed
- Click Install. The installation process starts, and the selected IntelliBuddies Client Tools will be installed in the selected installation folder as part of Step – 3
Step – 6: Complete Installation
• Click on the Finish button to complete the setup.
Verify installation
Launch the installed application and confirm that it opens successfully. For Enterprise client tools, verify the AI Command Center connection settings where applicable. If you use web automation, install and check the required browser extension.
Activating License
Once you install the application, activate it by following the license activation steps.