UI Panels
Designer Panel
You can view your App or workflow from the Designer panel. It enables you to modify the workflow and also provides you to work with the variables, arguments, and imports required and created for the current IntelliAppZ project.
You can navigate the App diagram inside this panel by double-clicking the activity you want to view. In the header of the Designer panel, it Displays the path as breadcrumbs.
You can copy activities using the keyboard shortcut Ctrl + C or from the context menu and paste them into the Designer panel.
You can activate Pan mode by clicking icon. You can use the zoom dropdown to change the zoom level.
You can use fit-to-screen to fit the entire workflow within the Designer panel.
You can click on the to get an overview of the whole project. This will allow navigating across the section by adjusting the focus.
Context Menu
The context menu enables you to perform several operations on your IntelliAppZ Process or workflow. You can reach the context menu by right-clicking on any activity inside your IntelliAppZ Process or workflow.
| Option | Description |
|---|---|
| Open | Opens the selected activity in the Designer panel. On double-clicking, it shows the same result |
| Collapse | This collapses the content of the selected activity and allows it to display only minimal content. Clicking on archives the same functionality. NOTE: This is available only for Sequence activity |
| Expand in Place | This expands the content of the selected activity and allows it to display more detailed content. Clicking on archives the same functionality. NOTE: This is available only for Sequence activity |
| Cut | Removes the selected activity and places it onto the Clipboard |
| Copy | Copies the selected activity into Clipboard |
| Paste | Pastes or Inserts the content from the Clipboard to the current location |
| Delete | Deletes the selected activity |
| Add Annotation | Insert an annotation node to the current activity to provide your notes or comments. You can dock or undock the annotation block after adding |
| Edit Annotation | Edit the annotation notes attached to the selected activity |
| Delete Annotation | Delete the annotation attached to the selected activity |
| Show All Annotations | Shows all the annotations added to the activities under the current IntelliAppZ Process or workflow |
| Hide All Annotations | Hides all the annotations added to the activities under the current IntelliAppZ Process or workflow |
| Delete All Annotations | Deletes all the annotations under the current IntelliAppZ Process or workflow |
| Copy as Image | Copies the screenshot of the content displayed as part of Designer panel onto Clipboard |
| Save as Image | Copies the screenshot of the content displayed as part of the Designer panel and prompts the dialog for the user to set the details for saving it |
| Create Variable | Creates a variable in the Variable panel |
| Export as Snippet | Creates a new snippet containing the selected activity. Automatically creates the arguments to this new Snippet based on the variables used in the selected activity. The new Snippet created will be visible as part of the Snippets panel. This functionality enables the reuse concept. |
| Extract as Workflow | Creates a new workflow containing the selected activity. It enables breaking down large IntelliAppZ processes or workflows into smaller ones. Automatically creates the arguments for this new workflow based on the variables used in the selected activity. The selected activity will be replaced with the Invoke Workflow activity, enabling you to edit and import arguments from the newly created workflow. |
| Surround with Try Catch | Embeds the selected activity inside a Try-Catch block |
| Disable Activity | Disables the selected activity by placing it inside a CommentOut activity |
| Enable Activity | Enables the previously disabled activity |
Activities Panel
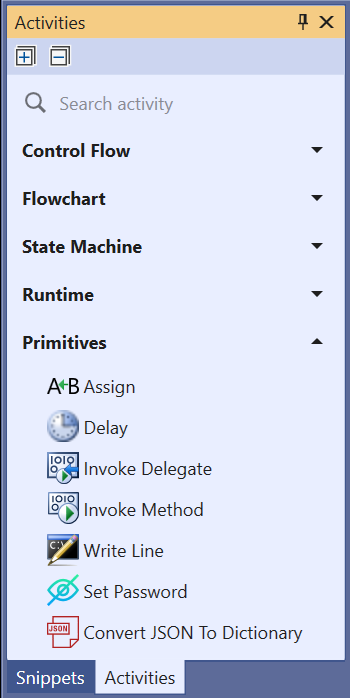
The Activities panel shows all the activities used to build your IntelliAppZ Process or workflow. You can search the needed activity by its Name using the search box at the panel's top.
Activities are classified or grouped based on their functionality. You can navigate them using navigation keys, select an activity, and drag and drop them into the Designer panel to build your workflow.
Snippets Panel
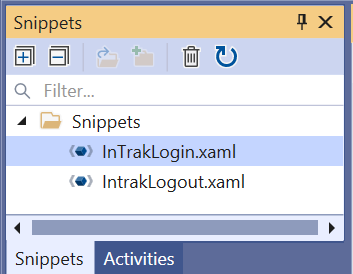
The Snippets panel displays all the snippets created by you. The purpose of snippets is to enable users to reuse automation easily.
Properties Panel
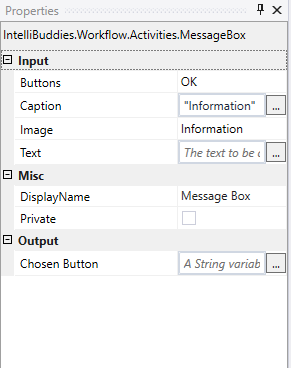
The Properties panel lets you view and modify a selected activity's properties. It provides a mechanism to configure the activity by setting the appropriate properties of that activity based on your IntelliAppZ Process or workflow context.
Expression Editor
The Expression Editor is available from the Properties panel, and you can find it as part of the fields or properties that require inputting text or from the body of the activity. You can pop it up by clicking on the [...] button at the end of the field or property.
Expression Editor allows writing the expressions in multiple lines. Expression Editor supports C# and VB language expressions. During project creation, choose the language.
You can utilize Keyboard Shortcuts to create variables from Expression Editor.
| Keyboard Shortcut | Description |
|---|---|
| Ctrl + K | Creates a variable of the input field type required by the activity. If an expression already exists in the field, you can select the existing expression or text and then hit Ctrl + K to create a variable with the selected expression as name |
Outline Panel
Display all available activity nodes of the process or workflow hierarchy in the Outline panel. It also highlights the activities in this panel based on the selection done in the Designer panel. You can also go to a specific activity in the Designer panel by selecting it in the Outline panel.
Output Panel
The Output panel lets you display the output of the IntelliAppZ Process coming through either WriteLog or WriteLine activities. You can use this panel to troubleshoot the Process before publishing it to AI Command Center and executing it by Buddies.
Error List Panel
The Error List panel displays errors found in the IntelliAppZ Process or workflow during the validation process. Double-clicking the error will enable the Designer panel to show the corresponding activity for quicker resolution.
Variables Panel
The Variables panel enables you to create variables and change them.
| Field | Description |
|---|---|
| Name | The Name of your variable. A name will be generated automatically by default, but you can override it by editing the autogenerated Name. |
| Variable type | Enables you to choose the type of your variable. The dropdown has the following options:
This is a mandatory field. |
| Scope | The scope of this variable. By default, they are available for the entire project. This is a mandatory field |
| Default | This is an optional field. You can specify a default value for this variable. |
Context Menu
| Option | Description |
|---|---|
| Delete | Delete this variable |
| Add Annotation | Add an annotation to the selected variable |
| Edit Annotation | Edit the annotation added to the chosen variable |
| Delete Annotation | Delete an existing annotation to the specified variable |
Arguments Panel
The Arguments panel enables you to create arguments and make changes.
The following table describes the properties available for arguments.
| Field | Description |
|---|---|
| Name | The Name of your argument. A name will be generated automatically by default, but you can override it by editing the autogenerated Name. |
| Direction | Select the direction of your argument. You can select from the following options:
|
| Argument type | Enables you to choose the type of your argument. The dropdown has the following options:
This is a mandatory field. |
| Default | This is an optional field. You can specify a default value for this argument. |
Context Menu
| Option | Description |
|---|---|
| Delete | Delete this argument |
| Add Annotation | Add an annotation to the selected argument |
| Edit Annotation | Edit the annotation added to the chosen argument |
| Delete Annotation | Delete an existing annotation to the argument chosen |
Imports Panel
You can view all the namespaces available for this project and add a new Namespace to the list from the Imports panel.
To add a new namespace, you can type the namespace in the Enter or Select namespace text box at the top of this panel. It will bring in the namespaces when you type in this text box. You can select the required namespace and press the Enter key to import that namespace to your project.
Project Explorer Panel
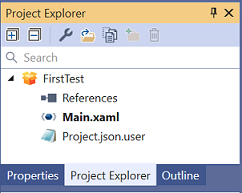
The Project Explorer panel lists all the workflow XAML files used in this project. It will also list all the related resource files used in this project.
The table below describes the contents of the Project Explorer panel and its associated functions.
| Content-Type | Description |
|---|---|
| Properties | You can modify project properties by double-clicking on this content type |
| References | You can add new assembly references to be used as part of this project through right-click context menu options |
| Workflow files | You can view the workflow (XAML) files used as part of this project. You can double-click to open the corresponding workflow in the Designer panel |
| Folders | You can add or import an existing folder to the project. You can structurally arrange solution items. |
| Resource files | You can view the resources used as part of this project. You can double-click to open the corresponding file. |


