Connections
Overview
Connections is a library of credentials to establish authentication for direct communication between IntelliBuddies and an external system.
You can manage all your automation connections to external systems under the Assets > Connections page inside the Control Room.
Adding a Connection
You must have Add Connections permissions to add a new Connection.
Login to the Control Room
Select Assets > Connections option from side panel
Click on Toolbar-Menu >
 button.
Choose the appropriate application by clicking on the icon in the New Connection dialog.
Configure the selected application connection by providing details.
Click on Test Connection to check the connection.
Once the Test Connection is successful, click on Add button to add the connection.
Microsoft SQL Server
Once you select this option, the following screen is where you can provide SQL Server connection configuration.

- Name – Specify a unique name to identify your Connection.
- Description – You can specify a brief description for your Connection.
- Database Server Name – Specify the SQL Server database server name or IP address
- Database Name – Specify the database name to which you want to connect.
- SSPI (Integrated Security) – Check this option to log in to SQL Server using Windows authentication. If you select this option, you don’t have to specify the credentials.
- User Name – Specify the user name for connecting to the database.
- Password - Specify the password for the user name.
PostgreSQL
Once you select this option, the following screen is where you can provide PostgreSQL connection configuration.
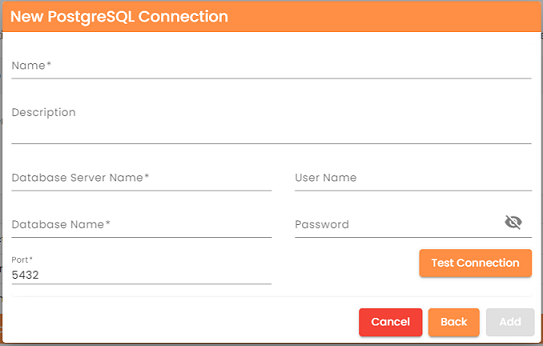
- Name – Specify a unique name to identify your Connection.
- Description – You can specify a brief description for your Connection.
- Database Server Name – Specify the PostgreSQL Server name or IP address
- Database Name – Specify the database name to which you want to connect.
- Port – Specify the port number to connect to the PostgreSQL server.
- User Name – Specify the user name for connecting to the database.
- Password - Specify the password for the user name.
MySQL
Once you select this option, the following screen is where you can provide MySQL connection configuration.

- Name – Specify a unique name to identify your Connection.
- Description – You can specify a brief description for your Connection.
- Database Server Name – Specify the MySQL Server name or IP address
- Database Name – Specify the database name to which you want to connect.
- Port – Specify the port number to connect to the MySQL server.
- User Name – Specify the user name for connecting to the database.
- Password - Specify the password for the user name.
Oracle
Once you select this option, the following screen is where you can provide Oracle connection configuration.

- Name – Specify a unique name to identify your Connection.
- Description – You can specify a brief description for your Connection.
- Database Server Name – Specify the Oracle Server name or IP address
- Database Name – Specify the Service ID (SID) here.
- Port – Specify the port number to connect to the Oracle server.
- User Name – Specify the user name for connecting to the database.
- Password - Specify the password for the user name.
File System
After selecting this option, you can configure the File System connection on the following screen.

- Name – Specify a unique name to identify your Connection.
- Description – You can specify a brief description for your Connection.
- Folder Path – Specify the target folder path for the file upload. A network or absolute folder path having Control Room Server access.
- User Name – Specify the user name for connecting to the File Path.
- Password - Specify the password for the user name.
OpenAI
Once you select this option, the following screen is where you can provide OpenAI connection configuration.

- Name – Specify a unique name to identify your Connection.
- Description – You can specify a brief description for your Connection.
- API Key - Specify the API Key provided by OpenAI.
Azure
Once you select this option, the following screen is where you can provide Azure connection configuration.
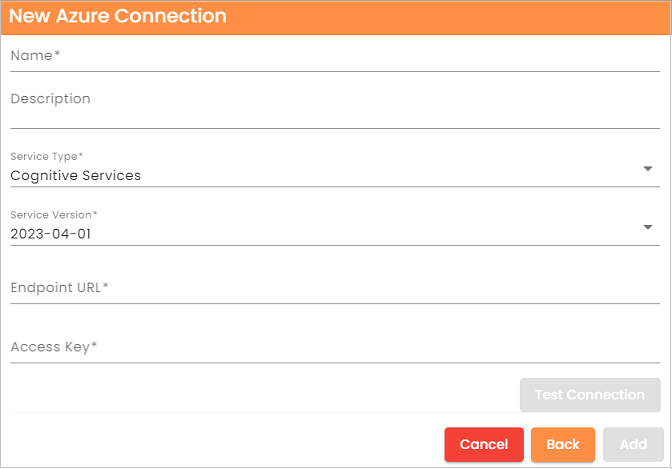
Name – Specify a unique name to identify your Connection.
Description – You can specify a brief description for your Connection.
Service Type - Choose the Azure service type you want to connect from the dropdown. The following options are currently available.
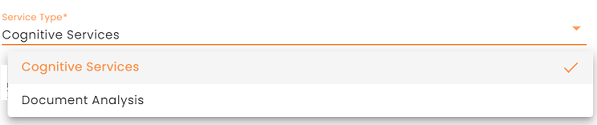
Type Description Cognitive Services Connect to Azure Cognitive Service end points. Document Analysis Connect to Azure Document Analysis service end points. Service Version - Specify the version of the selected service.
Endpoint URL – Specify the deployed endpoint URL of the Azure Cognitive/Document service instance.
Access Key – Specify the Access Key corresponding to the deployed service.
Email Server
After selecting this option, it will direct you to a screen to configure the Email Server connection.
Configurations for POP3 and IMAP

- Name – Provide a distinctive name to identify your Connection.
- Description – Optionally, concisely describe your Connection.
- Server Type - Select the type of email server. Options include POP3, IMAP, and Outlook.
- Host - Specify the hostname or URL of the email server.
- Port - Specify the listening port number of the email server.
- Email Address - Specify the login email account.
- Password - Specify the password to log in.
- Require SSL - Check this box if the email server requires SSL for communication.
Configurations for Outlook

- Tenant ID (Directory ID) – Specify the tenant ID of the Microsoft 365 Tenant. For guidance, refer to Registering App and gathering Tenant Id
- Client Id (Application Id) – Specify the client id of the registered app. For assistance, refer to Registering App and gathering Client Id
- Client Secret – Specify the client secret of the registered app. For instructions, refer to Create and gather Client Secret
- Email Address – Specify the email address to retrieve the mail messages.
- Mail Folder – Specify the mail folder to retrieve the messages.
Editing a Connection
- Login to the Control Room
- Select Assets > Connections option from side panel
- Select the Connection to modify from the data panel
- Right-click and select Edit
- Modify the connection properties and then click on the Update button
Deleting a Connection
- Login to the Control Room
- Select Assets > Connections option from side panel
- Select the Connection to delete
- Right-click and select Delete
- On confirmation, will delete the selected Connection
Auditing a Connection
- Login to the Control Room
- Select Assets > Connections option from side panel
- Select the Connection to audit
- Right-click and select Audit, which will bring up the audit logs of the selected Connection