Register application and assign permissions
IntelliBuddies uses Microsoft Authentication Library to establish an authenticated connection to Microsoft 365 applications. To enable IntelliBuddies to connect and call the Microsoft Graph API to read and write resources, follow the steps below:
- Creating and Registering your App
- Providing appropriate permissions to your registered App
- Configure Authentication to Get an Interactive Token
- Create and gather required connection information
Creating and Registering your App
-
Navigate to Azure portal
-
Search for
App Registrationsand click on the App registrations in the Services section. -
Click on `New Registration.'
-
Provide a Name for the App. e.g., IntelliBuddies M365
-
Choose Accounts in this organizational directory only.
-
Click on
Register.
Providing appropriate permissions to the registered App
Navigate into the created app registration and do the following steps
- Click on
API Permissionsin the left pane. - Click
Add a permissionand then choose Microsoft Graph. - Click on
Application permissions. Then select the appropriate permissions and clickAdd Permission.
OneDrive Services Permissions
Add the following permissions to the registered App to work with your OneDrive and SharePoint online documents.
a. Files.ReadWrite.All b. Sites.ReadWrite.All c. Group.ReadWrite.All d. User.Read.All
Outlook 365 Email Services Permissions
Add the following permissions to the registered App to work with your Outlook 365 emails.
a. Mail.Read b. Mail.ReadWrite [Optional: Needed if you want to set the read flag or delete the email automatically after reading an email]
-
Click
Delegated permissions, select the following permissions, and clickAdd.- Group.ReadWrite.All
- Tasks.ReadWrite
- Mail.Read
- Mail.ReadWrite [Optional: Needed if you want to set the read flag or delete the email automatically after reading an email]
-
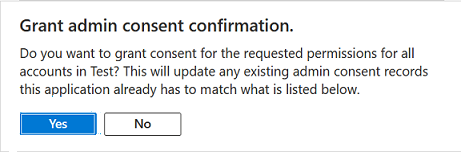
Click on
Grant admin consent for test [tenant]and click onYesin the confirmation dialog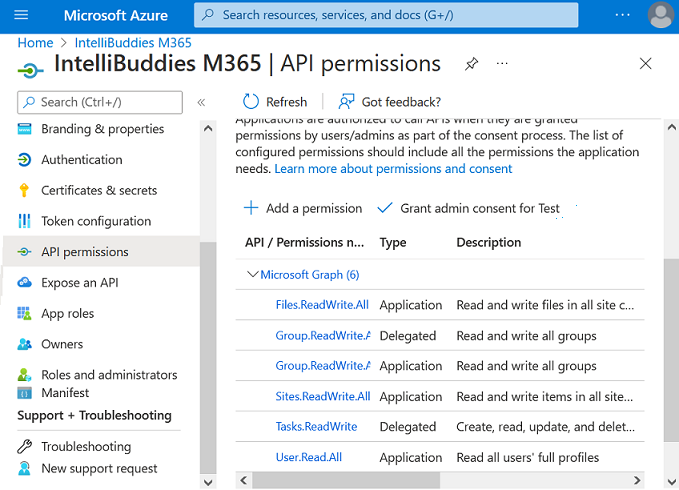

Configure Authentication to Get an Interactive Token
Navigate into the created app registration and do the following steps.
- Click on Authentication in the left pane and then click on + Add a platform to configure the platform.
- In the Configure Platform dialog, click on Mobile and Desktop applications
- In the Configure Desktop + devices dialog, check the checkbox option as shown in the below screenshot and add the Custom redirect URIs as
http://localhost
Create and gather the required connection information
Navigate to the App registration page and perform the following steps:
-
Click on
Overviewin the left pane. Copy the Application (client) Id and Directory (tenant) Id values and save them for future reference.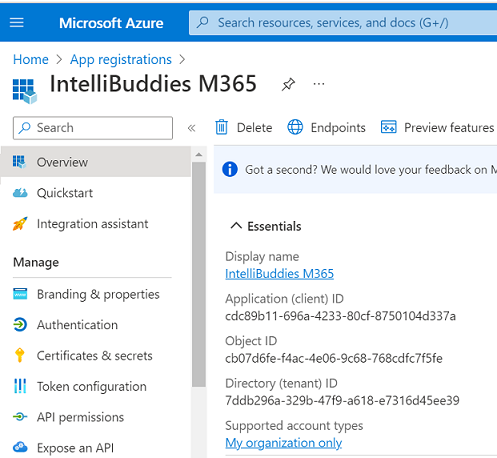
-
If Client-Secret based authentication is desired, then follow the steps in Create and gather Client Secret
-
If Certificate based authentication is desired, then follow the steps in Add certificate to App
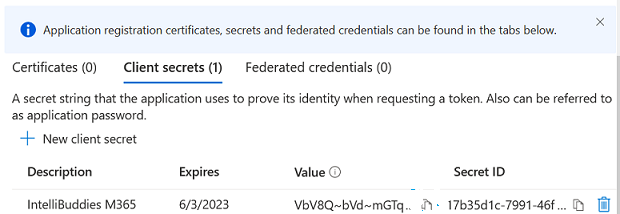
Create and gather the Client Secret
Navigate to the App registration page and perform the following steps:
-
Click
Certificates & secretsin the left pane and selectClient secrets. Click onNew client secret. -
Provide a helpful description. e.g., IntelliBuddies M365. Keep the recommended
Expiresperiod and click onAdd. -
Copy the Client Secret value and Save it for future reference.
Add certificate to App
Navigate to the App registration page and perform the following steps:
-
Click
Certificates & secretsin the left pane and selectCertificates. Click onUpload certificate. -
Choose the certificate file and provide a helpful description. e.g., IntelliBuddies M365 Certificate and click on
Add. -
The same certificate must be provided when using the Microsoft 365 Context activity.