Groups
Overview
The Groups tab allows administrators to organize users into logical units for streamlined access control and task coordination.
A Group represents a collection of users who share responsibilities, roles, or workflow participation within the AI Command Center.
Groups simplify permission management by allowing roles to be assigned at the group level instead of individually per user.
The Groups tab is available to users with the appropriate group management permissions.
How to access:
From the AI Command Center, open Settings (⚙️) in the top-right corner and navigate to Manage → Groups.
Groups View
The Groups tab displays all configured groups in a structured table layout.
| Column | Description |
|---|---|
| Group Name | Unique name of the group. |
| Group Leader | Designated group leader. |
| Business Calendar | Business calendar associated with the group (if configured). |
| Created By | User who created the group. |
| Modified At | Date and time of last modification. |
| Actions | Available operations such as View, Edit, Delete, or Audit (based on permissions). |
Group Participants
| Participants | Description |
|---|---|
| Group Leader | Can view all tasks assigned to group members. The Group Leader cannot be removed from the group unless a new leader is assigned. |
| Group Member | A user who belongs to the group and participates in shared responsibilities. |
Groups enhance collaboration, improve workload distribution, and support scalability across automation workflows.
Group Actions
From the Groups tab, the following actions are available (based on permissions):
| Action | Description |
|---|---|
| View | Opens group details in read-only mode. |
| Edit | Modify group configuration, members, or roles. |
| Delete | Permanently removes the group. |
| Audit | Displays audit history for the selected group. |
Creating a Group
To create a new group:
- Open the Groups tab.
- Click Add Group.
- Provide a unique group name.
- (Optional) Add a description.
- Assign a Group Leader.
- (Optional) Associate a Business Calendar.
The system applies this calendar only to users who do not have an individually assigned calendar. - Assign one or more Roles to the group.
- Add users in the Users tab.
- Click Add to save.
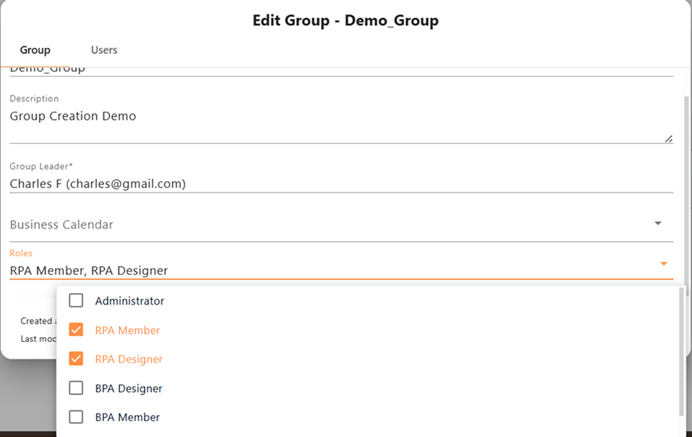
Editing a Group
To modify an existing group:
- Open the Groups tab.
- Select the group.
- Choose Edit.
- Update configuration, users, or roles.
- Click Update to save changes.
Deleting a Group
To delete a group:
- Open the Groups tab.
- Select the group.
- Choose Delete.
- Confirm the action.
Deleting a group removes all inherited roles assigned through that group but does not affect roles assigned directly to users.
Auditing a Group
To view audit logs:
- Open the Groups tab.
- Select the group.
- Choose Audit.
Roles Assigned at Group level
Why Use Group Roles?
Assigning roles individually can be complex at scale.
By assigning roles to a group:
- All group members automatically inherit those roles.
- Role management becomes centralized and scalable.
- Access consistency is maintained across teams.
Role Inheritance Behavior
When a user signs in, the system determines effective permissions by combining:
- Roles assigned directly to the user
- Roles inherited from all groups the user belongs to
Example:
If a group has the Administrator role and a user is added to that group, the user automatically receives Administrator permissions.
Viewing Inherited Roles
In the User View/Edit dialog, two role lists are displayed:
- Direct Roles – Assigned directly to the user
- Inherited Roles – Read-only roles granted via group membership
Inherited roles cannot be removed from the User dialog.
To remove an inherited role, you must:
- Remove the user from the group, or
- Remove the role from the group itself