Enabling APIs and creating credentials in Google Console
To connect to Google, you must enable API access to your Google Account and obtain credentials to authenticate to Google. To allow API access and create Credentials, follow the steps given below:
- Create a project in Google Cloud Console
- Enable API
- Configure OAuth Consent Screen
- Create Credentials
Create a Project in Google Cloud Console
To start with Google APIs, you must create a project in Google Cloud Console. Follow these steps:
- Go to Google Console and sign in to your Google account.
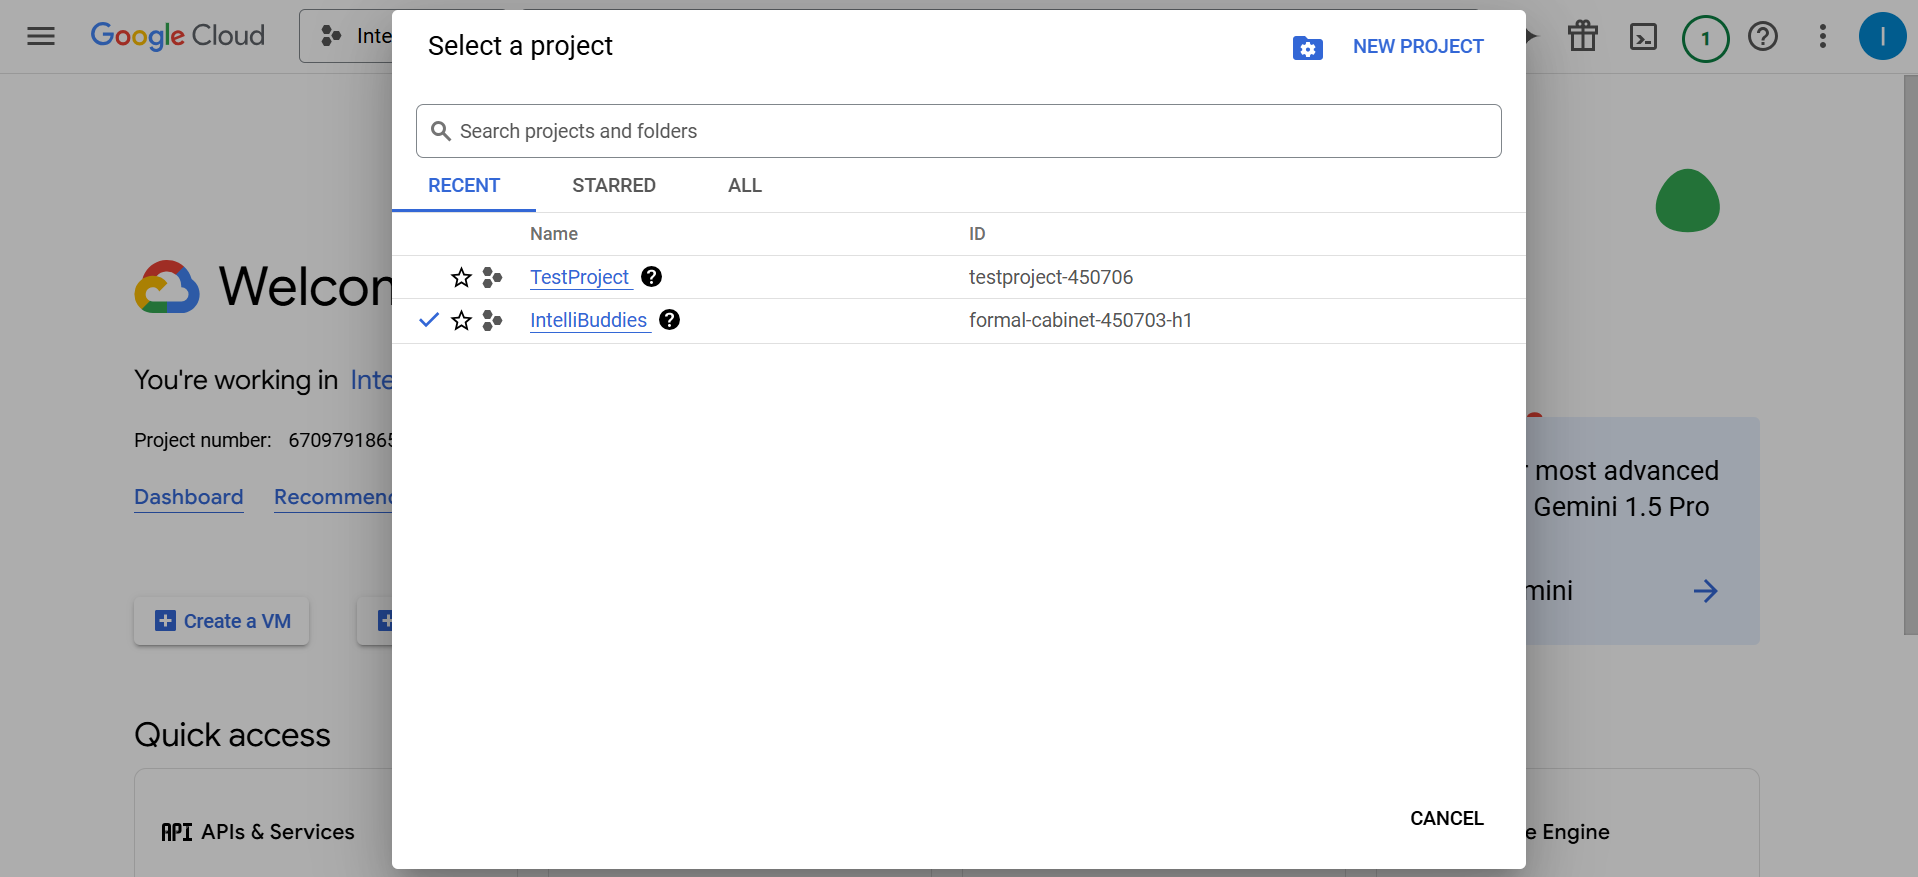
- In the top pane, click on Select a Project.
- You can choose an existing project or click New Project to create a new one.
- To switch between projects, click on the selected project in the top navigation pane and choose the desired one.
Enabling APIs in Google Cloud Console
To use Google services, you must enable the required APIs in your project. Follow these steps:
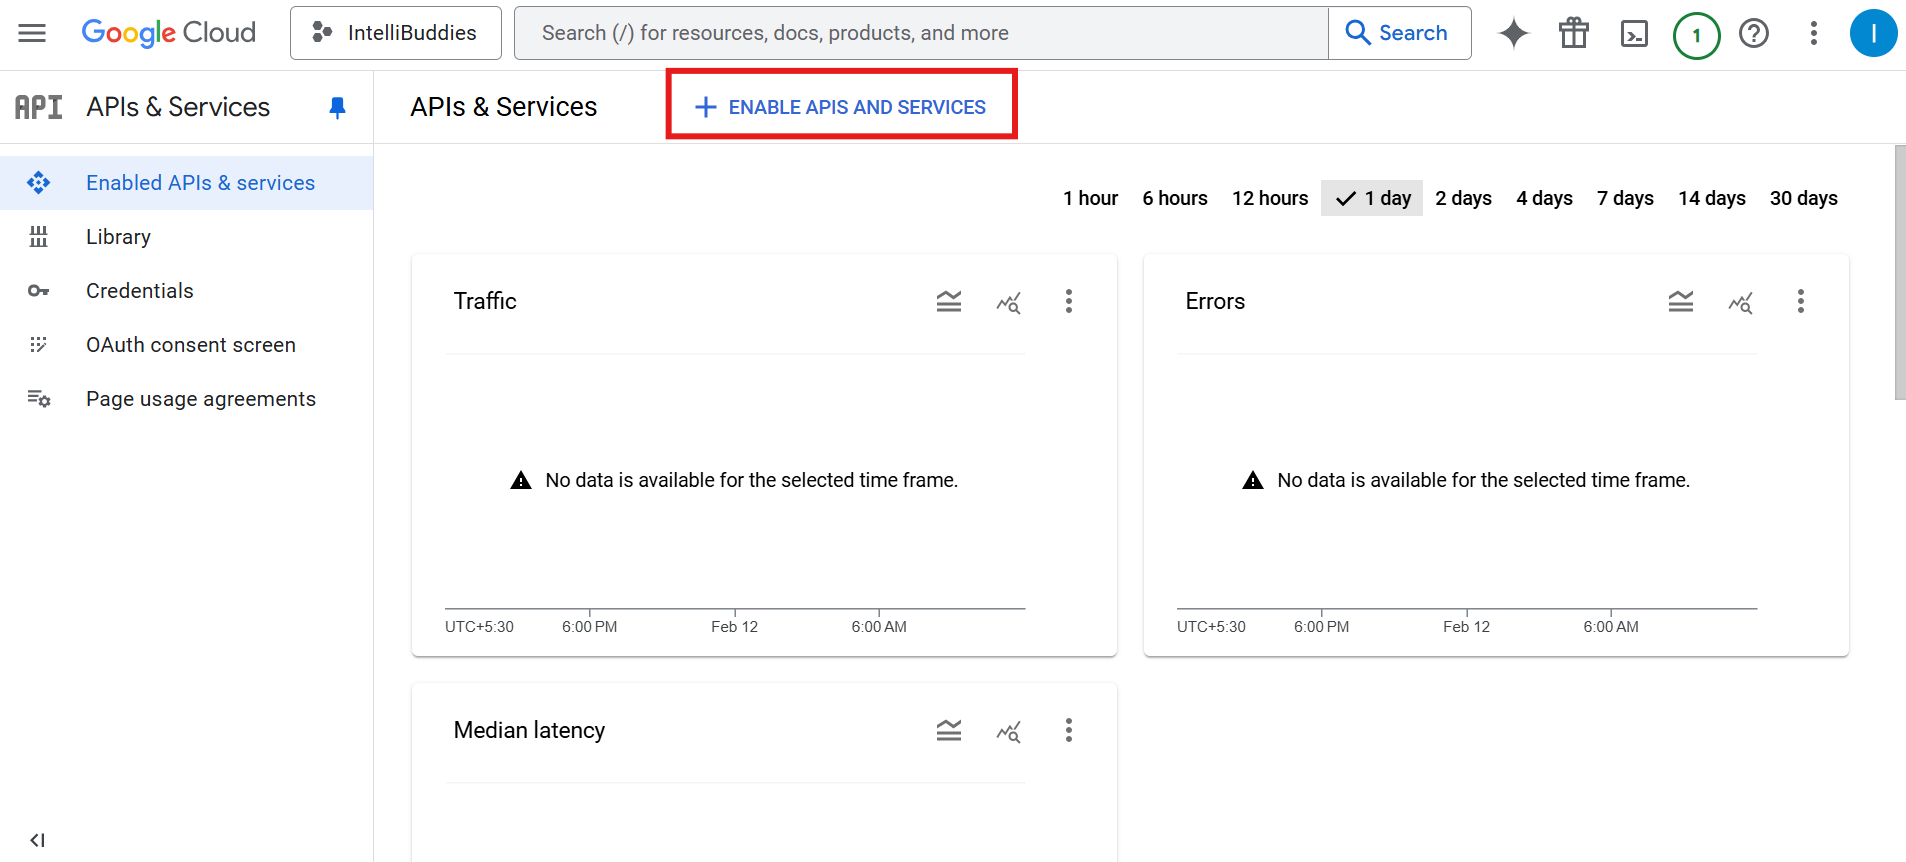
- After successfully creating your project, navigate to APIs & Services > ENABLE APIS AND SERVICES from the left menu. This will open the APIs & Services page.
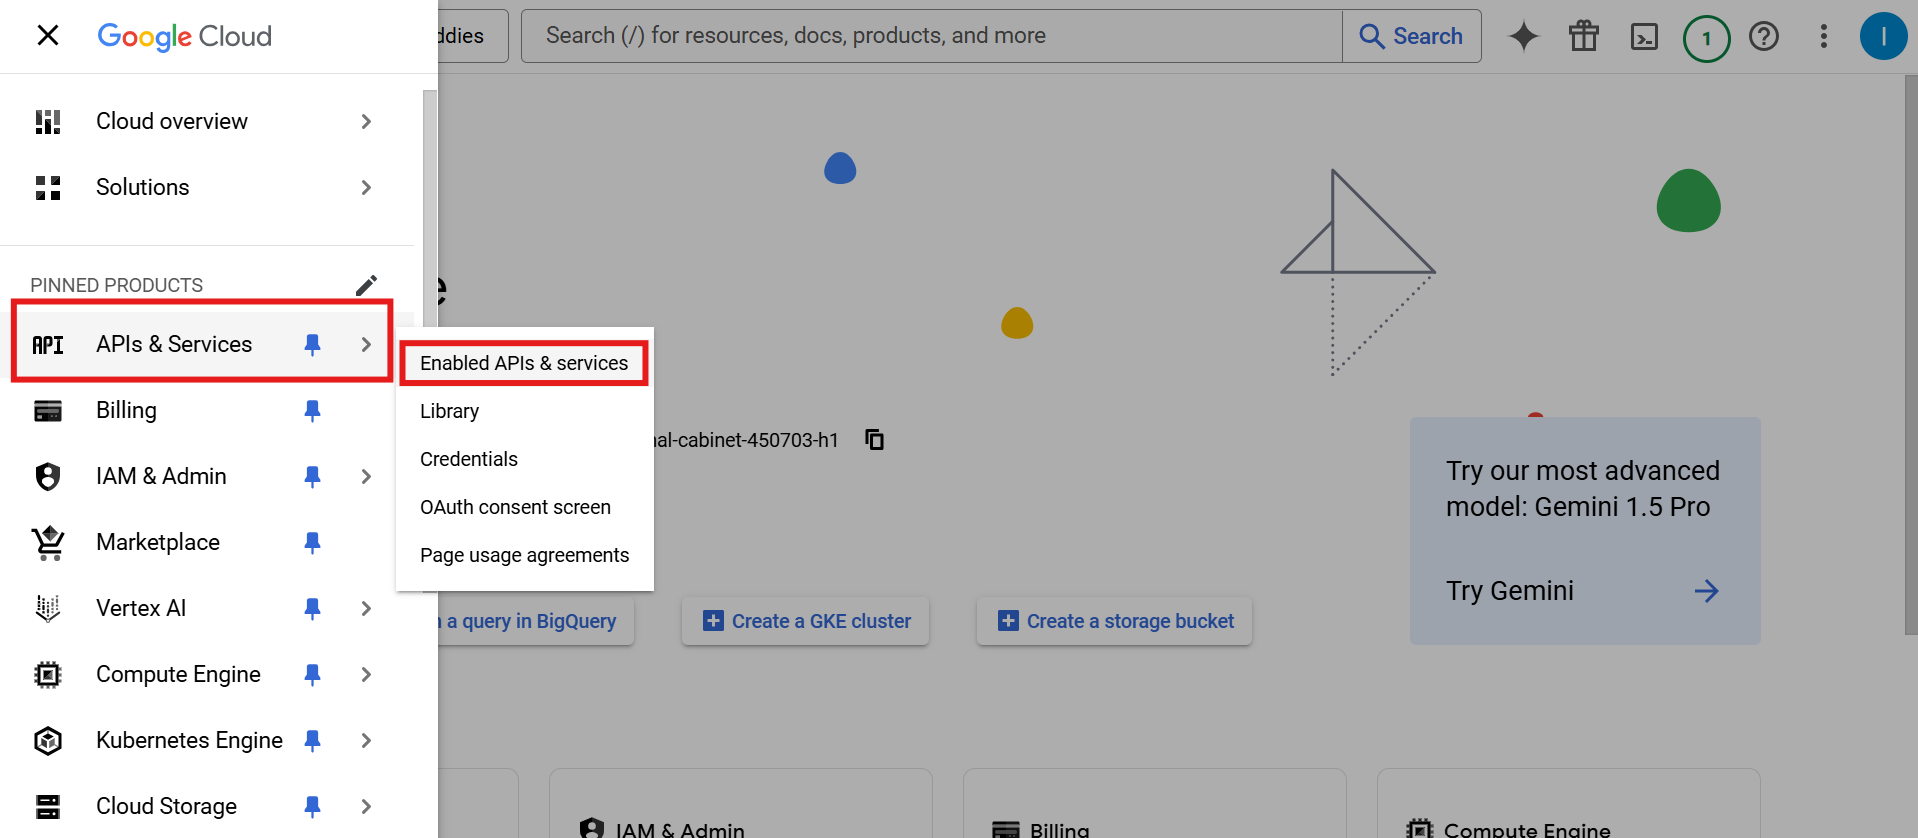
- On the APIs & Services page, click on + ENABLE APIS AND SERVICES to open the API Library page.
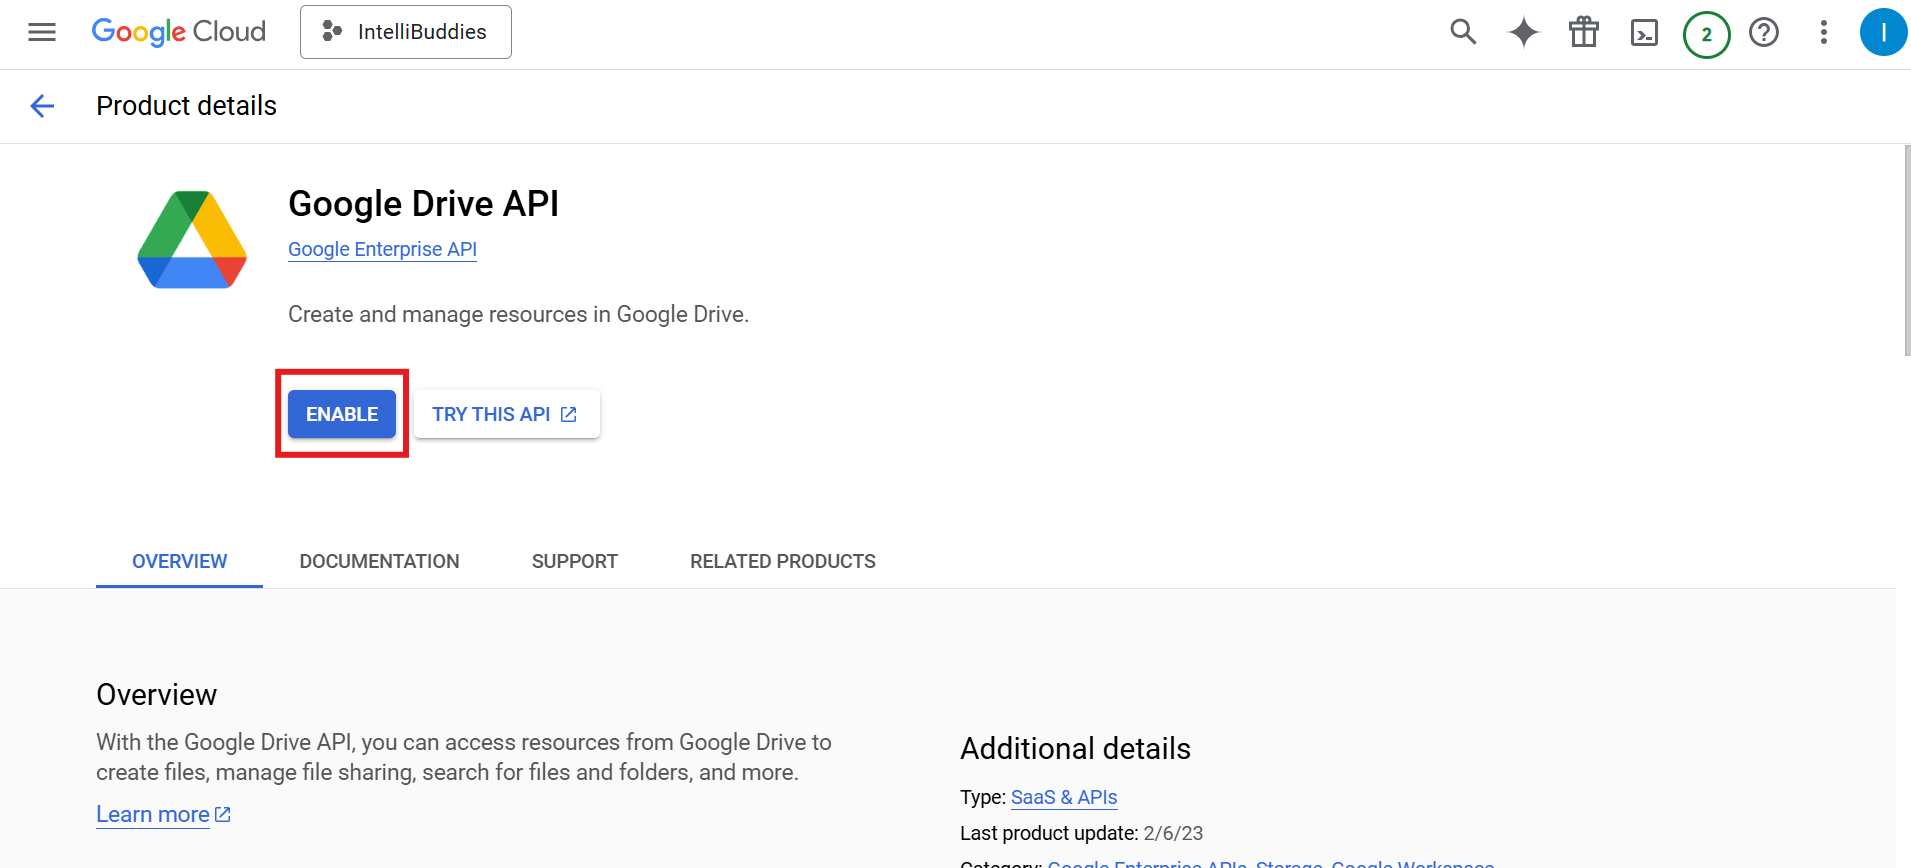
- In the API Library, use the search bar to find Google Drive API and Google Sheets API individually.
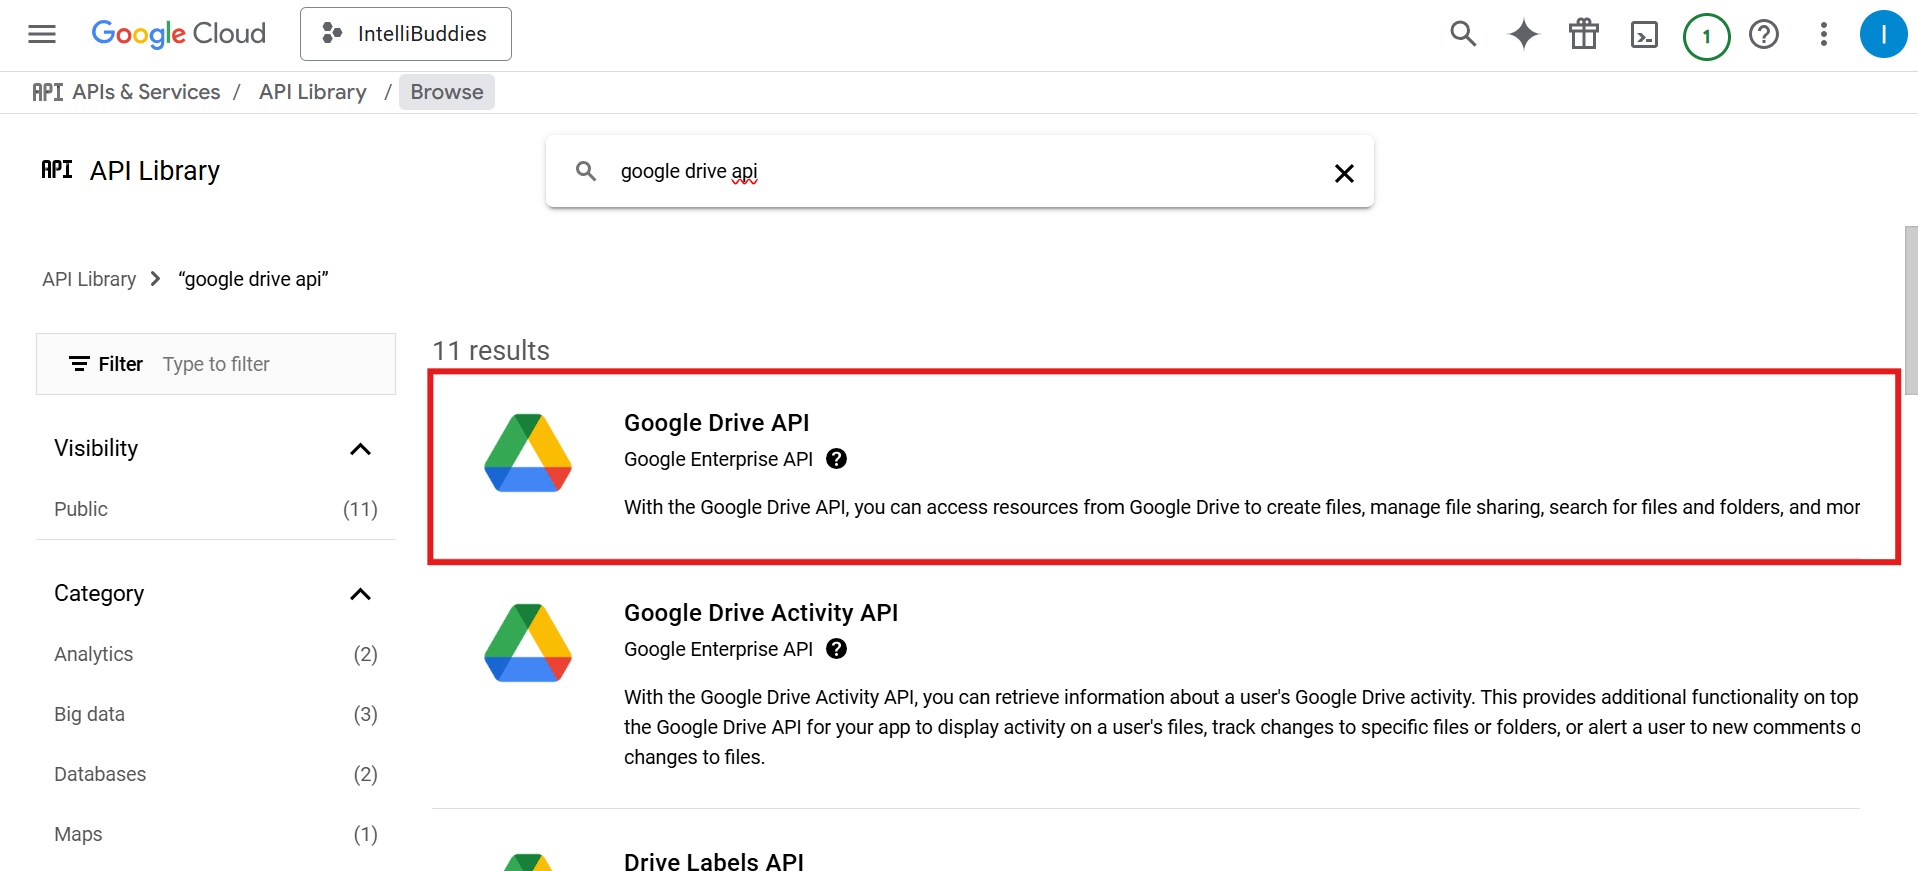
- Click on Google Drive API from the search results, then click the Enable button to activate the API. Repeat the same steps to enable the Google Sheets API.
Configuring the OAuth Consent Screen
To set up authentication for your Application, follow these steps to configure the OAuth consent screen in Google Cloud Console:
- Navigate to the APIs & Services page and select OAuth consent screen from the left navigation menu. Click GET STARTED.
- Enter a name for your Application.
- Select your Google account from the dropdown in the User Support Email field. Click Next.
- Under Audience, choose the appropriate option: - Internal - For Google Workspace users within your organization. - External - For standard Google account users.
- Choose the appropriate one and click the Next button.
- Click Next and proceed to Contact Information.
- Provide an email address for Google to send notifications related to your project. Click Next.
- Review and agree to the Google API Services: User Data policy then click CONTINUE.
- Click on the CREATE button.
- Go to the Audience section after creating the App and click PUBLISH APP to move it to production. - Confirm the action by clicking CONFIRM in the Push to production? dialog.
Testing: The App can be accessed only by added test users (up to 100). For more information, refer to Unverified apps.
Production: Any user with a Google account can access the App.
Configuring API Credentials
To authenticate your Application with Google services, follow the steps below to create API credentials.
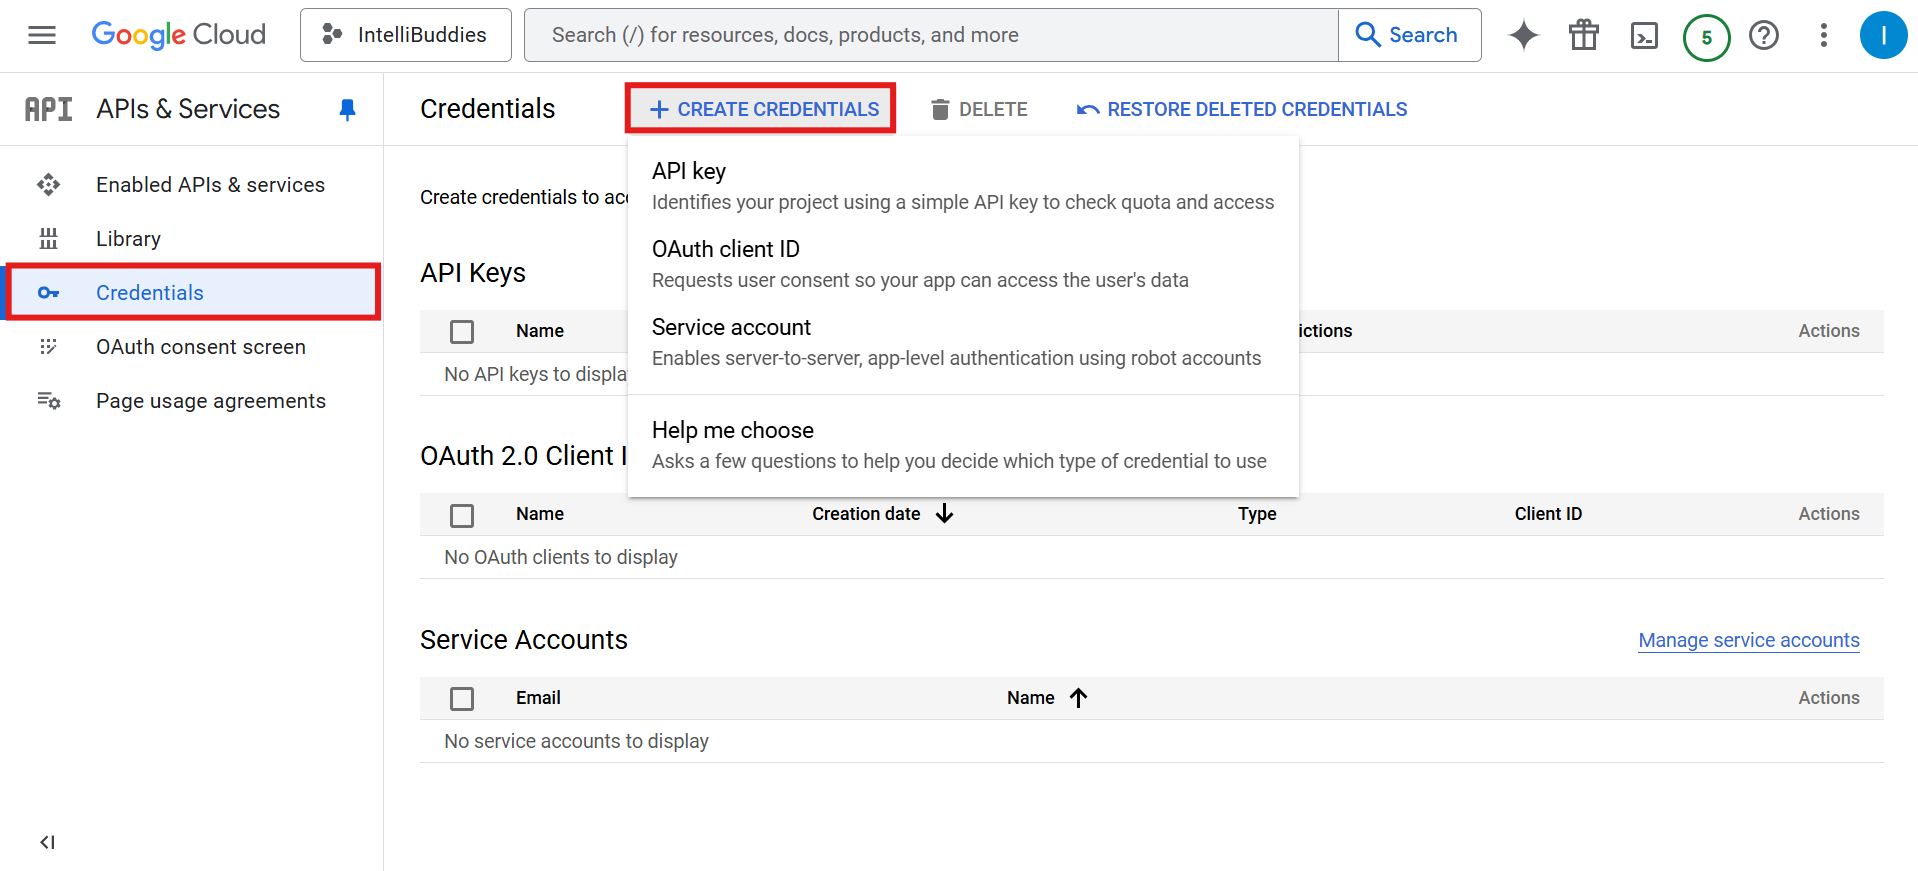
- Navigate to APIs & Services > Credentials from the left menu or go to the Credentials in APIs & Services tab within the APIs & Services page.
- Click + Create Credentials and select a credential type - API key - OAuth client ID. - Service account
- Follow the detailed instructions below to configure your selected credential type.
For additional guidance, refer to Setting up API keys, Setting up OAuth client ID, and Creating and managing Service accounts.
To determine the most suitable authentication type for your needs, refer to the Guide to Google Drive Activities.
Creating API Key credentials
To generate an API key for authentication, follow these steps:
- Click on + Create credentials in Credentials page.
- Select API key.
- It creates an API key.
Creating OAuth client ID credentials
To create an OAuth Client ID for authentication, follow these steps:
- Navigate to the Create credentials page in the Google Cloud Console.
- Click + Create credentials and select OAuth client ID.
- Choose Web application as the application type and provide a name for your OAuth Client ID.
- Under Authorised redirect URIs, add the following URL: [https://developers.google.com/oauthplayground].
- Click Create to generate the credentials.
- Copy and securely store the Client ID and Client secret for future use.
- Follow the steps to generate a Refresh Token in Google OAuth 2.0 Playground.
OAuth 2.0 Playground
To authorize access to the required Google APIs, follow these steps:
- Access OAuth 2.0 Playground - Go to the Google OAuth 2.0 Playground.
- Configure OAuth 2.0 - Click on the ⚙️ Settings icon (top-right corner). - Check Use your own OAuth credentials. - Enter your OAuth 2.0 Client ID and Client Secret (retrieved from Google Cloud Console). - Click Close to save the settings.
- Select API scopes - Under Step 1: Select & authorize APIs, enter the required API scope(s).
| API | Scope |
|---|---|
| Drive API v3 | https://www.googleapis.com/auth/drive |
| Google Sheets API v4 | https://www.googleapis.com/auth/drive |
- You can find more scopes in Drive API v3 and Google Sheets API v4. - Click Authorize APIs.
- Sign in & Authorize - A Google Sign-In window will appear—choose your Google account. - Click Allow to grant access to the selected API(s).
- Exchange Authorization Code for Tokens - Under Step 2: Exchange authorization code for tokens, click Exchange authorization code for tokens. - This will generate an Access Token and a Refresh Token. - Copy and securely store the Refresh Token for future use.
Creating Service Account credentials
Follow these steps to create a service account and generate a key:
- Navigate to the Credentials page in APIs & Services.
- Click on + Create credentials and select Service account.
- Enter a name for your service account.
- Click the Done button.
- Generate a Service Account Key - Select the newly created service account from the list. - Navigate to the Keys tab. - Click on Add Key > Create new key. - Download and securely store the generated key file.
Deleting your service account in the Google Cloud Console will result in the loss of all files and folders created by that account.
If you have a Google Workspace account, you can enable domain-wide delegation. For details on user impersonation, refer to user impersonation.
Enable Domain-Wide Delegation
- Sign in to your Google Admin console using an account which has super administrator privileges.
- In the Admin console, go to Menu > Security > Access and Data control > API controls
- Click Manage Domain Wide Delegation
- Click Add New and enter your service account client ID.
- In OAuth Scopes, add https://www.googleapis.com/auth/drive.
- You can find more scopes in Google OAuth 2.0 Scopes.
- Click Authorize.
The App should be available for use within 24 hours.
Configure OAuth2 For IntelliBuddies Google Connection
OAuth2 enables secure, user-based authentication and allows the Application to perform actions on behalf of a Google user.
Configuring the OAuth Consent Screen
To configure OAuth authentication, complete the following steps in Google Cloud Console:
- Navigate to APIs & Services > OAuth consent screen and click the GET STARTED.
- Enter the application name.
- Select Google account from the dropdown in the User Support Email field. Click Next.
- Under Audience, select External
- Click Next and proceed to Contact Information.
- Provide an email address for Google to send notifications related to your project. Click Next.
- Review and agree to the Google API Services: User Data policy then click CONTINUE.
- Click on the CREATE button.
- After creation, open the Audience section after creating the App and click PUBLISH APP to move it to production. - Confirm the action by clicking CONFIRM in the Push to production? dialog.
Testing: The App can be accessed only by added test users (up to 100). For more information, refer to Unverified apps.
Production: Any user with a Google account can access the App.
Creating OAuth client ID credentials
To generate OAuth credentials:
- Go to APIs & Services > Credentials.
- Navigate to the Create credentials page in the Google Cloud Console.
- Click + Create credentials and select OAuth client ID.
- Select Web application as the application type and provide a name for your OAuth Client ID.
- Copy the OAuth Redirect URL displayed in the application.
- Add the Redirect URL under Authorized JavaScript Origins.
- Click Create to generate the credentials.
- Securely store the generated Client ID and Client secret for future use.
Authorized JavaScript Origins Requirement
Google OAuth2 requires the application URL to be:
- A publicly accessible domain (for example,
https://app.example.com) localhost.
Internal or machine-only hostnames are not supported and will result in an Invalid origin error.
Configure OAuth2 in the Application
In the Google Connection screen:
- Select Authentication Type → OAuth2
- Provide the following details: - OAuth Redirect URL: Read-only field populated automatically by the system. It uses this value while creating OAuth credentials in Google Cloud Console. - Client ID: Paste the Client ID generated in Google Cloud Console. - Client Secret: Paste the Client Secret generated in Google Cloud Console.
Sign in with Google
After configuration:
- Click Sign in with Google
- Authenticate using a Google account
- Review and approve requested permissions
- The system redirects you back after successful authorization
The Google connection is now configured using OAuth2.
Limitation
- Users cannot delete files or folders they do not own.
Configure Service Account For IntelliBuddies Google Connection
To create a service account:
- Navigate to APIs & Services > Credentials
- Click Create Credentials > Service Account
- Enter a name and click Done
Service Account authentication allows the Application to access Google APIs using a dedicated Google account. This option supports both read and write operations and does not require user sign-in.
Creating Service Account Credentials
Follow these steps to create a service account and generate a key:
- Navigate to the Credentials page in APIs & Services.
- Click on + Create credentials and select Service account.
- Enter a name for your service account.
- Click the Done button.
To generate a key:
- Open the service account
- Go to the Keys tab
- Select Add Key > Create New Key
- Choose JSON and click Create.
- Download the file - Select the newly created service account from the list. - Navigate to the Keys tab. - Click on Add Key > Create new key. - Select JSON and click Create. - Download and securely store the generated key file.
Deleting a service account permanently removes all files and folders created by that account.
For Google Workspace domains, you can enable domain-wide delegation and configure user impersonation. For details on user impersonation, refer to user impersonation.
Configure Service Account in the Application
In the Google Connection screen:
- Select Authentication Type → Service Account
- Upload the JSON key file
- Optionally specify an Impersonated User email
Limitations
- Only
.jsonkey file format is supported. - Without impersonation, access is limited to shared resources
- Maximum upload size is 1 GB.
- Users cannot delete files or folders they do not own.
Configure API Key For IntelliBuddies Google Connections
API Key authentication provides read-only access to supported Google services without user authentication.
Use this option when you only need to retrieve public or read-only data.
Creating API Key Credentials
To generate an API key for authentication, follow these steps:
- Navigate to APIs & Services > Credentials
- Click on + Create credentials in Credentials page.
- Select API key.
- An API key will be generated.
- Copy and store the generated key securely
Configure API Key in the Application
In the Google Connection screen:
- Select Authentication Type → API Key
- Paste the generated API key

Limitations
- API Key authentication provides read-only access.
- User-level actions and write operations are not supported.
- Required APIs must be enabled.
- API restrictions may cause request failures