Virtual Element Selectors
The virtual application automation activities need the user to specify the image or position on the Screen during process designing. These images could be buttons, input, and display fields.
Process Designer provides an easy way for the user to specify these images or videos on Screen so that our Buddies can identify them dynamically during run time.
Mouse Input Selector
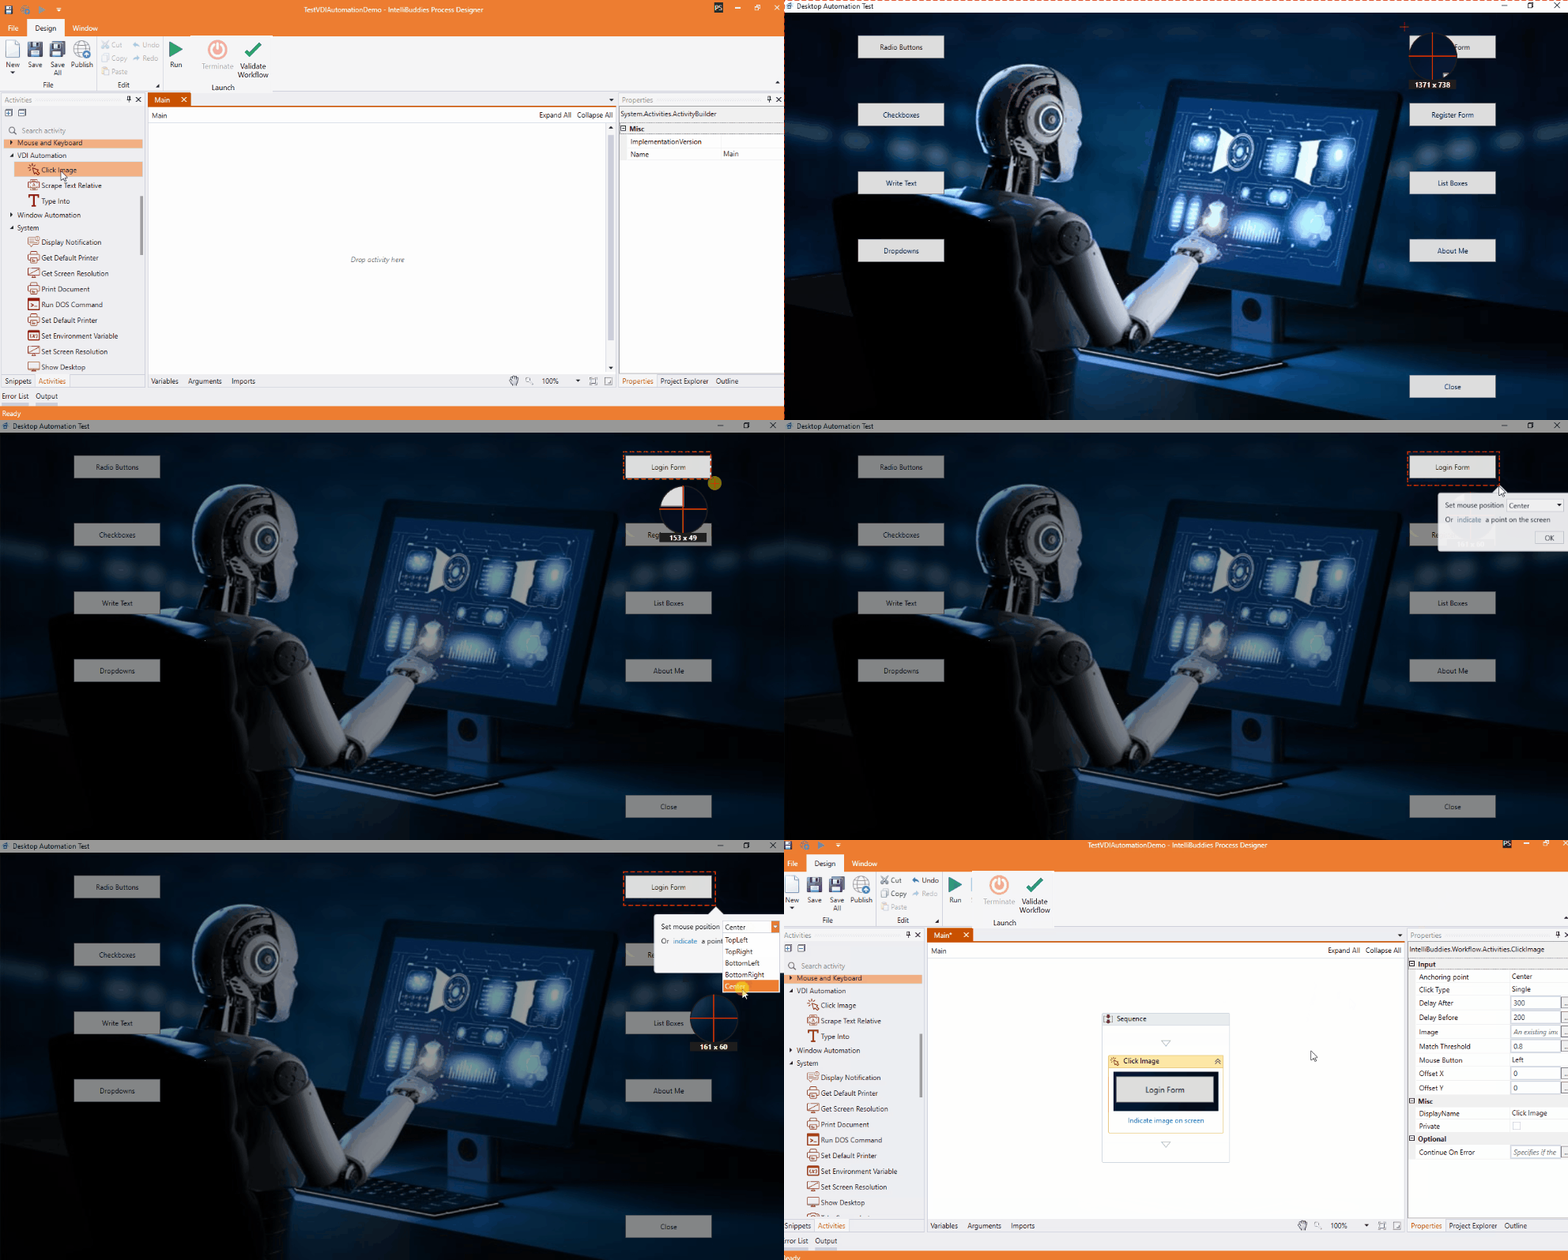
To select the UI element on a screen, perform the following steps:
- Click on the Indicate Image on Screen button available as part of that Activity.
- This will minimize the Process Designer application and converts the mouse pointer to the image selection lens.
- Mark the region on the Screen to specify the UI element
- Select the position of the element to perform the mouse operation. The following values are supported:
| Position | Description |
|---|---|
| TopLeft | Mouse operation is performed on the top-left corner of the identified image |
| TopRight | Mouse operation is performed on the top-right corner of the identified image |
| BottomLeft | Mouse operation is performed on the bottom-left corner of the identified image |
| BottomRight | Mouse operation is performed on the bottom-right corner of the identified image |
| Center | Mouse operation is performed on the center of the identified image. By default, the center will be selected. |
- Click on OK to complete your selection

Keyboard Input Selector
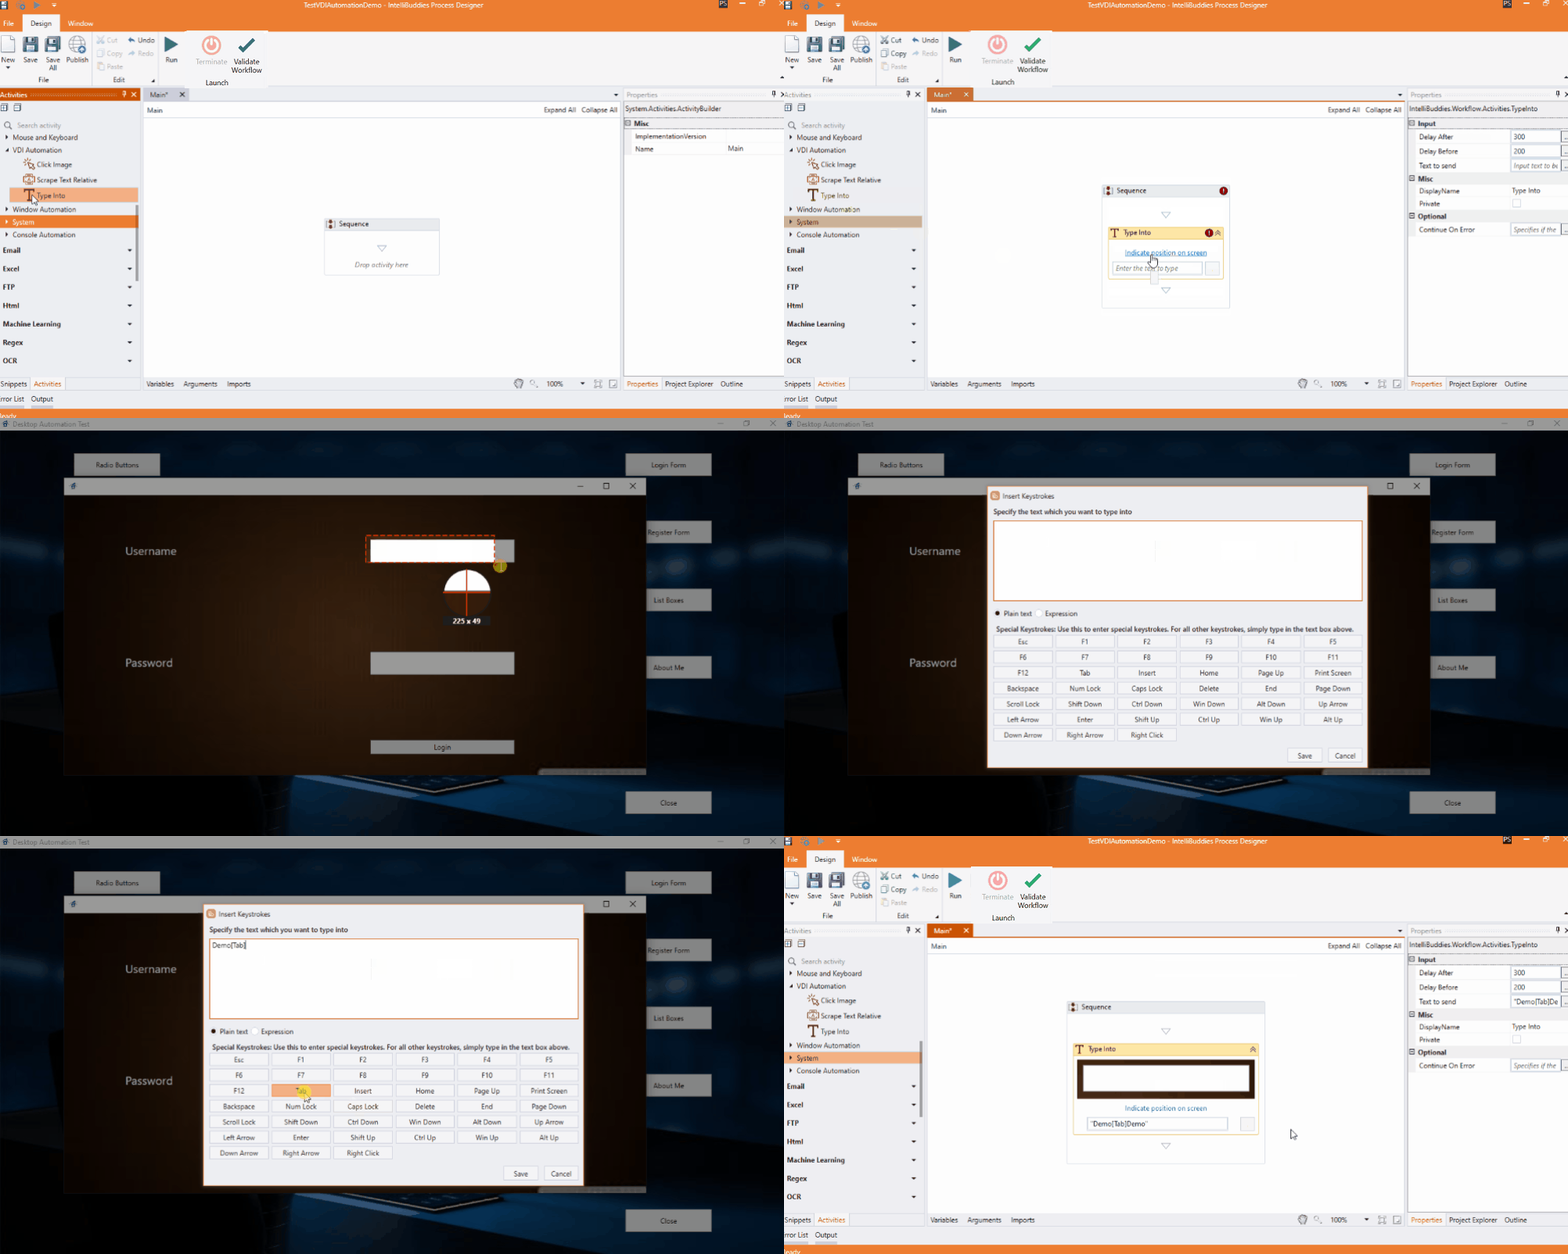
To select the UI element on a screen, perform the following steps:
- Click the Indicate position on Screen button available as part of that Activity.
- This will minimize the Process Designer application and converts the mouse pointer to the image selection lens.
- Mark the region on the Screen to specify the UI element
- Once the position is selected, it will bring up Virtual Keyboard from where you can type in the text and any special keys to be sent to the input element or window
- Click on Save to complete your selection.

Scrape Region Selector
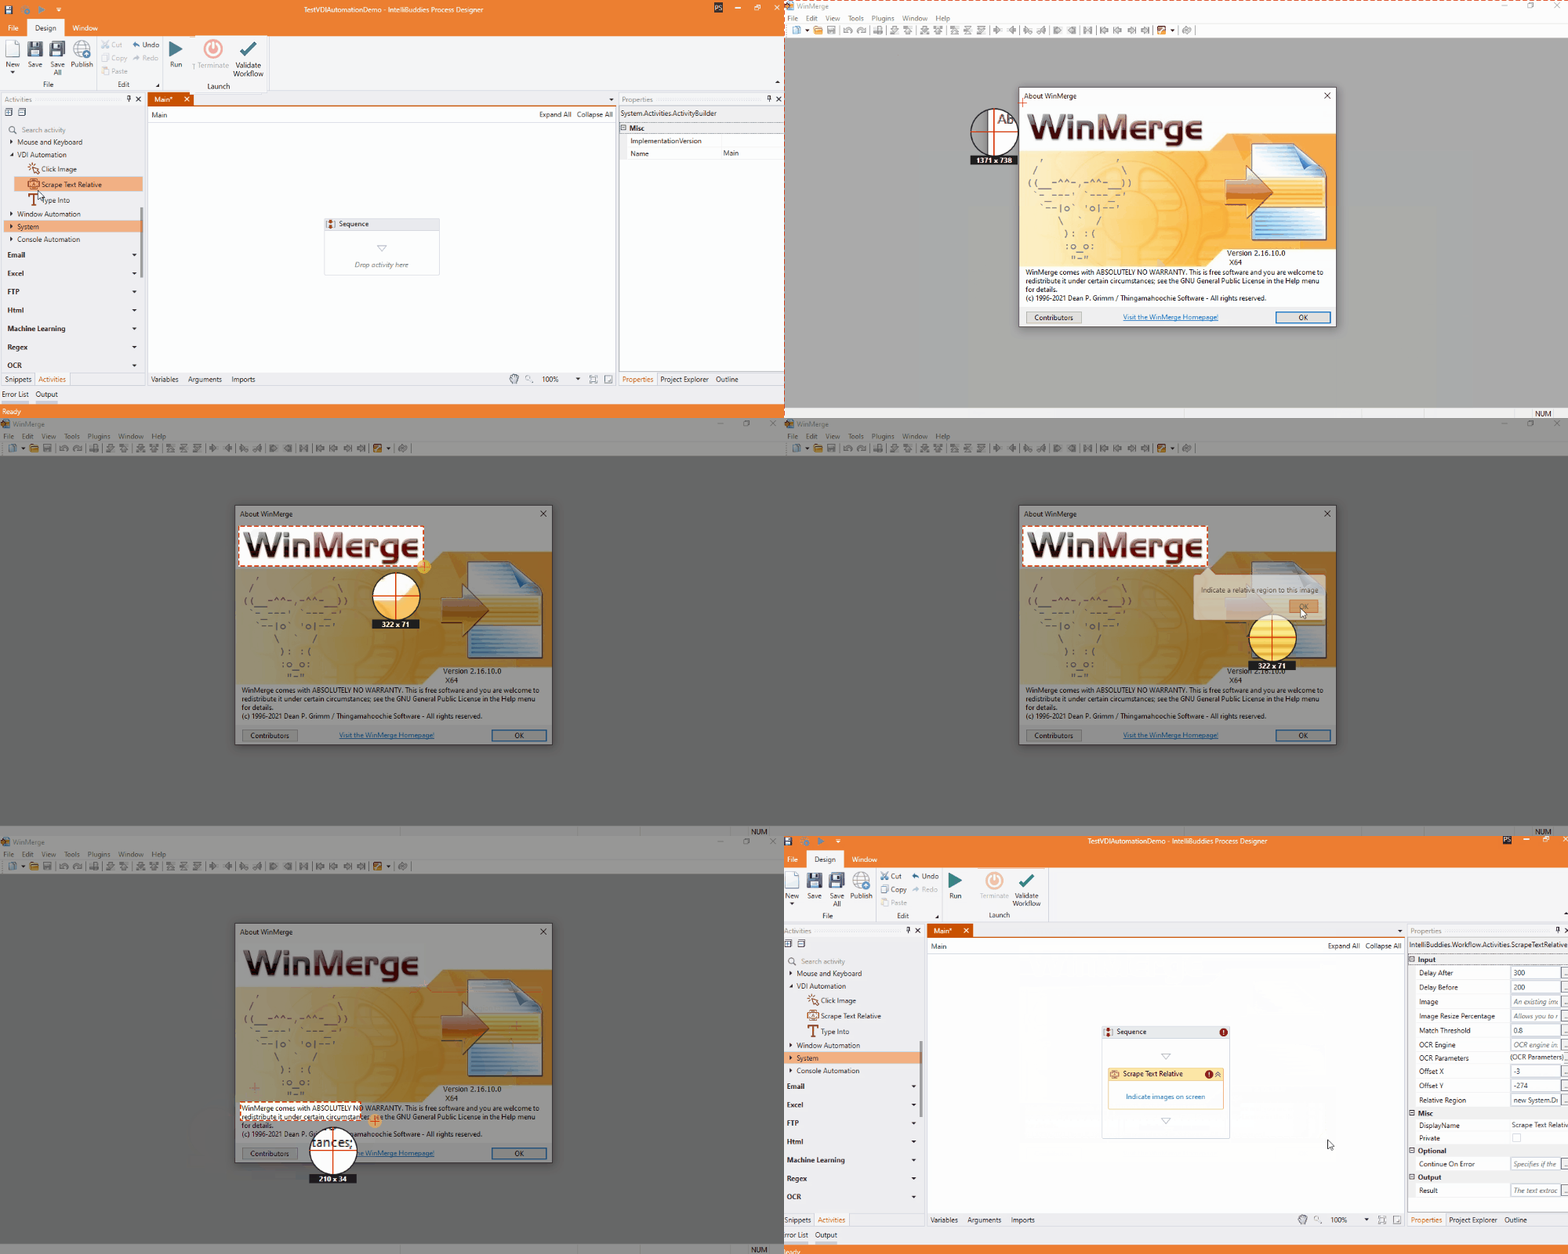
To select a region on your Screen from where you need to extract the text, perform the following steps:
- Click on the Indicate Images on Screen button available as part of that Activity.
- This will minimize the Process Designer application and converts the mouse pointer to the image selection lens.
- Mark the region on the Screen to specify the Anchor image
- Click on OK to indicate the relative region to scrape the text
- Mark the scrape region on the Screen

Changing marked region in Anchor Image
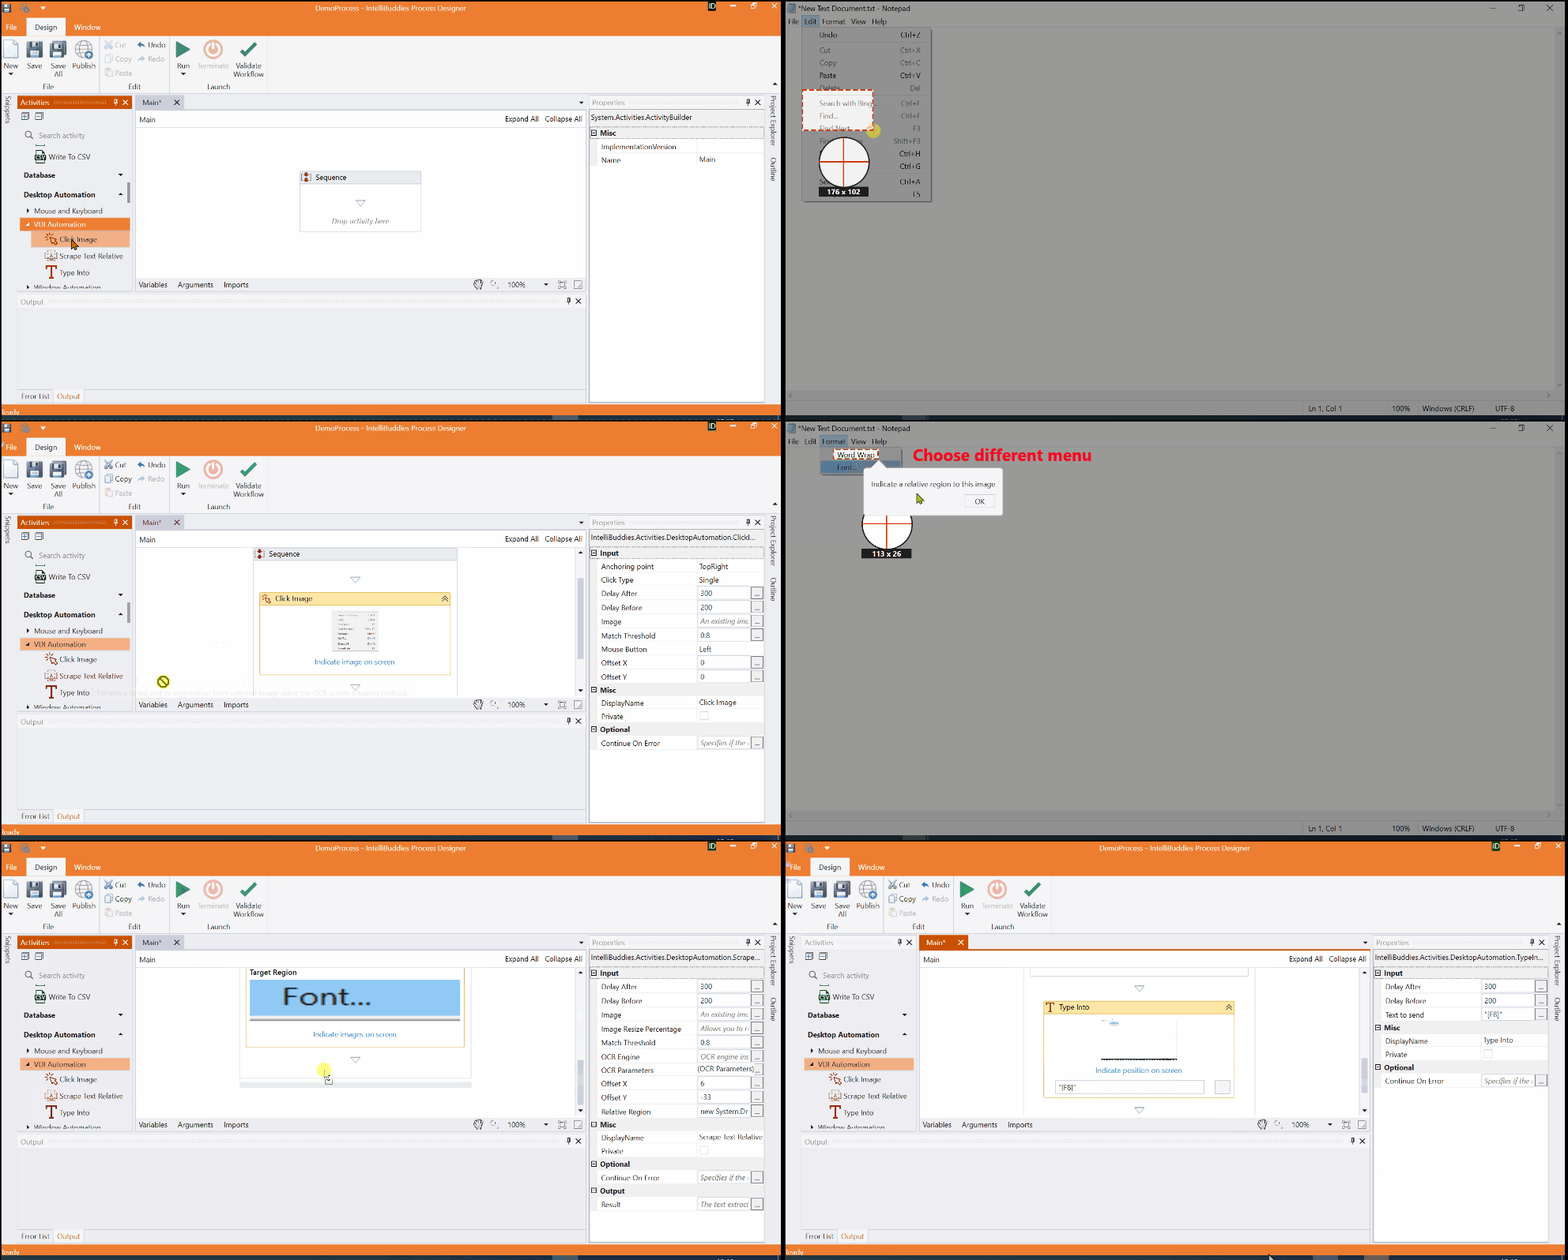
You can change the marked region inside Anchor Image in any of the above selector types Mouse Input, Keyboard Input, or Scrap Text even after clicking on the Indicate Images on Screen button. To change, perform the following steps:

- Click on the Indicate Images on Screen button available as part of that Activity.
- This will minimize the Process Designer application and converts the mouse pointer to the image selection lens.
- If you want to change the window or select the menu item, click on the F2 key, which will set 5 seconds delay in image capture. Now you can change the window or open a menu item.
- If you want to stop capturing, click on the Esc key.
- Mark the region on the Screen to specify the Anchor image
- Click on OK or Save by choosing the appropriate options of selector types
- You will see the image on the Screen